Flour Child Bakery opens in Virginia Beach!

My mom and I just opened a bakery in Virginia Beach!! "Like" us to stay updated! If you care to read our blog, it's flourchildbakery.blogspot.com.


Showing posts with label whipped cream. Show all posts

Tuesday, June 22, 2010

Coconut Cream Pie

There's a looong story that goes with this post, but since I have a TON of work to do on the computer today, I'm gonna make it short and sweet. I asked my dad what dessert he wanted for Father's Day, and his first reply was pie crust. His favorite thing is when I bake my leftover pie crust scraps with cinnamon and sugar. I wouldn't feel satisfied if all I baked him on Father's Day was scraps, so his second choice was coconut custard pie... and pie scraps, of course! :D I found a great recipe for coconut cream pie in The America's Test Kitchen Family Baking Book. I liked it because it used coconut milk in the custard.

I started by making and baking the pie crust. I made a double batch of pie pastry. I rolled out half and put it in a pie pan. Then I rolled out the other half, cut it into strips, sprinkled them with cinnamon sugar, and baked them as "scraps." While the crust was in the oven, I made the coconut custard. It was insanely delicious, and I knew it was gonna make a GREAT pie. Next is when the baking gods decided take a giant, steaming deuce on my day!

When I went to retrieve my beautiful pre-baked pie crust from the oven, it slid back on the oven mitt, and the 375 degree dark metal pie pan made contact with my arm flesh! Naturally, my reflex was to get it off me, ASAP! I jerked my arm forward and watched in slow motion as my perfect pie crust hit the floor and flattened into a fugly hot mess. My mom, trying to remedy the situation, grabbed the pie crust and tried to put it back together jigsaw style. "Cassie, you can't even tell!" No way! No way was I gonna serve my dad a pie that had once been in pieces on the floor! By this time, dinner was almost ready. I had no time to re-do anything. I accepted my defeat, and with my head down, I put the coconut custard in the fridge to wait until the next day when I could gather my wits and try again.But remember how I said the baking gods took not only a deuce, but a GIANT, STEAMING deuce on my day?? Yeah, I also baked a birthday cake for a family friend. Can you guess how that turned out? I'll put it this way, I took one bite and spit it out... SPIT IT OUT! How embarassing is that? I am trying to open my own bakery, and I just produced a cake for someone's birthday that might've tasted better if I'd made it in my Easy-Bake Oven! Gahh!! Needless to say, I had a well-deserved cry while Josh reassured me that I simply made a mistake somewhere in the recipe, and that I was still a baking goddess. :D I love that boy! <3 Ok, so it didn't end up being a short story after all. Oh well, that just means less time playing FarmVille later.... Here's the Coconut Cream Pie recipe. BTW, the pictures look redonkulous because I was using the camera I gave to my dad for Father's Day. I haven't figured out any of the settings yet.

Coconut Cream Pie (adapted from The America’s Test Kitchen Family Baking Book)

1 pre-baked 9” pie crust (half of the recipe after the link)

Filling
1 can (14 ounces) coconut milk (look for this on the Asian food aisle in the grocery store)
1 cup whole milk
2/3 cup granulated sugar, divided
1/4 teaspoon table salt
5 large egg yolks
1/4 cup cornstarch
2 tablespoons unsalted butter, cut into 2 pieces
1 teaspoon vanilla extract

Topping (my own recipe)
1 1/2 cups cold heavy cream
2 tablespoons confectioners’ sugar
1 teaspoon coconut flavoring
1/2 teaspoon vanilla extract
1/2 cup toasted coconut, optional

Bring coconut milk, whole milk, 1/3 cup of sugar, and salt to simmer over medium-high heat, stirring occasionally to ensure that sugar dissolves.

Whisk yolks, cornstarch, and remaining 1/3 cup of sugar in medium bowl until thoroughly combined. Whisking constantly, gradually ladle about 1 cup hot milk mixture over yolk mixture; whisk well to combine. Whisking constantly, gradually add remaining milk mixture to yolk mixture in 3 or 4 additions; whisk well to combine. Return mixture to saucepan. Reduce the heat to medium and cook, whisking vigorously, until the mixture is thickened and a few bubbles burst on the surface, about 30 seconds.

Off heat, whisk in the butter and vanilla. Let the mixture cool until just warm, stirring often, about 5 minutes. Pour warm filling into cooled pie crust. Press plastic wrap directly against surface of filling and refrigerate until firm, about 4 hours.

For the topping, whip the cream, sugar, and flavorings with an electric mixer on medium speed until stiff peaks form. Do not overbeat or the cream will curdle. Pipe or spread the whipped cream on top of the pie and sprinkle with toasted coconut.


Monday, June 14, 2010

Chocolate Cream Pie v2.0

"Cassie, you wanna make the dessert?" Of course I do! What would you like? "Oh, just make whatever you feel like making." They say that to me thinking they're doing me a favor. No, no, no... I love it when you tell me exactly what you want! I wish people would do it more often! So last week when my dad asked me for a chocolate cream pie, not too dark, kind milk chocolate-y, I jumped at the opportunity! Plus, it was an excuse for me to finally use the Dove solid milk chocolate bunny I've had since Easter.

The last time my dad requested a chocolate cream pie, I used a recipe from AllRecipes.com. It was alright, but you know me and my inability to settle on a recipe. This time I went for a surefire, failproof recipe from the ONLY source for perfect pie recipes, The Pie and Pastry Bible by Rose Levy Beranbaum. The recipe was unbelievably easy and quick. I made my favorite pie crust recipe to accompany the creamy chocolate filling and the cool whipped cream. (I know it's my dad's favorite pie crust too because his initial request wasn't for chocolate cream pie. It was for just plain pie crust that he could break into shards and dip into his Kozy Shack chocolate pudding!)

Rose didn't let me down. The pie was a hit, and my dad was completely satisfied. He's so funny! Everytime I make something we could potentially sell at our future bakery, he always calls out a prospective price. This one will be $34.95! ;DSome advice: When you cook the filling, make sure you let it thicken until it's almost as thick as you want it to be in your finished pie. It thickens as it cools, but it's not like Jell-O! It needs all the help it can get on the stove. And let it chill overnight. We cut into hours when it had been in the fridge for about 3 hours, and the filling was still a bit too soft. :)

PS: I didn't even notice until I started typing out the recipe, but there's a variation in the book for a milk chocolate version!! Lol! I included it here.

Chocolate Cream Pie (from The Pie and Pastry Bible by Rose Levy Beranbaum)

1 9-inch pie crust, prebaked (half the recipe after the link)

Filling
2 large eggs
1/4 cup (24 g) unsweetened cocoa powder, preferably Dutch-processed
3 tablespoons (28 g) cornstarch
3 cups milk, divided
2/3 cup (132 g) sugar
Pinch of salt
6 ounces (170 g) bittersweet chocolate, grated or finely chopped (I used milk chocolate)
2 tablespoons unsalted butter
1 teaspoon pure vanilla extract

Topping (I made a double recipe of this)
1 cup heavy cream
1 tablespoo n confectioners' sugar
1 teaspoon pure vanilla extract

Chocolate curls or shavings for garnish, optional

In a small bowl, whisk together the eggs, cocoa, cornstarch, and 1/4 cup of the milk until smooth.
In a medium nonreactive saucepan, stir together the remaining 2 3/4 cups of milk, the sugar, and salt. Over medium heat, bring the mixture to a full boil. Whisk 1/4 cup of this hot mixture into the egg mixture. Whisk the egg mixture into the milk mixture. Cook, continuing to whisk rapidly, being sure to go into the edges of the pan, until the mixture thickens and pools a little when dropped on the surface. (It thickens quickly, but let it cook until it's almost as thick as you want it to be in your finished pie.)
Remove it from the heat and whisk in the chocolate and butter. Continue whisking until the chocolate has melted and the mixture is smooth. Whisk in the vanilla extract. Using a rubber spatula, immediately press the mixture through a fine-mesh sieve and place a piece of plastic wrap directly on the surface to prevent a skin from forming. Allow it to cool to room temperature, or refrigerate until cold, about 1 hour and 15 minutes.
Pour the chocolate filling into the baked pie shell. It will fill the shell up to the top. Place a piece of greased plastic wrap on the surface and refrigerate the pie for at least 3 hours.
In a chilled bowl with chilled beaters, combine the heavy cream, sugar, and vanilla and beat until stiff peaks form. (Do not over beat; it will turn to butter!) Remove the plastic wrap from the pie and mound the topping over the chocolate filling.

VARIATION: For a less bittersweet, more milk chocolate filling, replace the milk with half-and-half, decrease the sugar to 1/2 cup (100 g), omit the cocoa, and increase the chocolate to 10 ounces (284 g).

Friday, March 20, 2009

The Cake Slice presents: Triple Lemon Chiffon Cake

I joined a group called The Cake Slice this month! It's a neat little group that bakes one recipe a month from a specific book. This year, we're baking our way through Sky High Irresistable Triple Layer Cakes by Alisa Huntsman and Peter Wynne. My first cake with the group is the Triple Lemon Chiffon Cake. I decorated mine with little pastel candies as a last resort because I didn't have anything yellow. It ended up looking like a perfect Easter cake! And it was DELICIOUS! The chiffon cake was sooo soft, and the tart lemon filling was just right! I usually don't like whipped cream as frosting, but this was pretty darn good! At first I was afraid about the chiffon part. When I attempted chiffon cupcakes à la Alton Brown, I got less than desirable results. However, these cake layers came out perfectly! I do think they could've used a little help flavorwise. Just a touch of vanilla would've been perfect. But my opinion on lemon desserts is often skewed, as they are not my favorite. Josh is the go-to man when I want an opinion regarding all things lemon. He's usually not a dessert guy, but he will totally scarf down anything lemon flavored. I'm pretty sure he was responsible for at least HALF of the cake getting eaten. One night I sent him home with THREE slices! I think it got his stamp of approval. ;D

Oh yeah... Did I mention... THERE'S A VIDEO!!?? Every time I post a video, I always get comments saying "You should make more videos!" So I made one of the cake making/baking process. Sorry, no video documentation of assembling the cake. My brother came home, and I feel like a total nerd recording myself while other people are around!


Ain't it pretty?? A layer cake I'm actually proud of! I guess the cake was too wide for the lid... :( You could imagine how the cake looked after this lide was remove and replaced a few more times!
The first slice!!
Yum!
After Josh got a hold of it! :)
Triple Lemon Chiffon Cake (from Sky High Iresistable Triple Layer Cakes by Alisa Huntsman and Peter Wynne)
Makes a 9-inch 3-layer cake


For the cake:
8 eggs, separated
1/4 cup walnut oil**
2 tablespoons freshly squeezed lemon juice
1 tablespoon lemon zest
1/3 cup water
1/2 teaspoon cream of tartar
1 1/2 cups sugar
1 3/4 cups cake flour*
1/2 teaspoon baking soda
1/2 teaspoon salt
[*1 cup cake flour is equal to 3/4 cup AP flour plus 2 tablespoons corn starch]
[**equal amount either almond oil, hazelnut oil, or canola oil]
(I used Canola)

Preheat the oven to 350 degrees F. Line the bottoms of three 9-inch pans with parchment paper but do not butter or grease the pans.

In a med-large bowl whisk together the egg yolks, oil, lemon juice, lemon zest, and water.

In the bowl of an electric mixer, whip the egg whites with the cream of tartar on medium speed until light and frothy. Slowly add 1/2 cup of sugar and continue to beat until soft peaks form.

Sift the flour, remaining sugar, baking soda , and salt into a large bowl. Whisk gently to combine. Make a well in the center of the dry ingredients. Pour in the egg yolk mixture and mix to create a smooth paste. Add one-fourth of the egg whites and fold in to lighten the batter. Fold in the remaining egg whites and divide the batter among the three pans.

Bake for about 16 minutes or until a cake tester comes out clean. Transfer to wire racks to cool in the pans. Once cool run a knife around the cake to in order to un-mold the cakes. Carefully pull off the parchment paper from the bottoms of the cakes.

To assemble the cake, place one layer on a cake stand. Top with a heaping 1/4 cup of lemon curd and spread it evenly. Repeat with the remaining layers. Frost the top of the cake and the sides with the lemon cream frosting.

Rich Lemon Curd
Makes 1 cup

3 whole eggs
2 egg yolks
1/2 cup sugar
1/2 cup plus 1 tablespoon freshly squeezed lemon juice (about 4 lemons)
grated zest of three lemons
4 tablespoons unsalted butter, at room temp.

Whisk together the whole eggs, yolks, sugar, lemon juice , and lemon zest together in a medium bowl. Transfer to a small non-reactive saucepan. Gently heat the mixture, whisking until it thickens enough to coat the back of a spoon. make sure not to boil the mixture. Pour the mixture through a sieve into a heatproof bowl. Stir in the butter and cover the curd with plastic making sure the plastic touches the curd. This should prevent a skin from forming on the curd. Refrigerate until cold. Then remove 3 tablespoons of curd and set it aside for the icing.

Lemon Cream Frosting
Makes 3 1/4 cups

1 1/2 cups heavy cream
2 tablespoons sugar
3 tablespoon lemon curd


Whip the cream and sugar in a large chilled bowl until stiff peaks form. Fold in the lemon curd, forming a stiff frosting.

Wednesday, January 28, 2009

Chocolate Cookie Dough Cupcakes

In honor of January 27 being National Chocolate Cake Day, last week's poll featured all chocolate cupcakes. The winner with 206 votes is Chocolate Cookie Dough Cupcakes! First, I just wanna say THANK YOU to everyone who voted. I'm so glad the majority of you picked this one! Two summers ago, my cousin and I made Chocolate Chip Cookie Dough Cupcakes from Cupcakes from the Cake Mix Doctor. They were freakin awesome. I've been dying to make them again ever since! This time I made the cupcake part from scratch instead of using a box mix. I also wanted it to be chocolate. The batter needed to be thick in order to support the big ball of frozen cookie dough, but all of my favorite chocolate cupcake recipes are really thin. I remembered that the chocolate batter from the Neapolitan Cupcakes was very thick, so I went with that one. Keep in mind that these cupcakes need to be refrigerated. Cupcakes made from scratch, especially those made with butter, tend to become hard when refrigerated. In my opinion these cupcakes are best when they're cold. Just something about biting into that cold, chewy cookie dough sends me through the roof! So if you want your cupcakes to stay soft in the fridge, I recommend using cake mix. However, these cupcakes seemed to work really well with the cookie dough, even when cold. They did become hard in the fridge, but they were still moist. So it was almost like eating a brownie with cookie dough inside! And the frosting... oh the frosting... it's a light, whipped cream cheese frosting with bits of homemade (eggless) cookie dough. This whole cupcake is to die for. The Cookie Dough Cupcake definitely wins my vote as the best cupcake ever invented!
Ingredients...It's so strange how something can go from this...
...To this in 22 minutes! :D
Isn't that just insane??
You know it's good when you sacrifice nutrition to have this for breakfast!
Now for the recipes....
I couldn't find a roll of cookie dough smaller than 1 lb. so I just used half of that. You need 8 oz. of frozen or refrigerated cookie dough. Cut it into 12 pieces. Roll them into balls and freeze them for 1 hour. Then make the cupcakes...

Chocolate Cupcakes (from MarthaStewart.com)
Makes 12
Ingredients
8 tablespoons (1 stick) unsalted butter, room temperature, plus more for pan
1 1/4 cups all-purpose flour (spooned and leveled), plus more for pan (I increased this to 1 1/2 cups)
1/2 cup cocoa powder (I reduced this to 1/4 cup; Use original amounts if you want a really chocolatey cupcake)
2 teaspoons baking powder
1/2 teaspoon salt
3/4 cup sugar
2 large eggs, room temperature
1 teaspoon pure vanilla extract
1/2 cup whole milk

Directions
Preheat oven to 350 degrees. Butter and flour a standard 12-cup muffin pan, or use paper liners. In a medium bowl, whisk together flour, cocoa, baking powder, and salt; set aside.
With an electric mixer, beat butter and sugar until light and fluffy. Add eggs one at a time, beating well after each addition; add vanilla, and mix until combined. On low speed, beat in half the flour mixture, followed by milk; end with remaining flour mixture. Mix just until incorporated (do not overmix).
Fill muffin cups 2/3 full with batter. Place a ball of frozen cookie dough on top of each cup (do not push it in). Bake until a toothpick inserted near the center of a cupcake (but not in the cookie dough) comes out clean, 22 to 24 minutes. Cool cupcakes in pan, 5 minutes; transfer to a wire rack to cool completely.

Cookie Dough Frosting (I found this recipe on a message board that has since been erased; This makes enough for 24 cupcakes, so I halved it)
For the cookie dough
¼ cup butter, softened
¼ cup brown sugar, plus 2 tbsp
2 tsp water
½ tsp vanilla
½ cup flour
¼ tsp salt
1/3 cup miniature chocolate chips

For the frosting
1 ½ cup heavy whipping cream
8 ozs cream cheese, softened
¾ cup granulated sugar (I reduced this to 2/3 cup)
1/8 tsp salt
1 tsp vanilla

For the cookie dough, cream the butter and brown sugar in a small bowl. Add water and vanilla and mix well. Add flour and salt and stir to combine. Stir in 1/3 cup Mini Morsels. Wrap the dough in waxed paper and freeze until firm, about 30 minutes. Break dough into 1/4 teaspoon sized chunks and place the chunks on a plate or in a plastic container, separating layers with waxed paper.
Store them in the refrigerator until ready to use.

To make the frosting, in a medium bowl (a cold bowl with cold beaters) beat the whipping cream until stiff peaks form (do not overbeat); set aside. In a large bowl, combine cream cheese, sugar, salt, and vanilla. Beat for 2 minutes until smooth. Fold in the whipped cream. Fold the frozen cookie dough chunks into the frosting and immediately frost the cooled cupcakes.


Overall rating on a scale of 1-5
Moistness: 4
Tenderness: 4 (Before being refrigerated)
Frosting: 5
Deliciousness: 100!!!

Friday, August 29, 2008

Banoffee Cupcakes

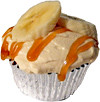
These were the poll winner by a TON of votes. I'm sorry it took me so long to post about them, but I've been really busy this week. Actually, I haven't been THAT busy, but it just seems like it. Ya know?? Anyway, on to the cupcakes! They were FABULOUS! I might be biased because I loooove banana cupcakes. But these were freakin GOOD! And the little pockets of melted caramel all throughout the cake were such a nice compliment in texture. To quote my boyfriend "It's soft like cake, but it tastes like a muffin. And the toffee bits are where it's at!" Haha. I sprinkled the top of them with Heath toffee bits before baking. To my knowledge, "Banoffee" is a marriage of the words "banana" and "toffee." Caramel and toffee are not the same thing. So the Heath pieces helped me mend that little problem. I topped them with whipped cream, but plain 'ole whipped cream wouldn't do. I added some storebought caramel. Not the soupy stuff that comes in a jar labeled as ice cream topping. No way! I'm talking about the thick stuff that comes in a plastic tub made for dipping Granny Smith apples in! Yeahhhhh. That stuff is so creamy and delicious. I used it to sweeten the whipped cream. It was perfect on the cupcakes! Here are some photos and the recipe...

PS:
I own a piece of the web now!

Ingredients Topped with Heath toffee bits before baking!
Cooling......
World, meet the Banoffee Cupcake!
After Josh and I shared a bite... See the caramel inside? Yum!
Recipe from Cupcake Heaven by Susannah Blake.

MY NOTES: I used the little Kraft chewey caramels you get for dipping apples. I chopped 5 of them really small and tossed them in with the flour to prevent them from sinking to the bottom of the cupcake. I only got 8 cupcakes. Mine were done at 14 minutes.

BANOFFEE CUPCAKES
Makes 10 (I got 8)

Ingredients
4 tablespoons unsalted butter, at room temperature
1/3 cup packed brown sugar
1 egg, beaten
1 ripe banana, mashed
1 cup self-rising flour
4 chewy caramels, chopped

To decorate
2/3 cup heavy cream, whipped
3-4 tablespoons dulce de leche or caramel sauce
1 banana, sliced

Preheat the oven to 350°F.
Beat the butter and sugar together in a bowl until creamy, then beat in the egg, a little at a time. Fold in the mashed banana, then sift the flour into the mixture and fold in, followed by the caramels (I tossed the caramels in the flour first).
Spoon the mixture into the paper liners and bake in the preheated oven for about 16 minutes (Mine were done after 14 minutes) until risen and a skewer inserted in the center comes out clean. Transfer to a wire rack to cool.
To decorate, swirl the cream over each of the cupcakes, then drizzle with a spoonful of dulce de leche or caramel sauce (I beat the caramel right in with the whipped cream) and top with slices of banana. (The bananas will turn brown quickly. Either toss them in lemon juice first or wait until you're ready to serve them.)

Note: Dulce de leche is a sweet caramel sauce from Argentina and it is available from larger supermarkets. If you can't find it, you can make it yourself. Put a sealed can of condensed milk in a saucepan, pour over boiling water to cover, and boil for 3 hours, adding more water as necessary so that the can is always covered. (CAUTION: This method is very dangerous because the can could explode. Watch it carefully!) Remove from the pan and let cool completely before opening using a can opener. Stir well to make a smooth sauce before spooning over the cakes.

Overall rating on a scale of 1-5
Moistness: 5
Tenderness: 5
Frosting: 5

Monday, August 11, 2008

My Banana Split Birthday Cake!!

UPDATE: THIS RECIPE HAS CHANGED! Read this post for details and new recipe!

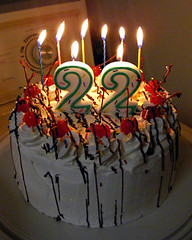
Happy birthday to me! Happy birthday to me! Happy birthday, dear Cassie! Happy birthday to me!

Friday, August 8, was my 22nd birthday. Saturday night I had a small party at my house. And as tradition goes (the tradition I started last year), I made my own cake! Thanks to everyone who left a comment a few entries back suggesting cake ideas. I decided to make a banana split cake. Let's put it this way... I might be making this cake for myself every year until I am so old and mangled that it just wouldn't be possible. It tasted exactly like a banana split! I used the highest rated Hummingbird Cake recipe on Allrecipes.com. I omitted the cinnamon (Have you ever had a banana split with cinnamon on it? Duh, me either). I layered it with whipped cream, fresh strawberries, and chocolate ganache. Then I frosted the whole thing with whipped cream, drizzled on some more ganache, carefully placed a few cherries, and threw on a butt load of sprinkles and HELLO DOLLY! Perfection was reached! The cake is sooo moist, and every single flavor of a banana split is dead on. It's incredible! It tastes delicious right out of the fridge. It's the perfect cake for a summer birthday!

Two unbaked cakes on a cluttered kitchen table.Two cakes cooling on an empty washing machine.Two cakes split into four (with mom's help because I'm no good at splitting cakes).You can see how moist it is.Layered with whipped cream, strawberries, and chocolate.TADA!Closeup!This is the prettiest cake I've ever made!And probably the tastiest!
UPDATE: THIS RECIPE HAS CHANGED! Read this post for details and new recipe!
Hummingbird Cake III from Allrecipes.com

INGREDIENTS
3 cups all-purpose flour
2 cups white sugar
1 teaspoon baking powder
1 teaspoon salt
1 teaspoon ground cinnamon (I omitted this)
3 eggs, beaten
1 1/2 cups vegetable oil (Next time I'll reduce this to 1 cup)
2 teaspoons vanilla extract
1 (8 ounce) can crushed pineapple, drained (REALLY DRAIN IT!)
1 cup chopped pecans (I used walnuts)
2 cups diced bananas

DIRECTIONS
Preheat oven to 350 degrees F (175 degrees C). Grease and flour two 8-inch round cake pans.
Combine flour, white sugar, baking powder, salt, and cinnamon in a large bowl. Add eggs and oil; stir until moistened. Do not beat. Stir in bananas, 2 teaspoons vanilla, pineapple, and pecans walnuts.
Bake for 25 to 30 minutes, or until golden brown around the edges. Cool on a wire rack for 10 minutes. Invert and remove pans. Cover cakes with a lint-free kitchen towel to finish cooling.


To make a Banana Split Cake:
When cakes are completely cool, split each layer into two. Thinly spread whipped cream over each layer. Sprinkle chopped fresh strawberries and drizzle ganache (or chocolate syrup) over the whipped cream. Frost the whole cake with whipped cream and drizzle more ganache over it. Add cherries and sprinkles for decoration.


And how about some photos from the party to finish this post!


My mom & my friend LanceJosh & me <333He always finds a way to undress at my parties!The best friends, Beth & Aaron.
Aaron was on prescriptions meds but couldn't resist Jello shooters...My book collection after getting 7 more for my birthday!

Thursday, July 10, 2008

White Russian Cupcakes

Monday, I went to my cousin Stephanie C.'s house to bake some cuppies with her. I brought my "Cupcakes from the Cake Mix Doctor" book, and Stephanie chose the recipe for White Russian Cupcakes. Yum! White Russian is my favorite drink on the rare occasion that I actually drink alcohol (...mix a little Bailey's with that and someone better watch out!). These cupcakes are really delicious. How can you ever go wrong with Kahlua whipped cream??
I didn't get a photo of the ingredients,
but here are the cupcakes going into the oven.Look how much they puffed up in the oven!We brushed them with Kahlua while they were still warm.I think Stephanie learned the importance of not over beating whipped cream... hehe
Recipe from Cupcakes from the Cake Mix Doctor by Anne Byrn.

White Russian Cupcakes
Makes 22-26 cupcakes

1 package (18.25 ounces) plain yellow cake mix
1 package (3.4 ounces) vanilla instant pudding mix
1 cup vegetable oil
3/4 cup whole milk
4 large eggs
1/4 cup vodka
1/4 cup plus 2 tablespoons Kahlua
1 teaspoon pure vanilla extract

Kahlua Whipped Cream
1 cup (8 ounces) heavy (whipping) cream
2 tablespoons confectioners' sugar
1 tablespoon Kahlua
2 tablespoons semisweet chocolate shavings, for garnish

1. Place a rack in the center of the oven and preheat the oven to 350°F. Line cupcake cups with paper liners. Set the pans aside.
2. Prepare the cupcake batter: Place the cake mix, pudding mix, oil, milk, eggs, vodka, 1/4 cup Kahlua, and vanilla in a large mixing bowl. Blend with an electric mixer on low speed for 30 seconds. Stop the machine and scrape down the sides of the bowl with a rubber spatula. Increase the mixer speed to medium and beat 2 minutes more, scraping down the sides again if needed. Spoon or scoop1/3 cup batter into each lined cupcake cup, filling it three quarters of the way full. (You will get between 22 and 26 cupcakes; remove the empty liners, if any.) Place the pans in the oven.
3. Bake the cupcakes until they are golden and spring back when lightly pressed with your finger, 17 to 20 min­utes. Remove the pans from the oven and place them on wire racks to cool for 5 minutes. Brush the tops of the cupcakes with the remaining 2 tablespoons Kahlua. Run a dinner knife around the edges of the cupcake liners. Lift the cupcakes up from the bottoms of the cups using the end of the knife, and pick them out of the cups carefully with your fingertips. Place them on a wire rack to cool completely before frosting.
4. Meanwhile, prepare the frosting: Place a large, clean mixing bowl and electric mixer beaters in the freezer to chill for 1 minute. Remove the bowl and beaters from the freezer. Pour the cream into the bowl and beat with an electric mixer on high speed until the cream has thickened. Stop the machine, and add the sugar and Kahlua. Beat the cream on high speed until stiff peaks form. DO NOT OVERBEAT OR IT WILL TURN INTO BUTTER.

5. Frost cooled cupcakes with whipped cream. Store in the refrigerator for up to 3 days.

Overall rating on a scale of 1-5
Moistness: 5
Tenderness: 5
Frosting: 5

Sunday, June 15, 2008

Chocolate Cream Pie

This pie was not suggested to me, but it is the highest rated chocolate pie on Allrecipes.com (yeah, I went back to it anyway). It was really good, and my dad LOVED it as the second half of his Fathers Day gift. I, however, think the chocolate filling was a bit too sweet. It was almost like really soft fudge. If you have a serious sweet tooth and love chocolate, then this is the pie for you! I'm gonna keep searching for a lighter, smoother chocolate pie.

The pie crust is a whole other story! I decided to be brave and make my own, instead of doing what I would usually do and get one of those refrigerated roll-out crusts. I chose the highest rated recipe for flaky pie crust on Allrecipes.com (Although you guys did suggest some great recipes; I even bookmarked a few!). The first time I made it, I didn't pulse it enough in the food processor. When I rolled it out it kept cracking and ripping. And when I tried to put it into the pie pan.... all hell broke loose. The crust ripped into an unsalvageable mess. I slammed the rolling pin down on the table, forcefully threw the crust into the trash, slammed every cabinet in my kitchen putting all the ingredients away, and almost began to cry... I met my match! I couldn't make a pie crust! After standing in the kitchen for 5 minutes just staring into nothing, I pulled myself together and decided to try again. This time I brought my boyfriend, Josh, into the kitchen to help keep me calm. I pulsed the dough in the food processor until it came together as a ball. That was the trick (Why I didn't do that in the first place, God only knows)! This time the pie crust rolled out perfectly, and when I put it into the pie pan it only ripped where I had folded it. I easily mended that with some scraps from the edges. I think I rolled it too thin though. I still haven't gotten the hang of that. My sugar cookies always come out so flat because I roll the dough paper thin! Anyway, after all the muss and fuss here is the pie I produced!
Ingredients for pie crust, simple enough.But I can't follow directions, so the first attempt was a failure.
Let the dough come together as a ball!
Then wrap it in plastic wrap and chill for 30 minutes.
Roll it out into a circle (I could only get a rectangle shape, haha like I said I haven't gotten the hang of rolling out dough yet). Trim to about 1 inch larger than your pie plate.
Ingredients for chocolate filling.
Whisk together the dry stuff.
Add the wet stuff and heat until butter is melted.
Pour chocolate mixture into unbaked pie shell (filling will be thin).
Bake until filling is BARELY wobbly when shaken.
Top with a generous portion of whipped cream!
Dad gets the first slice!
Flaky Pie Crust
1 1/4 cups all-purpose flour
1/4 teaspoon salt
1/2 cup shortening, chilled
3 tablespoons ice water

(I changed the directions to exactly how I did it. For original instructions, click the link at the top of the entry.) Combine flour, salt, and shortening in the bowl of a food processor and pulse until shortening is the size of oatmeal. Add 3 tablespoons of water and pulse until the dough forms a ball. Wrap the dough in plastic wrap and form it into a disk. Refrigerate for 30 minutes. Working with a floured rolling pin on a well-floured surface, roll the dough into a circle slightly larger than your pie plate. Gently invert your pie plate onto the dough. Using a pizza cutter or pastry wheel trim the dough about 1 inch larger than your pie plate. Fold the dough into fourths and place the corner in the center of the pie plate. Unfold the dough and gently mold it into the pan. Prick the bottom and sides with a fork. Pour filling in and bake according to pie directions.

Chocolate Cream Pie
2 cups white sugar
5 tablespoons unsweetened cocoa powder
1/4 cup all-purpose flour
1 (12 fluid ounce) can evaporated milk
1 teaspoon vanilla extract
4 egg yolks
1/4 cup butter

Meringue topping (optional) (I topped my cooled pie with whipped cream instead)
4 egg whites
1/4 cup white sugar

Whipped cream
2/3-1 cup heavy cream (depending on how much whipped cream you like on your pie)
2 Tbsp confectioners sugar
1/2-1 tsp vanilla extract

Preheat oven to 350 degrees F (175 degrees C).
In a saucepan, whisk together 2 cups sugar, cocoa and flour. Blend in evaporated milk and vanilla. Beat egg yolks, and stir into pan. Add the butter or margarine. Heat, stirring constantly just until butter is melted. Pour filling into unbaked pie shell (recipe above).
Bake in preheated oven for 35 to 40 minutes, or until pie is not "wobbly" when shaken (Mine was slightly wobbly after 40 minutes, but it firmed when it cooled).
For meringue topping, beat egg whites until soft peaks form. Gradually add 1/4 cup sugar, beating constantly, until stiff peaks form. Spread meringue on pie.
Return pie to oven, and bake until meringue is golden.

For whipped cream, beat heavy cream, confectioners sugar, and vanilla extract with a mixer on high speed until desired thickness; Do not overbeat or it will turn into butter! Spread onto cooled pie. Top with grated chocolate.