Flour Child Bakery opens in Virginia Beach!

My mom and I just opened a bakery in Virginia Beach!! "Like" us to stay updated! If you care to read our blog, it's flourchildbakery.blogspot.com.


Showing posts with label the cake slice. Show all posts

Saturday, March 20, 2010

The Cake Slice presents: Pineapple Upside-down Cake

Guess what! I got kicked out of The Cake Slice a few weeks ago. Nuh uh, no way! Yes way, I totally did. Working at a cupcakery kept me extremely busy over the holidays. As a result, I didn't have time to squeeze The Cake Slice recipes into my holiday baking. Since I missed three months in a row they booted me. But I had a good excuse and they took me back. YAY! So here is this month's cake! And it was totally delicious. Put it this way, I made it on the 18th, and by the 19th, IT WAS GONE! Success!I love this recipe because the cake itself is not too sweet. So the buttery, brown sugary syrup that soaks into the cake isn't overwhelming. I took some to work and everyone said it was really yummy. Wendi even broke her diet to try it. Double success!!Thanks, Cake Slice, for letting me back in! :D Check out what the other Cake Slicer's came up with: The Cake Slice Bakers!Pineapple Upside-Down Cake (from "Southern Cakes" by Nancie McDermott)
Makes 1 9" or 10" round cake

Pineapple Topping
One 20-ounce can pineapple rings, with their syrup or juice
4 tbsp cold butter
2/3 cup firmly packed brown sugar
10 maraschino cherries

Cake
1½ cups all purpose flour
¾ cup sugar
1½ tsp baking powder
½ salt
½ cup milk
4 tbsp butter, softened
1 egg
1 tsp vanilla extract

Heat the oven to 350F.

To make the topping, drain the pineapple well, reserving 2 tablespoons of the juice or syrup for the cake batter. Melt the cold butter in a 10 inch cast iron skillet over medium heat. Or, put the butter in a 9inch round cake pan and put it in the oven for a few minutes as the heat melts the butter.

Remove the pan from the oven or stove and sprinkle the brown sugar over the buttery surface. Place the pineapple rings carefully on top of the scattered brown sugar and melted butter, arranging them so they fit in 1 layer. (You may have a few left over). Place a cherry in the centre of each ring, and set the pan aside.

To make the cake, in a large mixing bowl, combine the flour, sugar, baking powder and salt. Use a fork to mix them together well. Add the milk and butter and beat well with a mixer, scraping down the bowl once or twice until you have a thick, fairly smooth batter, about 1 to 2 minutes.

Add the egg, reserved pineapple syrup or juice and the vanilla. Beat for 2 minutes more, stopping once or twice to scrape down the sides.

Carefully pour the batter over the pineapple arranged in the skillet or cake pan and use a spoon to spread it evenly to the edges of the pan. Bake for 35 to 40 minutes until the cake is golden brown and springs back when touched lightly in the centre. Cool in the skillet or pan for 5 minutes on a wire rack.

With oven mitts, carefully turn out the warm cake onto a serving plate by placing the plate upside down over the cake in the pan and then flipping them over together to release the cake onto the plate. Serve warm or at room temperature.

Monday, November 30, 2009

The Cake Slice presents: Burnt Sugar Cake

First, sorry this is late. I was supposed to post on Nov. 20th, but with the holidays approaching things got a little crazy. I hope everyone had a wonderful Thanksgiving. My vacation was wonderful, and we had lots of fun shopping on Black Friday! Now, onto the cake.....

I actually made this cake earlier in the month, but I'm just getting around to writing about it! It was delicious, and Josh loved it (which is always a good sign because he's usually a non-dessert person). The cake layers were soft and moist and had a wonderfully strong burnt sugar taste. The frosting was way too runny and sugary. So you know me, I made SMBC instead. Since I used all the burnt sugar syrup in the runny frosting fiasco, I made a homemade dark caramel sauce and just added it a little at a time to my SMBC until I got the flavor I was looking for. The end result was a gorgeous, amber-colored cake with silky smooth burnt sugar frosting! To get a look at what the other Cake Slicers came up with, check out The Cake Slice blogroll.
The burnt sugar syrup...

Burnt Sugar Cake (from "Southern Cakes" by Nancie McDermott)

Burnt Sugar Syrup
1 cup sugar
1 cup boiling water

Heat the sugar in a cast iron skillet or another heavy bottomed pan with high sides. Heat over a medium-low heat, stirring occasionally, until the sugar melts into a clear brown caramel syrup. It should be the color of tea.
Gradually add the boiling water, pouring it down the sides of the pan so that if the syrup foams and bubbles up, you should be protected.
Continue cooking, stirring often, until the water combines with the syrup and turns a handsome brown syrup.
Remove from the heat and set aside to cool. Store the cooled syrup in a sealed jar if not using right away.

Burnt Sugar Cake
3 cups all purpose flour
1 tbsp baking powder
1/2 tsp salt
1 tsp vanilla extract
1 cup milk
1 cup (2 sticks) butter
1 3/4 cups sugar
4 eggs
1/2 cup Burnt Sugar Syrup (recipe above)

Heat the oven to 350 degrees F. Grease and flour two 9 inch round cake pans.
In a medium bowl, combine the flour, baking powder and salt and stir with a fork to mix well. Stir the vanilla into the milk.
In a large bowl, beat the butter and the sugar with an electric mixer at high speed for 2–3 minutes, until they are well combined. Stop now and then to scrape the bowl down. Add the eggs, one by one, beating well each time. Pour in 1/2 cup of the burnt sugar syrup and beat well.
Add a third of the flour mixture and about half of the milk, beating at a low speed, until just incorporated. Mix in another third of the flour and the rest of the milk. Finally, add the remaining flour.
Divide the batter between the cake pans and bake for 20 to 25 minutes until the cakes are golden brown, spring back when touched gently in the center and begin to pull away from the sides of the pan (It took closer to 35 minutes in my oven. This is very strange because usually my oven bakes fast...??).
Let the cakes cool in the pans on a wire rack for 15 minutes. Turn out the cakes onto a wire rack to cool completely.

Burnt Sugar Frosting
3 3/4 cups confectioners sugar
1/2 cup Burnt Sugar Syrup (above)
1/4 cup (1/2 stick) butter
1/2 tsp vanilla extract
2 – 3 tbsp milk

In a large bowl, combine the confectioners sugar, the burnt sugar syrup, butter and vanilla. Beat with a mixer at medium speed for 2 to 3 minutes, scraping down the bowl now and then to bring the ingredients together.
Add 2 tablespoons of the milk and continue beating until the frosting is thick, soft, smooth and easy to spread. Add a little more sugar if it is thin, and a little more milk if it is too thick.

To Assemble
Place one layer, top side down, on a cake stand or serving plate. Scoop about ¾ cup of the frosting onto the cake and spread to the edges. Place the second cake layer over it, top side down. Frost the sides of the cake, and then the top until it is evenly covered.

Tuesday, October 20, 2009

The Cake Slice presents: Cinnamon-Pecan Coffee Cake

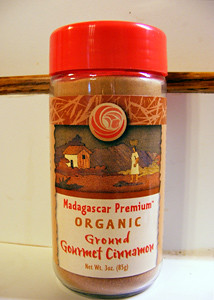
Hellooooooo Cake Slice! My, how I've missed you so! We just started baking from a new book, and guess what... The first cake isn't a layer cake! (And from the looks of next month's poll, the second won't be a layer cake either...but shhhh... you didn't hear that from me!) Our new book is "Southern Cakes" by Nancie McDermott, and our first recipe chosen is the Cinnamon-Pecan Coffee Cake. Wow, how insanely good did this cake smell in the oven!? As always, I used my new favorite cinnamon that I found at TJ Maxx. The coffee cake tasted great, and the dark, chewy raisins reminded me of an oatmeal raisin cookie. When I tasted the cake by itself, it tasted very plain. But luckily there's plenty of cinnamon-sugar, raisins, and pecans in every bite! Like a few of the other Cake Slicers, I had difficulty spreading the top layer of thick cake batter over the raisin/pecan filling. It looked like I had done it wrong, but once it baked up it looked great! A few things I'd recommend, don't toast your pecans first. The pecans on top get really brown. Also, some of the raisins on top of my cake got extremely dried out in the oven. Next time I'll plump them in boiling water first. Otherwise, a very fine recipe to begin our new year of The Cake Slice! To see the other bakers' coffee cakes, check out The Cake Slice blogroll!

Cinnamon-Pecan Coffee Cake (from Southern Cakes by Nancie McDermott)
(I halved this recipe and baked it in an 8 x 8-inch square pan)


For the cinnamon raisin filling
1 1/2 cups light brown sugar
3 tbsp all purpose flour
3 tbsp cinnamon
1 1/2 cups raisins
1 1/2 cups coarsely chopped pecans
3/4 cup (1 1/2 sticks) butter, melted

For the cake
3 cups all purpose flour
1 tbsp baking powder
1 tsp salt
1 tsp vanilla extract
1 cup milk
1 cup (2 sticks) butter, softened
1 cup sugar
2 eggs

Heat the oven to 350 degrees F. Grease and flour a 13 x 9-inch pan.

To make the filling, combine the light brown sugar, flour and cinnamon in a bowl and stir with a fork to mix everything well. Combine the raisins and pecans in another bowl and toss to mix them. Place the cinnamon mixture, nut mixture and melted butter by the baking pan to use later.

To make the cake batter, combine the flour, baking powder and salt in a bowl. Stir the vanilla into the milk. In a large bowl combine the butter and sugar and beat with a mixer on high speed until pale yellow and evenly mixed, about 2 minutes. Scrape down the bowl to ensure a good mix. Add the eggs and beat for another 2 minutes, scraping down the bowl now and then, until the mixture is smooth and light.

Use a large spoon or spatula to add about a third of the flour mixture to the butter mixture and stir only until the flour disappears. Add a third of the milk and mix in. Repeat twice more until all the flour and milk mixtures have been incorporated. Stir just enough to keep the batter smooth.

Spread half the batter evenly into the prepared pan (it should be a very thick batter). Sprinkle half the cinnamon mixture over the batter followed by half the melted butter. Scatter half the raisins and nuts over the top. Spread the remaining batter carefully over the filling, using a spatula to smooth the batter all the way to the edges of the pan. Top with the leftover cinnamon, butter and nut mixture, covering the cake evenly.

Bake for 45 to 50 minutes, until the cake is golden brown, fragrant and beginning to pull away from the edges of the pan. Place the pan on a wire rack and allow to cool in the pan for 5 to 10 minutes before serving in squares right from the pan. The cake is delicious hot, warm or at room temperature.

Tuesday, September 22, 2009

The Cake Slice presents: Triple Chocolate Fudge Cake

I'm not even going to begin this entry like a broken record by apologizing for being so late. That doesn't even matter. What matters is how freakin awesome this cake is! The September edition of The Cake Slice brought us the Triple Chocolate Fudge Cake. It was our very last recipe from "Sky High: Irresistible Triple-Layer Cakes." We sure did go out with a bang! Did I already use the term "freakin awesome" to describe it? The chocolate cake layers were probably the moistest cake I've ever baked. The chocolate flavor was so dead on. It was perfect! The white chocolate mousse filling was a delightful compliment to the rich, dark chocolate frosting. This cake is completely sinful. If you can eat an entire slice, you deserve a medal of honor. I barely made it through half a slice, and I was so satisfied I saved the rest for later! This recipe is a definite keeper.
Oh, I do have one warning for you. Don't do the "wax-paper-strips-under-the-cake-to-keep-your-cake-plate-clean-while-you-frost" trick. I tried it, and when I went to pull the paper out, the cake was so moist it started to break off and pull apart! I smudged it all back together, but it wasn't pretty!

Triple Chocolate Fudge Cake (from Sky High: Irresistible Triple-Layer Cakes)
Makes a 9" triple layer cake - serves 16 to 20

2 1/4 cups all-purpose flour
1 cup unsweetened cocoa powder
2 1/4 teaspoons baking soda
1 1/4 teaspoons baking powder
1 teaspoon salt
1/2 teaspoon ground cinnamon
2 1/2 ounces unsweetened chocolate, coarsely chopped
1 cup milk
1 1/4 cups hot, strongly brewed coffee
2 eggs
1 cup mayonnaise
1 1/2 teaspoons vanilla extract
2 1/4 cups sugar

1. Heat oven to 350F. Butter bottom and sides of 3 (9-inch) cake pans. Line bottom of pans with parchment or wax paper and butter the paper.
2. For batter, sift together flour, cocoa powder, baking soda, baking powder, salt, and cinnamon. Set aside the dry ingredients.
3. Put chopped chocolate in heat-proof bowl. Bring milk to a simmer. Pour the hot coffee and milk over the chocolate. Let stand 1 minute, then whisk until smooth. Let the mocha liquid cool slightly.
4. In a mixer bowl, beat together the eggs, mayonnaise, and vanilla until well blended. Gradually beat in sugar. Add dry ingredients and coffee liquid alternately in 2 or 3 additions, beating until smooth. Divide batter among pans.
5. Bake 25-28 minutes, or until pick inserted in center comes out clean. (I also suggest doing the finger test. Lightly press the tops of the cakes to make sure they don't feel wet of spongy at all. These cakes are so moist, if they are even slightly underbaked, they might sink.) Let cakes cool in pans on wire racks 10-15 minutes. Unmold cakes. Peel off paper lining and cool completely, at least 1 hour.

White Chocolate Mousse
4 ounces white chocolate, coarsely chopped
1 cup heavy cream
1 egg white
1 tablespoon sugar

1. Melt white chocolate with 1/4 cup cream in a double boiler or in a small metal bowl set over a pan of very hot water. Whisk until smooth. Remove from heat and cool to room temperature.
2. When it has cooled, beat the remaining 3/4 cup heavy cream until soft peaks form. In another clean bowl, whip egg white with sugar until fairly stiff peaks form.
3. Fold the beaten egg white into white chocolate cream. Then fold in the whipped cream just until blended (do not overwhip or your icing will split). Refrigerate until ready to use, but do not make too far in advance.

Sour Cream Chocolate Icing
12 ounces bittersweet or semisweet chocolate, coarsely chopped
1 stick unsalted butter
2 tablespoons light corn syrup
1/4 cup half-and-half, at room temperature
1/2 cup sour cream, at room temperature

Melt chocolate with butter and corn syrup in a double boiler over barely simmering water or in a heavy pan over very low heat. Remove from heat and whisk until smooth. Whisk in half-and-half and sour cream. Use while soft. (If icing is runny, let it cool completely to room temperature.)

To Assemble the Cake:
1. Place one cake layer flat-side up on cake stand. Cover top with half the white chocolate mousse, leaving 1/4 -inch margin around edge. Repeat with second layer.
2. Set third layer on top and pour half the sour cream chocolate over the filled cake. Spread all over the sides and top. Don’t worry if cake shows through. The first frosting is to seal in the crumbs which is why professionals call it a "crumb coat". Refrigerate cake uncovered for at least 30 minutes to allow the icing to set. Cover the rest of the icing with plastic wrap and set aside at room temperature.
3. Frost the top and sides of the cake with the remaining icing, which should have the consistency of mayonnaise. If the icing becomes too soft, chill briefly. If icing becomes too stiff, microwave on high 2 or 3 seconds to soften, and then stir to mix well. Use an offset palatte knife or the back of a spoon to swirl the frosting decoratively around the cake. Keep cake refrigerated.

Tuesday, July 21, 2009

The Cake Slice presents: Marbled Lemon Blueberry Butter Cake

Sorry I'm late! This new job is keeping me so busy, but I love it so I'm not complaining! I was supposed to post this entry yesterday with all of the other Cake Slicers, but as soon as I got home from work my mom swooped me up and took me to the mall to go cell phone shopping. I made this cake waayyy back at the beginning of the month. It was delicious, and the entire thing got eaten during wing night! That rarely happens! I'm gonna chalk it up to the fact that I only made half the recipe. I baked it in a 13X9 pan and then cut it into three "layers" to make a rectangular cake. I had a hard time marbling my batter, and when the cake was sliced you couldn't really tell it was marbled. But it was still yummy! The homemade blueberry filling was the best part! I wasn't a huge fan of the whole-egg buttercream. I would've MUCH rather had Swiss meringue buttercream, and Josh agreed with that! Other than that little tidbit, the cake was awesome! Another great choice for The Cake Slice!

See? The marbling looks pretty from the top... This is how I cut it to make a rectangle-shaped cake. I thought I was going to have problems with my buttercream. After whipping the eggs with the sugar syrup, I got SOUP! But it all worked out in the end... And I'm pretty darn proud of the way I decorated the top! ;D ...the marbling is indistinguishable, but it's still pretty!
Marbled Lemon Blueberry Butter Cake (from Sky High: Irresistable Triple-Layer Cakes)
Makes one 8-inch triple-layer cake

2 sticks (8 ounces) unsalted butter, at room temperature
2 cups sugar
2 tsp grated lemon zest
1½ tsp lemon extract
7 egg whites
3 cups cake flour
4 tsp baking powder
½ tsp salt
1¼ cups milk
Fresh blueberries, for decoration
Lemon blueberry preserves (below)
Lemon buttercream frosting (below)

Preheat the oven to 350 degrees F. Butter the bottom and sides of three 8 inch round cake pans. Line the bottom of each pan with a round of parchment or waxed paper and butter the paper. In a mixer, cream together the butter, sugar, lemon zest and lemon extract until light and fluffy. Gradually add the egg whites 2 or 3 at a time, beating well between additions and stopping occasionally to scrape down the sides of the bowl. Combine the flour, baking powder and salt, whisk gently to blend. In 2 or 3 alternating additions, beat the dry ingredients and milk into the butter mixture, scraping down the sides of the bowl several times. Beat on medium-high speed for about 1 minute to smooth out any lumps and aerate the batter. Scoop 1 cup of the batter into a small bowl. Divide the remaining equally among the 3 prepared pans, smoothing the tops with a spatula. This gives you a smooth surface to work with. Add 2½ tbsp of the lemon blueberry preserves to the reserved batter and blend well. Drizzle heaping teaspoons of this blueberry mixture over the batter in the pans. Use a skewer to swirl the blueberry mixture in short strokes to drag it down through the lemon batter without mixing it in. Bake for about 25 minutes or until a cake tester or skewer stuck in the centre comes out clean and the cake pulls away from the sides of the pan. Lat the layers cool for 10 minutes before turning out onto a wire rack, peeling off the paper and leaving to cool completely.

Lemon Blueberry Preserves
3 cups blueberries, fresh or frozen
¾ cup sugar
2 tbsp freshly squeezed lemon juice
1½ tsp grated lemon zest
1 tsp grated fresh ginger

Puree the blueberries with any juices that have exuded in a blender. Pass the puree
through a coarse strainer to remove the skins. In a heavy medium saucepan, combine the blueberry puree with the sugar, lemon juice, zest and ginger. Bring to a gentle boil over a medium heat, stirring often for 20 minutes, or until the preserves have thickened and are reduced to 1 cup. To check the proper thickness place a small amount of a saucer and put in the freezer until cold. Drag your finger through it. If a clear path is made through the preserve then it is ready. Let the preserves cool before using. (Can be made up to 5 days in advance).

Lemon Buttercream Frosting
1 cup sugar
¼ cup water
2 eggs
3 sticks (12 ounces) unsalted butter, at room temperature
2 tbsp freshly squeezed lemon juice

In a small saucepan, combine the sugar and water. Bring to the boil over a medium heat, stirring to dissolve the sugar. Continue to boil without stirring, occasionally washing down the sides of the pan with a wet pastry brush until the syrup reaches the soft-ball stage, 238 degrees F on a candy thermometer. Immediately remove from the heat. In a large mixer bowl with an electric mixer on medium speed, beast the eggs briefly. Slowly add the hot syrup in a thin stream, pouring it down the sides of the bowl; be careful to avoid hitting the beaters or the syrup may splatter. When all the syrup has been added, raise the speed to medium,-high and beat until the mixture is very fluffy and cooled to body temperature. This can take 15-20 minutes. Reduce the mixer speed to medium-low and gradually add the softened butter 2 to 3 tablespoons at a time, beating well between additions. As you’re adding the last few tablespoons of butter, the frosting will appear to break, then suddenly come together like whipped butter. Beat in the lemon juice, and the frosting is ready to use.

To Assemble
To assemble the cake, place a layer, flat side up, on a cake stand. Spread half of the lemon blueberry preserves over the top. Place a second layer on top of the first and spread the remaining preserves over it. Finally place the third layer on top and frost the top and sides with the lemon buttercream. Decorate with fresh blueberries and serve.

Saturday, June 20, 2009

The Cake Slice presents: Piña Colada Cake

For the June installment of The Cake Slice, the bakers made the Piña Colada Cake from Sky High: Irresistable Triple-Layer Cakes by Alisa Huntsman and Peter Wynne. It's a brown sugar cake, filled with tangy pineapple filling, and frosted with coconut meringue buttercream (again, the recipe makes Italian meringue buttercream, but with a few changes I Swissed it up!). Stephanie from Cram It In Your Face is staying with me this week, and she helped me make it. If you remember from last month's Cake Slice recipe, I baked it at Stephanie's house and I did all the work! This time I put her to work! We omitted the rum soak because I don't like the flavor of alcohol when it's not cooked out a little. Stephanie and I both agreed that the cake needed more coconut flavor. I think next time I'd make extra coconut frosting and put some in the middle on top of the pineapple filling. Also, we felt that the coconut milk gave the frosting an "off" flavor. Next time, I'd leave that out and use coconut oil instead of coconut extract. But I'm the baker, so I'm the worst critic. The wing nighters loved it and gave it 5 stars!

See how the other bakers fared this month by clicking here!

Here's me measuring water (because I used buttermilk powder), but I wanted to show my newest fashion statement... pink hair! I put Stephanie to work this time!
I don't know how I could survive without my cake leveler!
Stephanie is the queen of action shots! ;)
Mmm that pineapple filling is BOMB!
Another action shot... and props to my cake turntable, thanks for the help!
Sorry for the lighting... it was so cloudy!!
Stephanie and I shared the first slice, the fruit of our labor!!
Piña Colada Cake
from Sky High: Irresistible Triple-Layer Cakes by Alisa Huntsman and Peter Wynne

Brown Sugar Cake
3 3/4 cups cake flour
1 3/4 tsp baking soda
1 tsp baking powder
1/2 tsp salt
2 1/4 cups packed light brown sugar
2 sticks (8 ounces) unsalted butter, at room temperature
1 3/4 cups buttermilk
5 eggs
2 tsp vanilla extract

Preheat the oven to 350 degrees F. Butter and line the base of three 9inch cake pans.
Sift together the flour, baking soda, baking powder and salt into a large mixing bowl. Whisk gently to combine. Add the brown sugar, butter and 1 1/2 cups of the buttermilk to the dry ingredients. With the mixer on low blend to incorporate. Raise the speed to medium and beat until light and fluffy, 2 to 3 minutes.
Whisk the eggs with the remaining 1/4 cup buttermilk and the vanilla and add to the batter in 3 additions, scraping down the sides of the bowl well and beating only long enough to incorporate between additions. Divide the batter between the 3 pans.
Bake for 25-28 minutes or until a cake tester or wooden toothpick inserted in the center comes out clean. Let the layers cool in the pans for 10 minutes, then turn out onto wire racks, carefully peel off the paper and allow to cool completely.

Pineapple Filling
1 can (20 ounce) crushed pineapple in juice (no added sugar)
1 cup sugar
1/4 cup freshly squeezed lime juice
1 one-inch piece of vanilla bean split in half (We used 1 tablespoon vanilla extract)

Combine the pineapple, sugar and lime juice in a pan. Scrape the vanilla seeds into the pan too. Warm over a medium-low heat, stirring to dissolve the sugar, 2 to 3 minutes.
Raise the het to medium and simmer, stirring occasionally, until the juices have almost completely evaporated and its turned jam-like in consistency (This took us about 10 minutes). Let the filling cool completely before using. (Can be made a day in advance and refrigerated)

Coconut Buttercream
3 eggs whites
1 cup sugar
1/4 cup water (We omitted this)
2 1/2 sticks (10 ounces) unsalted butter, at room temperature (We reduced this to 2 sticks)
2/3 cup unsweetened coconut milk
1 1/2 tsp coconut extract

(We changed this to make it Swiss meringue buttercream. Whisk the egg whites and sugar over a double boiler until the mixture reaches 160 degrees F on a candy thermometer. Pour the mixture into the bowl of a stand mixer fitted with the whisk attachment. Beat on medium-high speed for 6-8 minutes, or until mixture is fluffy and cool to the touch. Switch to the paddle attachment. On medium speed, add butter a few tablespoons at a time. When all the butter has been added, increase the speed to medium-high and beat until the mixture becomes very thick and smooth, about 3 minutes.)

Put the eggs whites in the bowl of an electric mixer fitted with a whip attachment so they are ready to go.
Combine the sugar and water in a small saucepan and place over a medium heat, stirring to dissolve the sugar. Bring to the boil and cook without stirring until the syrup reaches the sold boil stage, 238 degrees F on a candy thermometer.
Beat the egg whites briefly at medium speed. Slowly add the hot syrup in a thin stream, being careful to avoid the beaters. Continue to whip until the meringue has cooled to body temperature.
With the mixer on low speed, gradually add the butter, several tablespoons at a time and continue to beat until a smooth fluffy frosting forms.
Add the coconut milk in several additions, scraping down the sides of the bowl well after each addition. Add the coconut extract and mix until smooth.

To assemble
9 tbsp rum – light, amber or dark
Coconut flakes and thin slices of pineapple

Place one layer flat side up on a cake stand. Sprinkle a generous 3 tbsp rum over the cake. Spread half of the pineapple filling over the layer, leaving a small gap around the edge. Add the second layer, sprinkle with more rum and cover with the remaining pineapple filling.
Top with the third layer and sprinkle with the remaining rum. Frost the top and sides of the cake with the coconut buttercream.
Decorate with some thin shreds of coconut and slices of pineapple if wished.

Wednesday, May 20, 2009

The Cake Slice presents: Mile-High Devil's Food Cake w/ Brown Sugar Buttercream

This month, The Cake Slice bakers made the Mile-High Devil's Food Cake from Sky High: Irresistible Triple-Layer Cakes. We had a choice to make either a 7-minute frosting or a meringue buttercream, both of which are flavored with brown sugar. Of course I chose to make the meringue buttercream (I made it Swiss-style instead of following the Italian-style instructions in the recipe, as I am the self-proclaimed "Queen of SMBC!"). I made this cake at my cousin Stephanie's house while I was in North Carolina for Mother's Day. We LOVE to bake together, but she lives so far away that we hardly ever see each other. Making the cake was supposed to be a joint effort, but I did all the work while she took pictures. She's lucky I love her so much! ;P

The recipe calls for making the layers in 8-inch pans. We made ours in 9-inch pans, and the batter rose perfectly to the top. If you make these in 8-inch pans, make sure they are at least 2 inches deep! It was quite an experience trying to make the Swiss meringue buttercream without my stand mixer. Stephanie's stand mixer only came with the paddle attachment, so I wasn't sure the SMBC would come together without the whisk attachment. However, it IS possible! After heating it over the double boiler, we poured it into the bowl of the stand mixer and beat it with a hand mixer on high until it was cooled. My arms were about to fall off because it took about 8 minutes! At this point, it was still soupy, not at all like the thick, marshmallowy consistency you get when you whip it with the whisk attachment in a stand mixer. We attached the bowl to the stand mixer with the paddle attachment and turned it on high. I didn't think the paddle would fluff up the meringue, but it did! After a few minutes, it became fluffy just like if we had used the whisk! We added the butter (only 2 1/2 sticks, because that's the amount I usually use for 5 egg whites). It did it's usual "curdle-before-magically-transforming-into-perfect-frosting" thing. Then, not only did I bake the cake... I got stuck frosting the cake... my least favorite part of cake-making! It was well worth the struggle because the cake was SO DELICIOUS! It was slightly more dense than other devil's food cakes I've made. I'm chalking that up to the brown sugar. But it was perfectly moist and soft. And the buttercream rocked, of course! I couldn't believe how quickly the cake got eaten. We made it Saturday, and by Sunday afternoon people were fighting for the last slice!

Pretty much the only chance I get for face time on my own blog is when the camera is in Stephanie's hands! So here I am, pouring the batter into the pans! ;D Of course we toothpicked all three layers to be sure they were done!
And here's me again, *ahem* looking slightly less attractive, while eyeballing the level of the cake... We had a little trouble with this one!
Action shot!! Nice photog skills, cousin!
And here's my our finished cake! If you can't tell, I'm more of a "no frills" person when it comes to decorating cakes...
And here it is on Saturday night after my mom and aunt Michelle got hold of it!!
Mile-High Devil’s Food Cake (from Sky High: Irresistible Triple-Layer Cakes by Alisa Huntsman and Peter Wynne)
Makes an 8-inch 3-layer cake

1 cup unsweetened cocoa, not Dutch processed
1 ¼ cups hot water
3 cups light brown sugar, packed
2 2/3 cups cake flour*
1 ½ teaspoons baking soda
¾ teaspoon salt
9 ounces (2 sticks + 2 tablespoons) unsalted butter at room temperature
3 large eggs
1 ½ teaspoons vanilla extract
¾ cup cold water
[*1 cup cake flour is equal to ¾ cup all-purpose flour plus 2 tablespoons of cornstarch]

Preheat the oven to 325 degrees F. Butter the bottoms and sides of three 8-inch round cake pans (We baked ours in 9-inch pans, and they almost overflowed. Make sure your 8-inch pans are tall!). Line the bottoms of the pans with parchment paper and grease the paper as well.
Place the cocoa in a medium bowl and add the hot water. Whisk until smooth and let it cool to room temperature. (To speed this up, whisk the cocoa into ¾ cup hot water. Then add ½ cup cold water to cool it down.)
In the bowl of an electric mixer, combine the sugar, flour, baking soda, and salt. With the mixer on low blend to combine. Add the butter and the dissolved cocoa. Then raise the mixer to medium speed and beat for 2 minutes until light and fluffy.
In a medium bowl whisk together the eggs, vanilla, and cold water until combined. Add this liquid to the batter in three additions scraping down the sides of the bowl between additions. Divide the batter among the three pans.
Bake for 35-45 minutes or until a cakes tester inserted into the almost comes out clean. (Our 9-inch cakes were done at 25 minutes.) There should be a few crumbs attached still. Cool the cakes in the pans for 15 minutes. Then invert and remove parchment paper and cool completely on a wire rack.

Brown Sugar Buttercream
5 egg whites
1 ¼ cups brown sugar
¼ cup water (We omitted this)
1 pound (4 sticks) unsalted butter, at room temperature (We reduced this to 2 ½ sticks)

(We made our buttercream using the Swiss meringue method-- Whisk the egg whites and sugar over a double boiler until the mixture reaches 160 degrees F on a candy thermometer. Pour the mixture into the bowl of a stand mixer fitted with the whisk attachment. Beat on medium-high speed for 6-8 minutes, or until mixture is fluffy and cool to the touch. Switch to the paddle attachment. On medium speed, add butter a few tablespoons at a time. When all the butter has been added, increase the speed to medium-high and beat until the mixture becomes very thick and smooth, about 3 minutes.)
Place all the egg whites in the bowl of an electric mixer; set aside.
In a heavy medium saucepan combine the sugar and water. Cook over medium heat stirring to dissolve the sugar. Then bring to a boil without stirring and cook until the syrup reaches 238 degrees F on a candy thermometer.
Begin beating the egg whites on medium low speed. Slowly pour in the syrup making sure not to hit the beater. Increase the mixer speed to medium high and beat until the meringue has cooled to body temperature.
With the mixer on med-low add 1-2 tablespoons of butter at a time. When all the butter has been added increase the mixer’s speed to medium and beat until the mixture looks curdled or separated. Continue to beat until the icing comes together again looking like soft smooth whipped butter.

Assembling the cake:
Place one layer flat side down and cover it with 2/3 cup of the frosting. (We used ½ cup frosting between each layer. We had just enough leftover to frost the top and sides.) Top with second layer and repeat process. Top with third layer and frost the sides of the cake.

Monday, April 20, 2009

The Cake Slice presents: Chai Cake w/ Honey Ginger Cream

I am so glad I joined The Cake Slice! Last month's Triple Lemon Chiffon Cake was fabulous, and this month's cake is even better! For April, we made this delicious chai spiced cake with honey ginger cream cheese frosting. Whoa! The cake is so soft and jam-packed with flavor. The honey and ginger flavors in the frosting are a perfect compliment to the warm spicy flavors in the cake. The recipe actually calls for cardamom, but have you seen the price of that stuff? I dunno if it's the same everywhere, but it was OUTRAGEOUS at my local grocery store. I substituted a little extra cinnamon and some cloves, and it tasted great! This cake would've been really perfect for Thanksgiving, but I'm glad they waited until I joined to bake it! I'll definitely be using this recipe as my go-to for spice cake! The frosting was extremely soft, so my cake is less than beautiful. I think when I make the cake again, I'll frost it with honey ginger SMBC!

Steeping the tea... Ohh I wanted to drink that so bad!Baking the layers...
Cooling time!
My sub-par cake...
...WAS FREAKIN DELICIOUS!
And what do you do with leftover cake scraps? Make cake truffles, of course!
UPDATE: Lots of you asked how to make the cake truffles. When you level the tops of your cakes, save the scraps. Mix it with a few spoonfuls of the frosting until you have a smooth, even mixture. Roll the mixture into bite-size balls and place them on a wax paper-lined cookie sheet. Freeze the balls until firm, about 10 minutes. Dip them in melted chocolate or candy melts. I like to keep mine in the fridge so the centers stay firm! Left at room temp, the centers will be extremely soft.

Chai Cake w/ Honey Ginger Cream (from Sky High Irresistible Triple Layer Cakes by Alisa Huntsman and Peter Wynne)
Makes an 8-inch 3-layer cake

1 1/3 cups milk
6 chai tea bags, without added sweetener, such as Tazo
(I used Stash)
4 whole eggs
2 egg yolks
2 teaspoons vanilla extract
2 3/4 cups cake flour*
2 cups sugar
4 1/2 teaspoons baking powder
3/4 teaspoons ground cinnamon
1/2 teaspoon ground cardamom**
1/2 teaspoon salt
8 ounces (2 sticks) unsalted butter, at room temperature
[*1 cup of cake flour is equal to 3/4 cup of all purpose flour plus 2 tablespoons of cornstarch.]
[**Cardamom substitute is an equal amount of brown cardamom OR equal parts ground nutmeg and cinnamon OR equal parts ground cloves and cinnamon]

Preheat the oven to 350 degrees F. Grease the bottom and sides of 3 8-inch round pans and line with parchment paper. Grease the paper as well.
In a small saucepan bring the milk to a simmer over medium-low heat. Add the tea bags, careful not to let the paper tag fall into the milk. Remove from heat and allow the tea to steep for 5 minutes. Remove the teabags and squeeze out the milk. Let the chai milk cool completely.
In a medium bowl mix the eggs, egg yolks, vanilla, and 1/3 cup of the chai milk. Whisk together.
Combine the flour, sugar, baking powder, cinnamon, cardamom, and salt in the bowl of a mixer. Beat on low for 30 seconds. Add the butter and the remaining chai milk, on medium-low speed. Raise the speed to medium and beat until light and fluffy (If you're using cake flour, don't worry about over beating. If you're using all-purpose flour, beat just until mixture looks almost even). Add the egg mixture in three additions scraping the between additions. Divide the batter evenly among the pans.
Bake the cakes for 26-28 minutes, or until a cake tester inserted in the middle comes out clean (My cakes were done at 22 mins). Allow the cakes to cool in the pans for 10 minutes. Remove cakes from pans and peel off parchment paper. Cool completely.
To assemble the cake place one layer flat side down a serving plate and top with 2/3 cup of icing. Spread to the edge and repeat with second layer. Place third layer on top and spread the remaining ginger cream on top allowing it to drizzle down the sides of the cake like icicles.

Honey Ginger Cream
2 1/2 cups confectioners sugar
6 ounces cream cheese, at room temperature
6 tablespoons unsalted butter, at room temperature
1/2 cup honey (any kind as long as liquid)
1/2 teaspoon fresh grated ginger

Place all the ingredients in a food processor. Pulse to blend together, then scrape the sides of the bowl and pulse until smooth (I mixed mine with a hand mixer on medium speed).