Flour Child Bakery opens in Virginia Beach!

My mom and I just opened a bakery in Virginia Beach!! "Like" us to stay updated! If you care to read our blog, it's flourchildbakery.blogspot.com.


Showing posts with label family baking book. Show all posts

Tuesday, June 22, 2010

Coconut Cream Pie

There's a looong story that goes with this post, but since I have a TON of work to do on the computer today, I'm gonna make it short and sweet. I asked my dad what dessert he wanted for Father's Day, and his first reply was pie crust. His favorite thing is when I bake my leftover pie crust scraps with cinnamon and sugar. I wouldn't feel satisfied if all I baked him on Father's Day was scraps, so his second choice was coconut custard pie... and pie scraps, of course! :D I found a great recipe for coconut cream pie in The America's Test Kitchen Family Baking Book. I liked it because it used coconut milk in the custard.

I started by making and baking the pie crust. I made a double batch of pie pastry. I rolled out half and put it in a pie pan. Then I rolled out the other half, cut it into strips, sprinkled them with cinnamon sugar, and baked them as "scraps." While the crust was in the oven, I made the coconut custard. It was insanely delicious, and I knew it was gonna make a GREAT pie. Next is when the baking gods decided take a giant, steaming deuce on my day!

When I went to retrieve my beautiful pre-baked pie crust from the oven, it slid back on the oven mitt, and the 375 degree dark metal pie pan made contact with my arm flesh! Naturally, my reflex was to get it off me, ASAP! I jerked my arm forward and watched in slow motion as my perfect pie crust hit the floor and flattened into a fugly hot mess. My mom, trying to remedy the situation, grabbed the pie crust and tried to put it back together jigsaw style. "Cassie, you can't even tell!" No way! No way was I gonna serve my dad a pie that had once been in pieces on the floor! By this time, dinner was almost ready. I had no time to re-do anything. I accepted my defeat, and with my head down, I put the coconut custard in the fridge to wait until the next day when I could gather my wits and try again.But remember how I said the baking gods took not only a deuce, but a GIANT, STEAMING deuce on my day?? Yeah, I also baked a birthday cake for a family friend. Can you guess how that turned out? I'll put it this way, I took one bite and spit it out... SPIT IT OUT! How embarassing is that? I am trying to open my own bakery, and I just produced a cake for someone's birthday that might've tasted better if I'd made it in my Easy-Bake Oven! Gahh!! Needless to say, I had a well-deserved cry while Josh reassured me that I simply made a mistake somewhere in the recipe, and that I was still a baking goddess. :D I love that boy! <3 Ok, so it didn't end up being a short story after all. Oh well, that just means less time playing FarmVille later.... Here's the Coconut Cream Pie recipe. BTW, the pictures look redonkulous because I was using the camera I gave to my dad for Father's Day. I haven't figured out any of the settings yet.

Coconut Cream Pie (adapted from The America’s Test Kitchen Family Baking Book)

1 pre-baked 9” pie crust (half of the recipe after the link)

Filling
1 can (14 ounces) coconut milk (look for this on the Asian food aisle in the grocery store)
1 cup whole milk
2/3 cup granulated sugar, divided
1/4 teaspoon table salt
5 large egg yolks
1/4 cup cornstarch
2 tablespoons unsalted butter, cut into 2 pieces
1 teaspoon vanilla extract

Topping (my own recipe)
1 1/2 cups cold heavy cream
2 tablespoons confectioners’ sugar
1 teaspoon coconut flavoring
1/2 teaspoon vanilla extract
1/2 cup toasted coconut, optional

Bring coconut milk, whole milk, 1/3 cup of sugar, and salt to simmer over medium-high heat, stirring occasionally to ensure that sugar dissolves.

Whisk yolks, cornstarch, and remaining 1/3 cup of sugar in medium bowl until thoroughly combined. Whisking constantly, gradually ladle about 1 cup hot milk mixture over yolk mixture; whisk well to combine. Whisking constantly, gradually add remaining milk mixture to yolk mixture in 3 or 4 additions; whisk well to combine. Return mixture to saucepan. Reduce the heat to medium and cook, whisking vigorously, until the mixture is thickened and a few bubbles burst on the surface, about 30 seconds.

Off heat, whisk in the butter and vanilla. Let the mixture cool until just warm, stirring often, about 5 minutes. Pour warm filling into cooled pie crust. Press plastic wrap directly against surface of filling and refrigerate until firm, about 4 hours.

For the topping, whip the cream, sugar, and flavorings with an electric mixer on medium speed until stiff peaks form. Do not overbeat or the cream will curdle. Pipe or spread the whipped cream on top of the pie and sprinkle with toasted coconut.


Wednesday, June 9, 2010

Soft Sugar Cookies w/ Pink Frosting

If you follow me on Twitter, or if you're a fan of the HTEAC Facebook page, you already know that I was seriously craving these cookies today! I must admit, a lot of times when I have a particular craving, I don't always hit the nail on the head with the recipe I choose. Today, I did it! These cookies are exactly what I wanted. They're soft and moist without being cake-like. The flavor is bangin', and the frosting is... well... the icing on the cookie! I predict these cookies will disappear like a fart in a fan factory. And I'll just go ahead and make a check mark on my bucket list beside "Use the idiom 'disappear like a fart in a fan factory.'" CHECK! (PS: Sorry if you're grossed out. Stop thinking about farts and start thinking about cookies!)I figured I didn't want to spend all day smearing frosting on these cookies, so I made a shortcut by rolling some of them in pink sugar before baking. They looked so pretty. The cookies with the frosting are very sweet, but it didn't stop me from eating a whole one and two bites off a second one. I bet they'd be perfect for kids! This recipe is totally a keeper.For the frosting, I didn't use a recipe. I started with
1 stick unsalted butter, softened
I mixed in about
1-2 cups confectioners' sugar
until it was stiffened. Then I added about
1 tablespoon milk
1/2 teaspoon vanilla extract
1 drop red food coloring

and mixed until it was creamy and spreadable.

Soft Sugar Cookies (from The America's Test Kitchen Family Baking Book)
Makes 2 dozen cookies

2 cups granulated sugar, divided
2 1/2 cups all-purpose flour
1/2 tsp baking powder
1/2 tsp salt
14 Tbsp (1 3/4 sticks) unsalted butter, softened
2 teaspoons vanilla extract
2 large eggs

Set oven rack in middle of the oven. Preheat oven to 350°F. Spread 1/2 cup of the sugar in a shallow dish for coating and set aside. In a separate bowl, whisk the flour, baking powder, and salt together and set aside.

Beat softened butter and remaining 1 1/2 cups sugar together in a large bowl using an electric mixer on medium speed until light and fluffy, 3-6 minutes. Beat in the vanilla then eggs, one at a time, until combined, about 30 seconds, scraping down the bowl & beaters as needed.

Reduce mixer speed to low and slowly mix in the flour mixture until combineds. Give the dough a final stir with a rubber spatula to make sure dough is combined.

Line large baking sheets with parchment paper. Using damp palms, roll 2 tablespoons of dough at a time into balls, then roll in sugar to coat. Place balls on parchment-lined baking sheets, spaced 2 inches apart. Flatten cookies with the buttered bottom of a drinking glass, then sprinkle and remaining sugar over flattened tops. (I just layed a piece of plastic wrap over my cookies and pressed them with the bottom of a clean glass.)

Bake cookies, one sheet at a time, until the edges are set and just beginning to brown but the centers are still soft and puffy, 10-12 minutes, rotating the baking sheet halfway through baking. Allow cookies to cook on baking sheet for 10 minutes, then serve warm or transfer to a wire rack and let cool completely.


*takes a bow for using the word "fart" 4 times in a blog post about prissy pink cookies!!* ;D

Monday, May 3, 2010

Oatmeal Fudge Bars

My mom asked me to make dessert yesterday to eat after we had Dad's famous ribs for dinner. After Dad's ribs, the dessert has to be amazing or it won't be remembered! These bars were pretty sensational, if I may say so myself. They are very rich, so an 8x8 pan could easily make 16 small servings. But we are a gluttonous family, so I cut mine into 12 pieces. The crispy, crunchy oat crust/topping is a wonderful accompaniment to the soft, fudgy center. This recipe is definitely a keeper!OATMEAL FUDGE BARS (from The America’s Test Kitchen Family Baking Book)
MAKES 16 bars
Old-fashioned rolled oats may be substituted for the quick-cooking oats, although the bars will be more chewy.
CRUST AND TOPPING
1 cup (3 ounces) quick-cooking oats
1 cup packed (7 ounces) light brown sugar
3/4 cup (3 3/4 ounces) all-purpose flour
1/4 teaspoon baking powder
1/4 teaspoon baking soda
1/4 teaspoon salt
8 tablespoons (1 stick) unsalted butter, melted and cooled

FILLING
1/4 cup (1 1/4 ounces) all-purpose flour
1/4 cup packed (1 3/4 ounces) light brown sugar
2 teaspoons instant espresso or instant coffee (if using granulated instant coffee, dissolve into 2 teaspoons hot water and stir into the chocolate mixture after the egg)
1/4 teaspoon salt
1 1/2 cups (9 ounces) semisweet chocolate chips
2 tablespoons unsalted butter
1 large egg

1. FOR THE CRUST AND TOPPING: Adjust an oven rack to the middle position and heat the oven to 325 degrees. Line an 8-inch square baking pan with a foil sling and grease the foil.
2. Whisk the oats, brown sugar, flour, baking powder, baking soda, and salt together in a large bowl. Stir in the melted butter until combined. Reserve 3/4 cup of the oat mixture for the topping.
3. Sprinkle the remaining oat mixture into the prepared pan and press into an even layer with the bottom of a measuring cup. Bake the crust until light golden brown, about 8 minutes. Let the crust cool completely on a wire rack, about 1 hour.
4. FOR THE FILLING: Whisk the flour, sugar, instant espresso, and salt together in a medium bowl. Melt the chocolate chips and butter together in the microwave, stirring often, 1 to 3 minutes. Transfer the chocolate mixture to a large bowl and let cool slightly. Whisk in the egg until combined. Stir in the flour mixture until just incorporated.
5. Adjust an oven rack to the middle position and heat the oven to 325 degrees. Spread the filling evenly over the cooled crust and smooth the top. Sprinkle with the reserved oat topping. Bake the bars until a toothpick inserted into the center comes out with a few moist crumbs attached and the filling begins to pull away from the sides of the pan, 25 to 30 minutes, rotating the pan halfway through baking.
6. Let the bars cool completely in the pan, set on a wire rack, about 2 hours. Remove the bars from the pan using the foil, cut into squares, and serve.

Friday, April 9, 2010

New York Cheesecake w/ Strawberry Topping

"OH-MY-GOSH!" Seriously, that's how they should rename this cheesecake. You'll only be able to say "OH-MY-GOSH" every time you take a bite. Actually, that's not true. Towards the end, it will be more like this... "OH-MY-GOSH, I'm going to throw up if I eat another bite, but OH-MY-GOSH-I-CAN'T-STOP!!" This is not a lie, people. I went to bed Wednesday night with a stomach so full of cheesecake, I couldn't even finish harvesting my Farmville crops! I was K.O.-ed by cheesecake! But it was allll worth it because I got to use up two lonely egg yolks that were hanging out in the fridge, AND I found my very first go-to cheesecake recipe. SUCCESS!!I'm kinda proud of my photos in this post. I guess the daylight just happened to be very suitable at the exact moment I got these shots because usually my photos are nowhere near this good! Sorry for tooting my own horn. You can tell me to stop whenever you'd like! ;)NEW YORK CHEESECAKE (from "The America’s Test Kitchen Family Baking Book")
SERVES 12
Crust
8 whole graham crackers, broken into 1-inch pieces
6 tablespoons (3/4 stick) unsalted butter, melted and cooled, plus 1 tablespoon for brushing pan
3 tablespoons sugar

Filling
2 1/2 pounds cream cheese, cut into chunks and softened (I used 2 packs Neufchâtel and 3 packs regular)
1 1/2 cups (10 1/2 ounces) sugar
1/8 teaspoon salt
1/3 cup sour cream (I used reduced fat)
2 teaspoons fresh lemon juice
2 teaspoons vanilla extract
2 large egg yolks
6 large eggs

1. Adjust an oven rack to the middle position and heat the oven to 325 degrees. Process the graham cracker pieces in a food processor to fine, even crumbs, about 30 seconds. Sprinkle the melted butter and sugar over the crumbs and pulse to incorporate. Sprinkle the mixture into a 9-inch springform pan (I used a 10" pan and still got a tall cheesecake). Press the crumbs firmly into an even layer using the bottom of a measuring cup. Bake the crust until fragrant and beginning to brown, 10 to 15 minutes. Let the crust cool to room temperature, about 30 minutes.

2. Meanwhile, increase the oven temperature to 500 degrees. Beat the cream cheese in a large bowl with an electric mixer on medium-low speed until smooth, 1 to 3 minutes. Scrape down the bowl and beaters as needed.

3. Beat in half of the sugar and salt until incorporated, 1 to 3 minutes. Beat in the remaining sugar until incorporated, 1 to 3 minutes. Beat in the sour cream, lemon juice, and vanilla until incorporated, 1 to 3 minutes. Beat in the egg yolks and eggs, two at a time, until combined, 1 to 3 minutes.

4. Being careful not to disturb the baked crust, brush the inside of the prepared springform pan with melted butter. Set the pan on a rimmed baking sheet. Carefully pour the filling into the pan. Bake the cheesecake for 10 minutes.

5. Without opening the oven door, reduce the oven temperature to 200 degrees and continue to bake the cheesecake until an instant-read thermometer inserted in the center of the cake registers 150 degrees, about 1 1/2 hours, rotating the pan halfway through baking.

6. Transfer the cake to a wire rack and run a knife around the edge of the cake. Let the cheesecake cool until just barely warm, 2 1/2 to 3 hours, running a knife around the edge of the cake every hour or so. Wrap the pan tightly in plastic wrap and refrigerate until cold, at least 3 hours.

7. To unmold the cheesecake, wrap a wet, hot kitchen towel around the cake pan and let sit for 1 minute. Remove the sides of the pan and carefully slide the cake onto a cake platter. Let the cheesecake sit at room temperature for 30 minutes before serving. (I think this is a matter of preference. We liked ours cold, straight from the fridge!) The cooled, tightly wrapped cake can be refrigerated for up to 4 days.

STRAWBERRY TOPPING
MAKES about 3 cups

4 cups (20 ounces) fresh strawberries, hulled and sliced thin
1/4 cup (1 3/4 ounces) sugar
Pinch salt
1/2 cup strawberry jam
1 tablespoon fresh lemon juice
(1 tablespoon cornstarch, my own addition)

1. Toss the strawberries, sugar, and salt together in a large bowl and let sit, stirring occasionally, until the strawberries have released their juice and the sugar has dissolved, about 30 minutes.

2. Process the jam in a food processor (or blender) until smooth, about 8 seconds. Simmer the jam in a small saucepan over medium heat until no longer foamy, about 3 minutes. Stir the warm jam mixture and the lemon juice into the strawberries. Let the topping cool to room temperature before serving, about 1 hour. Serve at room temperature or chilled.

(I chilled this mixture overnight, but I wanted it to be thicker, almost like pie filling. So, I strained the liquid off of the strawberries, reserved about 3 tablespoons of it in a measuring cup, and brought the rest to a simmer. I whisked 1 tablespoon of cornstarch into the reserved 3 tablespoons of strawberry juice, then stirred that into the simmering pot. I brought it back to a simmer and whisked it for about 3 minutes to thicken. I chilled that until completely cold, and then stirred it back into the strawberries. The result was a nice, thick strawberry glaze!)

Monday, January 25, 2010

Rustic Italian Bread

Sorry for the MAJOR delay between posts. I'm full of excuses, but my most current is Cafe World on Facebook! It takes up ALL my time! I made this bread about two weeks ago, and it was so good that I want to post it right away. But I had hungry customers to feed in my virtual cafe, and I can't let my buzz rating slip below 100! ;) Anyway, I'm posting it now, and I must say it's totally delicious! I'll put it this way, it's yummy enough to eat WITHOUT any butter smeared on top! The crust is extra crunchy, and the interior is so moist and chewy. I used the "same-day" variation of the recipe, and the flavor was incredible. I can't even imagine how good it would taste if I took the extra time to make the sponge a day ahead! This recipe makes a loaf large enough to feed 8-10 people alongside a nice spaghetti dinner. The four of us polished off half of it, and I took care of the rest as French toast over the next few mornings. Breakfast has never been better!! (Well, except for the amazing muesli my mom picked up for me at Grandma's Pantry while she was in Harrisonburg!) :D
Rustic Italian Bread (from "The America's Test Kitchen Family Baking Book")
This recipe requires a bit of patience—the sponge, which gives the bread flavor, must be made 11 to 27 hours before the dough is made. We find it makes the most sense to prepare the sponge (which requires just 5 minutes of hands-on work) the day before you want to bake the bread.

On the second day, remove the sponge from the refrigerator and begin step 2 at least 7 hours before you want to serve the bread. If you own two standing mixer bowls, in step 1 you can refrigerate the sponge in the bowl in which it was made. Use the second bowl to make the dough in step 2. Have ready a spray bottle filled with water for misting the loaves.
Variation: SAME-DAY RUSTIC ITALIAN BREAD
If you don't have time for a sponge, this loaf can be made the same day, but the flavor won't be as complex, and the crumb will be finer and more uniform (like sandwich bread).
Omit the sponge. When assembling the dough in step 2, increase the amount of bread flour to 5 cups, increase the water to 2 1/4 cups, and increase the yeast to 1 envelope (2 1/4 teaspoons).

Sponge
2 cups (11 ounces) bread flour
1 cup warm water (110 degrees)
1/4 teaspoon instant or rapid-rise yeast


Dough
3-3 1/2 cups (16 1/2 to 19 1/4 ounces) bread flour
1 teaspoon instant or rapid-rise yeast
1 1/4 cups warm water (110 degrees)
2 teaspoons salt

1. For the sponge: Stir all of the ingredients together in a medium bowl until combined. Cover with plastic wrap and let sit at room temperature until the sponge has risen and fallen, at least 6 hours or up to 24 hours.

2. For the dough: Combine 3 cups of the flour and the yeast in a standing mixer fitted with the dough hook. With the mixer on low speed add the water and mix until the dough comes together, about 2 minutes. Stop the mixer, cover the bowl with plastic wrap, and let sit at room temperature for 20 minutes.

3. Remove the plastic wrap, add the sponge and salt, and knead the dough on medium-low speed until it is smooth and elastic, about 8 minutes. If after 4 minutes more flour is needed, add the remaining 1/2 cup of flour, 2 tablespoons at a time, until the dough clears the sides of the bowl but sticks to the bottom.

4. Turn the dough out onto a lightly floured counter, and knead by hand to form a smooth round ball. Place the dough in a large, lightly oiled bowl and cover tightly with greased plastic wrap. Let the dough rise in a warm place until doubled in size, about 1 hour.

5. Turn the dough in the bowl with a dough scraper or large rubber spatula. Gently lift and fold a third of the dough toward the center. Repeat with the opposite side of the dough. Finally, fold the dough in half, perpendicular to the first folds. The dough shape should be a rough square. Cover, let rise for 30 more minutes, then repeat the turning process. Cover and let rise until the dough has doubled in size, about 30 minutes longer.

6. Top a rimless (or inverted) baking sheet with parchment paper. Turn dough out onto a lightly floured counter, press it into a 10-inch square without tearing it, and gently dimple it with your fingertips. Fold the top corners diagonally to the middle. Using your fingertips and starting at the top of the dough, pull the underside of the dough up over the top, stretching it considerably, and begin to roll the dough up into a rough log. With each roll, press the seam firmly to seal. Continue to do this, forming the dough into a taut log, 5 to 7 more times. Transfer to the prepared baking sheet, seam side down, and gently tuck the ends into a taut loaf. Mist the loaf with vegetable oil spray, cover loosely with plastic wrap, and let rise in a warm place until nearly doubled in size and the dough barely springs back when poked with a knuckle, 1 to 1 1/2 hours.

7. Meanwhile, adjust an oven rack to the lower-middle position, place a baking stone on the rack, and heat the oven to 500 degrees. Let the baking stone heat for at least 30 minutes (but no longer than 1 hour).

8. (I dusted mine lightly with flour before I slashed it.) Cut three 1/2-inch deep diagonal slashes across the top of the dough and spray the loaf lightly with water. Carefully slide the loaf and parchment onto the hot baking stone. Bake the bread for 10 minutes.

9. Rotate the bread, reduce the oven temperature to 400 degrees, and continue to bake until the center of the loaf registers 210 degrees on an instant-read thermometer and the crust is deep golden brown, 30 to 35 minutes. (I think mine only took somewhere between 25-30 minutes to finish baking, so keep an eye on it.)

10. Transfer the loaf to a wire rack, discard the parchment, and let cool to room temperature, about 2 hours, before serving.

Friday, May 1, 2009

Big and Chewy Light Chocolate Chip Cookies

Hey! Did you know it's almost summertime? And it's about to get hot? And you're gonna have to shed some clothing to stay comfortable? And did you know that means it's almost swimsuit season!?!?!! If you're like me, you got really comfortable in your sweatshirts and jeans this winter. And if you're like me, you also got pretty comfortable with cakes, brownies, cookies, pies, and all the other yummies that came and went with the holidays. Okay I know I'm sounding like a New Years' resolution right now, but I'm about to let you in on something incredible so stay with me!!

Hey! Did you know you can eat chocolate chip cookies and STILL look pretty freakin hot in a bathing suit this summer??? Ladies and gentleman, may I introduce you to the "Big and Chewy Light Chocolate Chip Cookie." That's right! It's big (compared to other "diet" cookies), it's chewy, and it's LIGHT! The recipe is from The America's Test Kitchen Family Baking Book. I made their Low-fat Blueberry Muffins a few months ago, and those were perfect. So I definitely had high expectations when I started making the dough for light chocolate chip cookies. How can chocolate chip cookies be low-fat and still be chewy and delicious? DATES! No, I'm not dissing all my single ladies. I'm talking about nature's candy. Dates are naturally chewy, so it makes sense that adding homemade date purée to the cookie dough would make these cookies super chewy! I might even start adding date purée to other cookie recipes (and maybe even brownies) to make them chewier... it's just a thought.

Thanks to a handy recipe calculator, I roughly estimated the nutritional facts of ATK's regular chocolate chip cookies (recipe converted to yield 18 cookies):
PER COOKIE: Cal 191; Fat 9 g; Sat fat 5.5 g; Chol 27.4 mg; Carb 27 g; Protein 1.9 g
Compare that to the facts for the low-fat version:
PER COOKIE: Cal 120; Fat 3 g; Sat fat 2 g; Chol 15 mg; Carb 23 g; Protein 2 g
So fear not, people! It is possible to eat cookies and look HOT! Oh and while I'm at it I wanna mention my new obsession: Organic dark chocolate chips from Woodstock Farms. I found these on sale at a random no-name grocery store a few weeks ago. I figured these "healthy" chocolate chip cookies were a pretty good excuse to use organic chocolate chips. These chips taste about as dark as regular semi-sweet chips. They're creamy, smooth, and they melted perfectly in the cookies. If you ever come across organic chocolate chips, I definitely recommend trying them! Of course, if you live in a fancy city and have access to stores like Whole Foods and Trader Joe's then you've probably known about organic chocolate chips looong before me! Good for you! ;P

Browned butter and homemade date purée contribute to the great flavor and texture in these cookies! The lean cookie dough is very crumbly.
It's not sticky at all, so don't be afraid to mix with your hands!
Break the dough balls in half and press the side together. The jagged edges on top help these cookies bake with craggly brown edges.
They look perfect, but how do they taste?
FANTASTIC!
I usually prefer my cookies baked on the lighter side (left). However, these cookies are gonna be chewy no matter what! Baking them for about 18 minutes (right) turns them a nice toasty brown and develops some yummy flavor!
BIG AND CHEWY LIGHT CHOCOLATE CHIP COOKIES (from The America’s Test Kitchen Family Baking Book)
MAKES about 18 cookies (I got exactly 18! It’s a miracle!)
“Dried dates can be found in the nut and dried fruit section of the supermarket. Be sure to buy dates that are still supple. To chop the dates quickly, try using kitchen shears sprayed with vegetable oil spray.”

1 cup water
1/4 cup (1 1/4 ounces) finely chopped dates
3 tablespoons unsalted butter
2 cups (10 ounces) all-purpose flour
1/2 teaspoon baking soda
1/2 teaspoon salt
1 1/4 cups packed (8 3/4 ounces) light brown sugar
1 large egg
2 teaspoons vanilla extract
1/2 cup (3 ounces) semisweet chocolate chips

1. Adjust an oven rack to the middle position and heat the oven to 325 degrees F. Line 2 large baking sheets with parchment paper.
2. Bring the water and dates to a boil in a small saucepan over medium-high heat. Simmer until the dates are tender and most of the water has evaporated, about 20 minutes. Using a rubber spatula, work the dates through a fine-mesh strainer into a medium bowl. Scrape the dates remaining in the strainer into the bowl (you should have about 1/4 cup puree). Cook the butter in a small saucepan over medium heat until nutty brown, about 4 minutes. Let cool.
3. Whisk the flour, baking soda, and salt together in a medium bowl. In a large bowl, beat the melted butter, brown sugar, and date puree together with an electric mixer on medium speed until smooth, 1 to 2 minutes. Beat in the egg and vanilla until combined, about 30 seconds, scraping down the bowl and beaters as needed.
4. Reduce the mixer speed to low and slowly add the flour mixture until combined, about 30 seconds. Reserve 2 tablespoons of the chocolate chips, then mix in the remaining chips until incorporated. (The batter will be very stiff. You can use your hands to mix the chips in because the batter is not sticky at all.)
5. (I refrigerated my dough for several hours before this next step.) Working with 2 tablespoons of dough at a time, roll the dough into balls, tear the balls in half, and press back together with the torn side up. Lay the cookies jagged side up on the pre­pared baking sheets, spaced about 2 inches apart. Press the remaining 2 tablespoons of chips evenly over the cookies.
6. Bake the cookies, one sheet at a time, until the edges are set and beginning to brown but the centers are still soft and puffy, 15 to 20 minutes, rotating the sheet halfway through baking. (If the cookies are underbaked, they will have a gummy texture.)
7. Let the cookies cool on the baking sheet for 10 minutes, then serve warm or transfer to a wire rack and let cool completely.

To Make Ahead
The bowl of cookie dough can be wrapped tightly with plastic wrap and refrigerated for up to 3 days; let soften at room temperature (I didn’t have to soften mine; It was scoopable out of the fridge.)
, then portion and bake as directed. The dough can also be portioned and shaped into balls on a baking sheet and frozen; when they are frozen solid, transfer them to a large zipper-lock bag. To bake, arrange the frozen cookies (do not thaw) on a parchment-lined baking sheet and bake as directed, increasing the baking time to 20 to 25 minutes.

PER COOKIE: Cal 120; Fat 3 g; Sat fat 2 g; Chol 15 mg; Carb 23 g; Protein 2 g; Fiber 0 g; Sodium 55 mg
Using our classic chocolate chip cookie recipe as a base, we created a great-tasting low-fat chocolate chip cookie. But there was a problem: Since most of the butter had been taken out, within an hour of coming out of the oven, our tender and chewy cookies turned into rocks. The solution? Homemade date puree, made by cooking and mashing dried dates. We replaced three-quarters of the butter in our favorite full-fat recipe with date puree. Then we pumped up the butter flavor by melting and browning the remaining butter. adding just enough richness to mask any hints of date flavor.”--THE AMERICA’S TEST KITCHEN FAMILY BAKING BOOK

Wednesday, April 15, 2009

Hot Cross Buns

Whoa! It's been a while, hasn't it? Excuse me while I blow the dust off my blog! Well, hello, I'm back! I was out of town for the Easter weekend, and then I took a few days to get myself back together (and to start a new blog!). And now I'm here, blogging for your enjoyment! Let me tell you about these hot cross buns... If you've never had them (or even heard of them) they are a traditional Easter treat. I'm not really sure why, but you can click here if you care to investigate. I had never made them before, but I wanted to start a new family tradition by making them for everyone on Easter morning. I didn't want to lug my million pound mixer on a 4 hour road trip. So I made the dough Thursday and froze it before the second proofing. I was extremely worried that the dough wouldn't survive the trip in the cooler. But it survived! Saturday night I took it out of the freezer and left it in the fridge to thaw overnight. Sunday morning, I sat it on the counter for an hour to finish proofing. When the buns were ready, I cut the X's, brushed them with egg wash, and threw them into the oven! 25 minutes later, things were smelling goooood! Instead of the plain powdered sugar glaze, I made a cream cheese glaze. They were so good! Everyone loved them... if you scroll down you'll see the proof! ;D I'm going to compare them to cinnamon rolls. They had that soft, chewy texture and a fabulous cinnamon-y, yeasty flavor. I'll definitely be making these more often than Easter!

Proofing on Sunday morning! Of course my family wouldn't settle a tiny 'X' of frosting...
I had to smother them! YUM!! How about some feedback...


WE LOVE THEM!!

HOT CROSS BUNS (from The America’s Test Kitchen Family Baking Book)
MAKES 12 buns
"These buns are traditional for Easter; however, they taste good all year round. To prevent the icing from being too thick, drizzle it over the buns while they are still warm."

BUNS
3/4 cup buttermilk, warm (110 degrees)
6 tablespoons (3/4 stick) unsalted butter, melted and cooled
3 large eggs
4 1/4 cups (21 1/4 ounces) all-purpose flour
1/4 cup (1 3/4 ounces) sugar
1 envelope (2 1/4 teaspoons) instant or rapid-rise yeast
1 1/4 teaspoons salt
1 teaspoon ground cinnamon
3/4 cup (3 3/4 ounces) currants or raisins
1 large egg
1 tablespoon water
GLAZE
3/4 cup (3 ounces) confectioners' sugar
1 tablespoon milk
1/2 teaspoon vanilla extract
2 ounces cream cheese, softened (my own addition)

1. FOR THE BUNS: Whisk the buttermilk, melted butter, and eggs together in a large liquid measuring cup. Combine 4 cups of the flour, sugar, yeast, salt, and cinnamon in a standing mixer fitted with the dough hook. With the mixer on low speed, add the buttermilk mixture and mix until the dough comes together, about 2 minutes.

2. Increase the mixer speed to medium and knead until the dough is smooth and elastic, about 10 minutes. If after 5 minutes, more flour is needed, add the remaining 1/4 cup flour, 1 tablespoon at a time, until the dough clears the side of the bowl but sticks to the bottom.

3. Turn the dough out onto a clean counter, add the currants, and knead by hand to form a smooth round ball with evenly distributed currants. Place the dough in a lightly oiled bowl and wrap tightly with plastic wrap. Let rise in a warm, draft-free place until doubled in size, 2 to 2 1/2 hours.

4. Grease a 13x9-inch baking pan. Turn the dough out onto a lightly floured counter; divide it into 12 even pieces (If you have a scale, now is a great time to use it!). Round the pieces of dough into small, taut rolls. Arrange the rolls in the prepared baking pan and wrap tightly with greased plastic wrap. Let rise in a warm place until the rolls have nearly doubled in size and are pressed against one another, 1 to 1 1/2 hours.

5. Adjust an oven rack to the middle position and heat the oven to 350 degrees. Using a sharp knife, cut an X through the top 1/4 inch of each bun. Whisk the egg and water together and brush over the buns. Bake until golden and puffed, 25 to 30 minutes.

6. FOR THE GLAZE: Let the rolls cool in the pan for 5 minutes. Whisk the confectioners' sugar, milk, and vanilla together then drizzle it in an X into the cut grooves of the buns. (I just spread the glaze over them like cinnamon rolls!) Serve warm or let cool completely.

To Make Ahead
In step 4, do not let the buns rise, but refrigerate them overnight or up to 16 hours. (I froze mine for 2 days and then left them in the fridge overnight to thaw.) Let the buns sit at room temperature until they have nearly doubled in size, about 1 hour, then bake as directed.

Sunday, March 22, 2009

The Best Buttermilk Biscuits

"The Best" according to America's Test Kitchen. Not the best according to me. I think it's the flavor of the buttermilk powder I don't like, but these biscuits were not my what I am looking for when it comes to the perfect biscuit. They weren't quite fluffy enough. And the baking time was WAY too long. I took them out 2 minutes early, and they were still too brown for my liking. I think I'd like them a little better if I baked them with the sides touching. They'd be a lot softer, and maybe even fluffier. The photo of the biscuits in he America's Test Kitchen Family Baking Book even looks like they baked their biscuits side-by-side, but the instructions say to space them apart. Hmm... I might try this again. But overall, I'm not pleased with the first recipe I chose to break in my brand new biscuit cutters! If you want to suggest your favorite biscuit recipe, I would gladly accept any and all advice! Thanks :D

The Best Buttermilk Biscuits (from The America's Test Kitchen Family Baking Book)
MAKES 12
(I got 9 when I halved it!)
“You can substitute 1¾ cups regular buttermilk or soured milk for the milk and powdered buttermilk; however, the biscuits will be less flavorful. Baking the biscuits upside down ensures a more even rise.”

3¾ cups (18¾ ounces) all-purpose flour
½ cup powdered buttermilk
2 tablespoons sugar
4 teaspoons baking powder
1½ teaspoons salt
1 teaspoon baking soda
12 tablespoons (1½ sticks) unsalted butter, cut into ½-inch pieces and chilled
4 tablespoons vegetable shortening, chilled and cut into ½-inch pieces
1¼ cups whole milk

1.Adjust an oven rack to the middle position and heat the oven to 450 degrees. Line a baking sheet with parchment paper.
2.Pulse the flour, buttermilk powder, sugar, baking powder, salt, and baking soda together in a food processor to combine, about 3 pulses.Scatter the butter and shortening evenly over the top, and continue to pulse until the mixture resembles coarse meal, about 15 pulses.
3.Transfer the flour mixture to a large bowl. Stir in the milk with a rubber spatula until the dough comes together. Turn the dough out ontoa well-floured surface. Lightly flour your hands and the dough, and knead the dough gently until uniform, about 30 seconds. Roll the dough intoa 10-inch round, about 1 inch thick.
4.Using a floured 2½-inch biscuit cutter, stamp out 12 biscuits, gently patting the dough scraps back into a uniform, 1-inch-thick piece as needed.Arrange the biscuits upside down on the prepared baking sheet, spaced about 1½ inches apart.
5.Bake for 5 minutes. Rotate the pan, reduce the oven temperature to 400 degrees, and continue to bake until golden brown, 12 to 15 minutes (Mine were done at 10). Transfer to a wire rack, let cool for 5 minutes, and serve warm.

To Make Ahead
The cut, unbaked biscuits can be covered and refrigerated for up to 24 hours; bake as directed. (They do not freeze well.)
“After lots of testing and tasting, we concluded that the best buttermilk biscuits are made with buttermilk powder. Not only does the buttermilk powder produce biscuits with a slightly finer, fluffier texture, but we can add as much of the powder as we want to the dough for maximum buttermilk tang with no textural side effects. When using liquid buttermilk, on the other hand, you can only add as much as the dough can handle; using too much liquid will turn the dough into a batter.” -THE AMERICA’S TEST KITCHEN FAMILY BAKING BOOK

Tuesday, March 10, 2009

Low-Fat Blueberry Muffins

UPDATE: I noticed a lot of you commented and said you're going to bookmark this recipe until blueberries are in season. America's Test Kitchen actually recommends frozen wild blueberries. Wild blueberries are packed with flavor, and they are teeny tiny which makes them perfect for muffins. Also, they're frozen at the peak of freshness, so they're a fabulous substitute for fresh berries! It would be torture to wait for berry season!

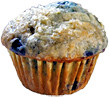
Last weekend I was craving something other than my usual granola parfait for breakfast. I've been extremely lax on watching what I eat lately, so I wanted to make something a little on the lighter side. I looked in the Light Baking section of one of my favorite books, The America's Test Kitchen Family Baking Book, and found a recipe for blueberry muffins. What a great recipe! The muffins are chockful of blueberries. They're so moist and light. You'd never guess they are low-fat! I especially love them because they aren't so sweet that you think you're eating cake. They were sooo good when they were warm from the oven, and the next day they tasted like a whole other muffin. I love a recipe that does that! This is going to be my go-to recipe for blueberry muffins from now on. How many low-fat recipes are good enough to be go-to's?? Bravo, America's Test Kitchen! You definitely deserve a pat on the back for this one!
They're so pretty...
Mmmmm, can it get any better???
LIGHT BLUEBERRY MUFFINS (from The America’s Test Kitchen Family Baking Book)
MAKES 12 (I got 8 when I halved the recipe)

Vegetable oil spray
2 cups (10 oz) plus 1 tablespoon all-purpose flour
1 cup (4 oz) cake flour
1 cup (7 oz) sugar, plus 1 tablespoon for sprinkling
(I used coarse sugar for sprinkling)
1 tablespoon baking powder
1/2 teaspoon baking soda
1/2 teaspoon salt
4 tablespoons (1/2 stick) unsalted butter, softened
2 large eggs
2 teaspoons fresh lemon Juice
1 teaspoon grated fresh lemon zest
1 teaspoon vanilla extract
1 1/2 cups plain low-fat yogurt (Use low-fat yogurt here; nonfat yogurt will make dry, tasteless muffins)
2 cups fresh or frozen blueberries (ATK prefers frozen wild blueberries)

1. Adjust an oven rack to the middle position and heat the oven to 375 degrees. Spray a 12-cup muffin tin with vegetable oil spray.

2. Whisk 2 cups of the all-purpose flour, cake flour, 1/4 cup of the sugar, baking powder, baking soda, and salt together in a medium bowl. In a large bowl, beat 3/4 cup more sugar and butter together with an electric mixer on medium speed until light and fluffy, 3 to 6 minutes. Beat in the eggs, one at a time, until combined, about 30 seconds. Beat in the lemon juice, lemon zest, and vanilla until incorporated, scraping down the bowl and beaters as needed.

3. Reduce the mixer speed to low. Beat in one-third of the flour mixture and half of the yogurt. Repeat with half of the remaining flour mixture and the remaining yogurt. Beat in the remaining flour mixture until just incorporated. Do not overmix.

4. Toss the blueberries with the remaining tablespoon of all-purpose flour, then gently fold them into the batter with a rubber spatula. Using a 1/3-cup measuring cup sprayed with vegetable oil spray, portion the batter into each muffin cup, then portion any remaining batter evenly among the cups using a small spoon (My cups were almost completely full). Sprinkle the tops with the remaining tablespoon sugar. Bake until golden and a toothpick inserted in the center of a muffin comes out with just a few crumbs attached, 25 to 30 minutes, rotating the pan halfway through baking.

5. Let the muffins cool in the pan for 5 minutes, then flip out onto a wire rack and let cool for 10 minutes before serving.

(I halved the recipe expecting to get 6, but I got 8. Therefore, the nutrition facts are a little higher than what my muffins would actually be.)
PER MUFFIN: Cal 250; Fat 5 g; Sat fat 3 g; Chol 45 mg; Carb 45 g; Protein 6 g; Fiber 1 g; Sodium 270 mg

"We wanted to drastically reduce the amount of butter in our muffins down to just 3 or 4 tablespoons-but we didn't want them to be dry and dense. The solution turned out to be twofold. First, we creamed a portion of the sugar with the butter, which made the muffins light and airy. Second, we substituted cake flour for some of the all-purpose flour to give the muffins a fine-textured, delicate crumb." -THE AMERICA’S TEST KITCHEN FAMILY BAKING BOOK