Flour Child Bakery opens in Virginia Beach!

My mom and I just opened a bakery in Virginia Beach!! "Like" us to stay updated! If you care to read our blog, it's flourchildbakery.blogspot.com.


Showing posts with label bread. Show all posts

Wednesday, July 14, 2010

Cinnamon-Swirl Bread

There's not much of a story behind this post. But just for fun, let's see how much I can say about it. I woke up one morning this week and decided I had to have cinnamon-swirl bread. I parked my butt on the carpet in front of the bookcase and started browsing the index of all 5 million of my baking books. After about 11 books, I finally found a recipe for cinnamon raisin bread in Joy of Cooking. The basis of the recipe was their milk bread, which I use for hamburger buns, so I already knew it was good. I made the recipe sans raisins because I have to be in the mood for raisins.

The end result was this incredible-smelling, light as a feather, beautiful loaf of cinnamon-swirl bread. It was exactly what I was craving. My mom can't ever stand to wait the proper time for bread to cool. She forces me to ruin my breads all the time by slicing into them while they're hot. But this time, I was so glad she did! This is the loaf of my dreams! Slightly sweetened, cinnamon-y, with a nice crust. Ohhhh I LOVE IT! :D :DCinnamon Raisin Bread (from Joy of Cooking)
Yields 1 loaf

Ingredients
1 package (2 1/4 teaspoons) active dry yeast
3 tablespoons of warm (105º to 115ºF) water
1 cup whole or low-fat milk, warmed to 105º to 115ºF (I used skim)
5 tablespoons of melted unsalted butter
3 tablespoons of sugar
1 large egg
1 teaspoon of salt
3 1/2 - 4 cups all-purpose flour or bread flour

Filling
1/2 cup raisins
2 tablespoons granulated sugar
2 teaspoons cinnamon

Finishing
1 egg
Pinch of salt

Mix yeast and water together in a large bowl or bowl of heavy-duty mixer and let stand for five minutes until yeast dissolves.
Add the remaining ingredients except for the flour and mix for 1 minute on low speed. Gradually add 3 1/2 cups of flour. If needed, slowly add remaining 1/2 cup flour, 2 tablespoons at a time, until the dough is moist, not sticky. Dough should clear the sides of the bowl but stick to the bottom. Knead for about 10 minutes on low to medium speed until the dough is smooth and elastic.
Transfer the dough to an oiled bowl and turn it over once to coat. Loosely cover with plastic wrap and let rise for 1 1/2 to 2 hours or until doubled in volume.
While the dough is rising place raisins in a small saucepan with enough cold water to cover by 1/2 inch and bring to a boil. Drain well and let cool. Stir together sugar and cinnamon.
Grease an 8 1/2”x4 1/2” loaf pan. Punch dough down. Roll the dough into an 8”x18” rectangle about 1/2” thick. Brush the surface of the dough with 1 1/2 teaspoons of melted butter. Sprinkle all but 2 teaspoons of the cinnamon mixture over the dough and spread the raisins evenly over the surface. Starting from one 8” side, roll up the dough and pinch the seam and ends closed. Place seam side down in the pan. Cover loosely with oiled plastic wrap and let rise until doubled in volume, 1 to 1 1/2 hours.
Preheat the oven to 375ºF. Whisk egg and salt together and gently brush over the top of the loaf. Sprinkle the top of the dough with the remaining cinnamon mixture. Bake until crust is deep golden brown and the bottom of the sounds hollow when tapped, 40 to 45 minutes (or until the internal temperature reaches 195ºF or above). Remove loaf from the pan onto a cooling rack. While the bread is still hot, brush the top with: 2 teaspoons of melted butter. Let cool completely before slicing.

Thursday, March 18, 2010

Challah v2.0

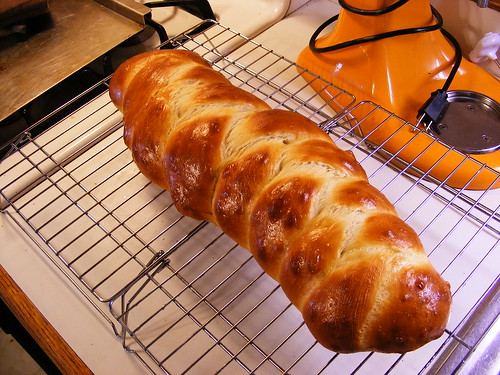
This is my second attempt at challah. The recipe is from The Art and Soul of Baking by Cindy Mushet. I think I like it a little more than the first recipe I used, which was from Martha's Baking Handbook. I have to admit that my first braid was prettier (it was tougher to braid because the dough had more flour, but the finished braid was more defined). No worries, this challah is absolutely delish! The soft dough was a breeze to braid and squish the ends together. And I like that this one has far less egg yolks than the Martha recipe (her's tasted too eggy, IMHO). The flavor of this braid is just right as toast with jam, and of course it makes the best French toast (my favorite food EVER), but it also makes a bangin' hot ham and cheese sandwich! I plan on snacking on the bread while it's fresh, and then cubing and freezing the leftovers to save for bread pudding whenever I get a day off from work.

BTW, I need to get something out of my system...
I LOVE BREAD PUDDING!!
And just an FYI, the Limoncello bread pudding at Carrabba's is freakin' awesome! If you know any other bread pudding I should try, please let me know. :D Until then, enjoy these photos and bookmark the recipe (or buy the book, it's amazing)!
Challah (from “The Art and Soul of Baking” by Cindy Mushet)
Makes 1 loaf

3/4 cup (6 ounces) warm water (110° to 115°F)
2 tablespoons (1 1/2 ounces) honey
1 1/2 teaspoons active dry yeast, or 1 1/8 teaspoons instant yeast
2 large eggs, at room temperature
3 tablespoons (1 1/2 ounces) neutral oil, such as canola or safflower
2 1/2 cups (12 1/2 ounces) bread flour or unbleached all-purpose flour, plus more if needed
3/4 teaspoon salt
1 large egg, lightly beaten
2 teaspoons poppy seeds (optional)

Combine the warm water and honey in the bowl of the stand mixer and sprinkle the yeast over the top. Whisk by hand to blend well. Let the mixture sit for 5 to 10 minutes, until the yeast is activated and foamy or bubbling. Add the eggs and oil and whisk by hand until well blended. Stir in the flour and salt. Attach the dough hook and knead on low speed for 2 minutes, scraping down the bowl as necessary, until the dough begins to come together. Turn the speed to medium and knead for 6 to 8 minutes, until the dough is smooth, silky, and elastic. You may need to add a little extra flour, a tablespoon at a time, toward the end. The dough should begin to pull away from the sides of the bowl but still be slightly tacky.

Lightly oil the tub or bowl, scrape the dough into the tub, and brush the surface of the dough with a little oil. Cover with plastic wrap or a damp lint-free cotton towel and let the dough rise until doubled in size, 45 to 60 minutes. If you are using a tub, be sure to mark the starting level of the dough with a pencil or piece of tape so it's easy to tell when the dough has doubled.

Turn the dough out onto a lightly floured work surface. Press down on the dough firmly to expel some of the air bubbles, but don't knead the dough again or it will be too springy and difficult to shape (if this happens, simply cover the dough with plastic wrap or a lint-free cotton towel and let it rest for 10 to 15 minutes to give the gluten some time to relax). Divide the dough into 3 equal pieces (about 8 1/2 ounces each). Work with one piece at a time and keep the others covered to prevent a skin from forming. Using flattened hands, roll each piece back and forth, forming a rope about 15 inches long with tapered ends. You may not be able to stretch each piece to the full length the first time; if that's the case, cover it and continue with another piece. Return to the first piece when you've finished the others and try stretching it a little more.

Line a large baking sheet with parchment paper or a silicone mat and lay the 3 ropes on the sheet with the ends facing you. Pinch together the three ends furthest you. Braid the dough, pinching the loose ends together at the bottom. Gently stretch ends outward so the center is plump while the ends are tapered. Tuck the ends under slightly.
Cover the braid loosely with plastic wrap or a damp lint-free cotton towel. Allow the braid to rise until it is almost double in size and looks like it has taken a deep breath, 40 to 50 minutes.

Preheat the oven to 375°F and position an oven rack in the center. Gently brush the entire surface of the braid with a light wash of beaten egg. (You will not use all the egg.) Take care that there are no pools or drips of glaze. Sprinkle with the poppy seeds, if you like. Bake for 20 to 25 minutes, until the top and bottom are golden brown and the internal temperature registers 190°F on an instant-read thermometer. Transfer to a rack to cool completely. To serve, slice with a serrated knife.

Challah is at its best the same day it is baked. But, you can store the bread, wrapped in plastic, at room temperature for 2 days. For longer storage, double-wrap in plastic and freeze in a resealable plastic freezer bag for up to 1 month. Thaw on the counter for 1 1/2 to 2 hours, until it reaches room temperature. Reheat in a 375°F oven for 10 to 15 minutes, until the bread is warmed through.

DAIRY CHALLAH: (This is the recipe I used!) This version of challah is more tender than the pareve challah above, because it contains milk and butter. Replace the water with the same amount of milk and the oil with the same amount of very soft butter.

Monday, February 15, 2010

King Cake for Mardi Gras

I'm not much into Mardi Gras, mostly because I don't know a lot about it. Also because I live in Virginia, and it's just far enough away from New Orleans that we don't hear any of the noise from the all-night street parties. The only thing I know about Mardi Gras is that the celebration includes a pastry known as King Cake. Here's a tidbit from Wikipedia for you:
A king cake is a type of cake associated with the festival of Epiphany in the Christmas season in a number of countries, and in other places with Mardi Gras and Carnival. In the United States, which celebrates Carnival ranging from Pensacola, Florida to East Texas, centered on New Orleans it is associated instead with Mardi Gras season traditions. The cakes have a small trinket (often a small plastic baby, sometimes said to represent Baby Jesus) inside, and the person who gets the piece of cake with the trinket has various privileges and obligations (such as buying [or making] the cake for the next celebration).
A cake with a plastic baby inside!! How could you not be into that?? I omitted the baby because I know it's gonna always be me making the king cake, and that's okay by me! ;D

Another successful checkmark on my Top 100 list! If you've never had King Cake before, it tastes very similar to a cinnamon roll. It's chewy and sweet and sugary and delicious! It's a tiny bit time consuming and requires some effort, but I would absolutely make this again next Mardi Gras!
Making the dough, proofing, and rolling it out...

I used two types of cinnamon in my filling!

Braids... proofed, baked, and iced!

Ain't she a beauty!?

My first taste of King Cake! Happy Mardi Gras! ;)

King Cake (from "Recipe Hall of Fame Dessert Cookbook")
Makes 2 large pastries

Dough
1 stick plus 1 tablespoon unsalted butter
2/3 cup fat-free evaporated milk (I used regular evap. milk)
1/3 cup plus 2 tablespoons sugar
2 teaspoons salt
2 packages active dry yeast
1/3 cup warm water
4 eggs
1 tablespoon grated lemon rind (I used only 1 teaspoon)
2 tablespoons grated orange rind (I used only 1 tablespoon)
5 cups plus 1 cup all-purpose flour

In a saucepan, melt 1 stick butter, milk, 1/3 cup sugar, and salt. Cool to lukewarm. In a large mixing bowl, combine 2 tablespoons sugar, yeast, and water. Let stand until foaming, about 5-10 minutes. Beat eggs into yeast; then add milk mixture and rinds. Stir in flour, 1/2 cup at a time, reserving 1 cup of flour for kneading surface. Knead dough until smooth, about 5-10 minutes. (I put mine in a stand mixer with the dough hook on medium-low speed for about 6 minutes.) Place in large mixing bowl greased with 1 tablespoon butter, turning dough once to grease top; cover and let rise in a warm place until doubled, about 1 1/2 - 2 hours.

Filling
1 stick butter, melted
3/4 cup granulated sugar
1/2 cup dark brown sugar, packed
1 tablespoon cinnamon

Mix sugars and cinnamon; set aside.
When dough has doubled, punch down and divide in half. On a floured surface, roll half into a rectangle 30 x 15. (I couldn't get mine quite this big, but I got within a few inches.) Brush with half of the melted butter and cut into 3 lengthwise strips. Sprinkle half of the sugar mixture on strips, leaving a 1-inch lengthwise strip free for sealing. Fold each strip lengthwise toward the center, sealing the seam. You will now have three 30-inch strips with sugar mixture enclosed in each. Braid the 3 strips and make a circle by joining ends. (It's a bit tricky to braid the ends together, but just start tucking and eventually you'll get it.) Repeat with other half of dough. Place each cake on a 10 x 15-inch baking sheet, cover with a damp cloth, and let rise until doubled, about 1 hour. (I covered mine with plastic wrap sprayed with nonstick spray.)

Garnish
1 cup sugar, colored (1/3 cup each of yellow, purple, and green)
1 egg, beaten
2 (3/4-inch) plastic babies or 2 beans (I was going to use an almond, but I forgot them!)

Tint sugar by mixing food coloring until desired color is reached. For purple, use equal amounts of blue and red. A food processor aids in mixing, and keeps the sugar from being too moist.

Brush each cake with beaten egg and sprinkle with colored sugars, alternating colors. (I used the egg wash, but I did not sprinkle my cakes with sugar before baking. Instead I mixed 2 cups confectioners' sugar with a bit of orange juice until I got a thick glaze. Warm that in the microwave until it is pourable and slightly warm, about 15-20 seconds. Slowly pour the glaze over the cooled cakes. Let it set for about 1 minute, then sprinkle with colored sugars.) Preheat oven to 350°. Bake 20 minutes. Remove from pan immediately so sugar will not harden; while still warm, place 1 plastic baby in each from underneath. Makes two 9x 12-inch cakes. Freezes well.

To freeze: Wrap cooled cake tightly in plastic. Before serving, remove plastic and thaw.

Recipe was sent in from Jambalaya (Louisiana)

Monday, January 25, 2010

Rustic Italian Bread

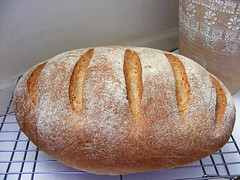
Sorry for the MAJOR delay between posts. I'm full of excuses, but my most current is Cafe World on Facebook! It takes up ALL my time! I made this bread about two weeks ago, and it was so good that I want to post it right away. But I had hungry customers to feed in my virtual cafe, and I can't let my buzz rating slip below 100! ;) Anyway, I'm posting it now, and I must say it's totally delicious! I'll put it this way, it's yummy enough to eat WITHOUT any butter smeared on top! The crust is extra crunchy, and the interior is so moist and chewy. I used the "same-day" variation of the recipe, and the flavor was incredible. I can't even imagine how good it would taste if I took the extra time to make the sponge a day ahead! This recipe makes a loaf large enough to feed 8-10 people alongside a nice spaghetti dinner. The four of us polished off half of it, and I took care of the rest as French toast over the next few mornings. Breakfast has never been better!! (Well, except for the amazing muesli my mom picked up for me at Grandma's Pantry while she was in Harrisonburg!) :D
Rustic Italian Bread (from "The America's Test Kitchen Family Baking Book")
This recipe requires a bit of patience—the sponge, which gives the bread flavor, must be made 11 to 27 hours before the dough is made. We find it makes the most sense to prepare the sponge (which requires just 5 minutes of hands-on work) the day before you want to bake the bread.

On the second day, remove the sponge from the refrigerator and begin step 2 at least 7 hours before you want to serve the bread. If you own two standing mixer bowls, in step 1 you can refrigerate the sponge in the bowl in which it was made. Use the second bowl to make the dough in step 2. Have ready a spray bottle filled with water for misting the loaves.
Variation: SAME-DAY RUSTIC ITALIAN BREAD
If you don't have time for a sponge, this loaf can be made the same day, but the flavor won't be as complex, and the crumb will be finer and more uniform (like sandwich bread).
Omit the sponge. When assembling the dough in step 2, increase the amount of bread flour to 5 cups, increase the water to 2 1/4 cups, and increase the yeast to 1 envelope (2 1/4 teaspoons).

Sponge
2 cups (11 ounces) bread flour
1 cup warm water (110 degrees)
1/4 teaspoon instant or rapid-rise yeast


Dough
3-3 1/2 cups (16 1/2 to 19 1/4 ounces) bread flour
1 teaspoon instant or rapid-rise yeast
1 1/4 cups warm water (110 degrees)
2 teaspoons salt

1. For the sponge: Stir all of the ingredients together in a medium bowl until combined. Cover with plastic wrap and let sit at room temperature until the sponge has risen and fallen, at least 6 hours or up to 24 hours.

2. For the dough: Combine 3 cups of the flour and the yeast in a standing mixer fitted with the dough hook. With the mixer on low speed add the water and mix until the dough comes together, about 2 minutes. Stop the mixer, cover the bowl with plastic wrap, and let sit at room temperature for 20 minutes.

3. Remove the plastic wrap, add the sponge and salt, and knead the dough on medium-low speed until it is smooth and elastic, about 8 minutes. If after 4 minutes more flour is needed, add the remaining 1/2 cup of flour, 2 tablespoons at a time, until the dough clears the sides of the bowl but sticks to the bottom.

4. Turn the dough out onto a lightly floured counter, and knead by hand to form a smooth round ball. Place the dough in a large, lightly oiled bowl and cover tightly with greased plastic wrap. Let the dough rise in a warm place until doubled in size, about 1 hour.

5. Turn the dough in the bowl with a dough scraper or large rubber spatula. Gently lift and fold a third of the dough toward the center. Repeat with the opposite side of the dough. Finally, fold the dough in half, perpendicular to the first folds. The dough shape should be a rough square. Cover, let rise for 30 more minutes, then repeat the turning process. Cover and let rise until the dough has doubled in size, about 30 minutes longer.

6. Top a rimless (or inverted) baking sheet with parchment paper. Turn dough out onto a lightly floured counter, press it into a 10-inch square without tearing it, and gently dimple it with your fingertips. Fold the top corners diagonally to the middle. Using your fingertips and starting at the top of the dough, pull the underside of the dough up over the top, stretching it considerably, and begin to roll the dough up into a rough log. With each roll, press the seam firmly to seal. Continue to do this, forming the dough into a taut log, 5 to 7 more times. Transfer to the prepared baking sheet, seam side down, and gently tuck the ends into a taut loaf. Mist the loaf with vegetable oil spray, cover loosely with plastic wrap, and let rise in a warm place until nearly doubled in size and the dough barely springs back when poked with a knuckle, 1 to 1 1/2 hours.

7. Meanwhile, adjust an oven rack to the lower-middle position, place a baking stone on the rack, and heat the oven to 500 degrees. Let the baking stone heat for at least 30 minutes (but no longer than 1 hour).

8. (I dusted mine lightly with flour before I slashed it.) Cut three 1/2-inch deep diagonal slashes across the top of the dough and spray the loaf lightly with water. Carefully slide the loaf and parchment onto the hot baking stone. Bake the bread for 10 minutes.

9. Rotate the bread, reduce the oven temperature to 400 degrees, and continue to bake until the center of the loaf registers 210 degrees on an instant-read thermometer and the crust is deep golden brown, 30 to 35 minutes. (I think mine only took somewhere between 25-30 minutes to finish baking, so keep an eye on it.)

10. Transfer the loaf to a wire rack, discard the parchment, and let cool to room temperature, about 2 hours, before serving.

Friday, November 13, 2009

Italian Bread

Originally I wasn't planning on blogging about this recipe. My dad asked me to make some bread last minute for spaghetti dinner. Since we were rained in all day... oh yeah, I live in the Hampton Roads area of VA. If you haven't heard, WE'RE FREAKIN UNDER WATER thanks to the "November Nor'easter"! Google it to see if you can find the video of the guy rowing himself with a broom in a pool float to get to a 7-11! Anyway, back to the bread. It was very last minute, but it came out gorgeous so I twittered about it (tweeted about it? hmm...) Lots of you asked for the recipe, so here it is! It's super simple, and if you apply some basic baguette forming techniques you'll get a pretty fancy looking loaf! ;D


Italian Bread (adapted from The Taste of Home Baking Book)
1 package active dry yeast
1 1/2 cups warm water (110 degrees F), divided
1 1/2 tablespoons sugar
1 1/2 tablespoons shortening
1 1/2 teaspoons salt
1 egg
4-4 1/2 cups all-purpose flour

In a large mixing bowl, dissolve yeast in 1/4 cup warm water. Add the sugar, shortening, salt, egg, remaining water, and 2 cups of flour; beat until smooth. Stir in enough remaining flour to form a soft dough. Turn the speed to medium and knead for 8 minutes, or until smooth and elastic. Place in a greased bowl, turning once to grease top. Cover and let rise in a warm place until doubled, about 1 hour.

Punch dough down. Turn out onto a lightly floured surface. Flatten into a rough rectangle. Fold in half long ways and pinch the seem. Fold in half long ways again, and pinch the seem. Turn the dough seem side down and lightly roll from the center to the ends to double the length of the loaf. Place seam side down on a parchment lined baking sheet. Cover loosely with a dry towl and let rise until doubled.

Slash the loaf four or five times diagonally with a sharp knife. Bake at 350 degrees F for 30-35 minutes or until golden brown. Remove from pan and place on a wire rack to cool completely before slicing.

Tuesday, October 13, 2009

Pumpkin Yeast Bread

First, I was on a pie kick... now it's a pumpkin kick. At least I can't say I'm not celebrating my favorite season this year! I love Autumn because of the changing leaves, the cooler air, and the fantastic recipes I get to make with apples and pumpkins! After the Pumpkin Chiffon Pie, I've been really interested in making unusual pumpkin recipes (ie, NOT the traditional pie or pumpkin bread recipes). Most pumpkin bread recipes are quick breads. They're usually pretty spicy and chock full of chocolate chips or some type of nuts. I wanted to go the non-traditional route by making a slightly spicy pumpkin yeast bread. I googled for a recipe (which always makes me feel like I'm cheating on my massive cookbook library), and I settled on a recipe from kingarthurflour.com. The only thing I changed were the spices because I wanted to use my favorite cinnamon and a few other pumpkin pie spices. The end result was a delightfully soft, golden orange bread with a slight whiff of spice. I know you're not supposed to slice warm bread because it damages the interior texture of the bread, and usually I can restrain myself, but this time I COULD NOT RESIST!! The pumpkin flavor was faint, but it was definitely there. The crust was so delicious, and the bread was so soft and moist.


It also makes fantastic toast. I topped mine with spiced pear butter from the Shenandoah Heritage Farmers Market. Mmmm... perfect!
PS: To everyone who was offended by me considering a 1985 recipe to be vintage in my last post, it's vintage to me because it was written before I was born. I classify anything from before 1986 as being vintage, regardless of Webster's definition of the word "vintage." My apologies for making anyone feel old! =/

Pumpkin Yeast Bread (adapted from KingArthurFlour.com)
(I halved this recipe and made 1 9x5-inch loaf)

1/2 cup warm water
2 packages (2 tablespoons) active dry yeast (actually the packages are 2 1/4 teaspoons, so you would only need to measure 1 1/2 tablespoons)
2/3 cup warm milk
2 large eggs, beaten
1 1/2 cups puréed pumpkin, either fresh or canned
2 tablespoons vegetable oil
6 1/2 cups (approximately) King Arthur Unbleached All-Purpose Flour
1/2 cup brown sugar
2 teaspoons salt
1/2 teaspoon ground ginger (I used 1/2 teaspoon cinnamon, 1/4 teaspoon each ginger and nutmeg, and 1/8 teaspoon ground cloves)
1/2 teaspoon ground cardamom (I omitted this)

In a large bowl, stir yeast into water to soften. Add milk, eggs, pumpkin, oil, 4 cups flour, brown sugar, salt, ginger and cardamom to yeast mixture. Beat vigorously for 2 minutes.

Gradually add remaining flour, a little at a time, until you have a dough stiff enough to knead. Turn dough out onto a floured surface. Knead, adding flour as necessary, until you have a smooth, elastic dough.

Put dough into an oiled bowl. Turn once to coat entire ball of dough with oil. Cover with a towel and let rise until doubled, about 1 hour.

Turn dough out onto a lightly oiled work surface. Divide dough in half. Shape dough into loaves and place in well-greased 10x5-inch pans or, shape half into a loaf, and other half into 12 large dinner rolls. Cover with a towel and let rise until almost doubled, about 45 minutes.

Bake in a preheated 375°F oven. Loaves bake about 30 minutes (my 9x5 loaf was done at 25 minutes), rolls about 20. Check the internal temperature of each with an instant-read thermometer; a reading of 190°F means bread or rolls are done.

Immediately remove bread or rolls from pans and cool on a wire rack to prevent crust from becoming soggy. For a shiny crust, brush tops of bread or rolls lightly with vegetable oil. Makes 2 large loaves, or 1 large loaf and 12 dinner rolls.

Tuesday, September 22, 2009

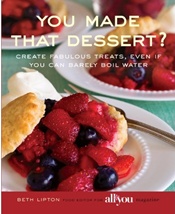
Book Review: "You Made That Dessert?" by Beth Lipton

Recently, I was asked by one of my favorite bloggers, Beth of CookiePie, if I would review her brand new cookbook called "You Made That Dessert?" I was completely flattered that she thought of me, and I was totally awestruck that she got her very own cookbook published. How cool is she??? Lol! She sent me a copy, and I am in love with it! The pictures are fantastic. There is a wide variety of dessert recipes. I love the little stories that go with each one. The two recipes I've tried so far were completely delicious! I made the Gingersnaps (pg. 7) and the Peanut Butter and Banana Bread (pg. 80). The gingersnaps were robust and spicy, crispy around the edges with a great chewy texture. I took some to work and everyone loved them! The peanut butter and banana bread is a genius recipe! It takes a classic flavor combination and makes it new! I made it into muffins instead of a loaf, and they were perfect! Moist and dense, not too sweet, they would make a great breakfast or afternoon snack. I recommend this book to any baker, not because I love Beth and her blog, but because it really is a fantastic cookbook!

You can find it on Amazon.com and BarnesandNoble.com

Gingersnaps
Makes 3 dozen cookies

2 cups (8.5 ounces) all-purpose flour
2 teaspoons baking soda
1/2 teaspoon salt
1 tablespoon plus 2 teaspoons ground ginger
1 1/2 teaspoons cinnamon
1/4 teaspoon ground cloves
1/4 teaspoon black pepper
12 tablespoons (1 1/2 sticks) unsalted butter, at room temperature
1 1/2 cups (10.5 ounces) sugar
1 large egg, at room temperature
1/4 cup molasses
1/2 teaspoon vanilla extract

Preheat the oven to 350°F. Line three rimmed baking sheets with parchment paper. In a small bowl, mix the flour, baking soda, salt, ginger, cinnamon, cloves, and pepper, and stir with a fork to combine.

In a large bowl, using an electric mixer at medium speed, beat together the butter and 1 cup sugar until light and fluffy, about 2 minutes. Stop the mixer and add the egg, molasses, and vanilla, then beat until combined. Stop the mixer and scrape down the sides and bottom of the bowl with a flexible spatula. Beat again until the mixture is uniform. (The mixture may look curdled and separated at first, but don't worry; as you beat it, it will come together and turn a pale brown.)

Stop the mixer and add the flour mixture. Use a flexible spatula or wooden spoon to mix the dry ingredients into the butter mixture until a dough forms. Scrape down the sides and bottom of the bowl and stir well so that all of the dry ingredients are fully incorporated.

Place the remaining 1/2 cup sugar in a small bowl. Use a small ice cream scoop or two teaspoons to scoop out pieces of dough and roll them, one at a time, in your palms to form balls that are about 1 1/2 inches wide. One at a time, roll the balls in the sugar until they're coated, then place the dough balls 2 inches apart on the baking sheets (don't crowd them-they will spread a lot). Use the bottom of a glass to lightly press the balls into discs.

Bake the cookies for 10 to 11 minutes, until lightly browned. Let them cool on the pans on wire racks for 5 minutes, then use a spatula to remove the gingersnaps and place them directly on the wire racks to cool completely.


Peanut Butter & Banana Bread
Makes 1 9-inch loaf

1 1/4 cups (5.35 ounces) all-purpose flour
1 teaspoon baking soda
1/2 teaspoon salt
1/2 cup creamy peanut butter (do not use "natural")
2/3 cup sugar
3 large ripe bananas, mashed with a fork
2 large eggs, at room temperature, lightly beaten
1/2 cup chopped walnuts or chopped pecans (optional)
1/2 cup miniature chocolate chips (optional)

Preheat the oven to 350°F. Mist a 5 x 9-inch loaf pan with cooking spray.

In a small bowl, mix the flour, baking soda, and salt with a fork. In a large bowl, using an electric mixer on medium-low speed, beat the peanut butter and sugar together until well blended, about 2 minutes. Beat in the mashed banana and eggs; mix well.

Using a wooden spoon or flexible spatula, stir the flour mixture into the peanut butter-banana mixture, mixing until just combined, scraping down the sides of the bowl with a flexible spatula if needed. Stir in the chopped nuts and/or chocolate chips, if using.

Pour the batter into the pan and gently smooth the top with the flexible spatula. Bake 45 minutes. Cover the pan loosely with foil and bake 10 to 15 minutes longer, until a toothpick inserted in the center comes out clean. Let the bread cool on a wire rack for 10 minutes in the pan.

Remove the bread by running a paring knife around the inside of the pan to loosen it, then inverting the pan to release the bread : onto a wire rack. Carefully turn the bread right-side up and cool completely. Slice and serve. Wrap any leftovers tightly in plastic wrap and foil; keep at room temperature for up to 3 days, or freeze for up to 1 month.


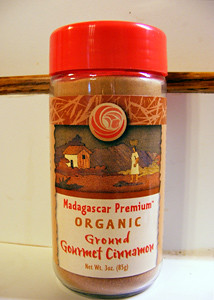
I guess I'll go ahead and use this entry to tell you about this awesome cinnamon I found at TJ Maxx last week! It's made out of totally different stuff than most cinnamon sold in the United States. If you watch "Good Eats" religiously like I do, you've heard Alton Brown talk about the difference between cheap cinnamon (Cassia) and REAL cinnamon (Cinnamomum Zeylanicum). This is the REAL STUFF and it was only $4.99! It smells so much better than cheap cinnamon. It was really yummy in the gingersnaps, and I bet it's gonna make INSANE cinnamon rolls! I'm definitely gonna go back and get a few more.

Wednesday, June 24, 2009

Pain Pesto (Pesto Swirl Bread)

UPDATE: I'm happy to say that it's only day 2, and the whole loaf is almost gone. Embarrassingly, I'm responsible for about half of it! ;D

I've been in the mood to bake bread this week. I set out to choose a bread recipe to use the 6 egg yolks I have in the fridge, but when I found this recipe for pesto bread in A Passion for Baking by Marcy Goldman, I could practically hear my basil plant screaming "yeeaahh pick that one!!" How can I say no to talking botanicals?? The recipes calls for a jar of prepared pesto, and I'm sure Buitoni would've done a fine job. But, HELLO!?!? It's summer! Pretty much the only thing I get excited about in the summer is Stephanie coming to visit and making my own pesto! I found the pesto recipe in the newest addition to my bookshelf, Eating the Greek Way by Fedon Alexander Lindberg, M.D. (got it for a whopping $3.99 at Ross). I couldn't stop eating the pesto by itself, but I knew I had to save at least 1/2 cup of it for the bread. Speaking of the bread...

Ohhh bread... what did I do wrong? I felt I was being so gentle and kind to you. I patiently waited for you to rise. I handled you tenderly when I rolled you out. I bathed you in glorious pesto. I tucked you into a nice warm oven. And you came out looking like the puniest swirl bread I've ever seen. Were you not fond of me halving your recipe? Did I roll you too thinly? Did I squeeze you too tightly? Did I possibly over-proof you? Will I ever know? Don't worry though, bread, because your puny layers were still delicious. We will meet again soon, and hopefully you won't be so deformed next time. Until then, I wish you a safe journey as you travel down the esophagi of my family and friends. Tata for now!

What? You say I was talking to the bread? Nooo! I'd never do that. I'm not a lunatic who talks to various inanimate objects such as televions, stoplights, and food! *subject change* Here's the recipe... ;)

Pain Pesto (from A Passion for Baking by Marcy Goldman)
Makes 1 large loaf

1 1/4 cups warm water (100 to 110 degrees F)
1 tablespoon rapid rise yeast
4 cups, approximately, bread flour
1/3 cup extra virgin olive oil
5 teaspoons sugar
2 3/4 teaspoons salt
1 (10 oz) jar of prepared pesto (a generous cup)
Dustings of salt, pepper, Parmesan cheese, and parsley

Stack two baking sheets together and line top sheet with parchment paper.
In mixing bowl, hand whisk water and yeast together and let stand 3 minutes to dissolve yeast. Add one cup of flour and stir briefly. Then stir in oil, sugar, salt, and most of remaining flour. Mix ingredients and then attach dough hook and knead on lowest speed 6 to 8 minutes until smooth and elastic, adding more flour as required.
Remove dough hook from machine and spray dough with nonstick cooking spray. Cover entire mixer with clear plastic bag. (Or remove the bowl, cover it with plastic wrap and place it in a turned-off, warm oven [below 200 degrees F].) Let rise 45 to 90 minutes or until almost doubled.
Gently deflate dough on lightly floured surface. Let rest 10 minutes and then roll out into 20x20 inch shape. If dough resists, let it rest a few more minutes and roll out gently. Drizzle some additional olive oil on dough and then smear pesto all over surface. Roll up jelly roll style. Shape into "S" shape on prepared baking sheet.
Drizzle olive oil on top and dust with salt, pepper, Parmesan, and parsley. Cover loosely with plastic wrap and let rise until puffy, about 45 to 60 minutes.
Preheat oven to 350 degrees. Press bread down slightly before it goes into the oven. Bake until it is well browned, about 35 to 45 minutes. Cool to warm on baking sheets before cutting.

Pesto Sauce (from Eating the Greek Way by Fedon Alexander Lindberg, M.D.)
Makes 1 cup; 6 to 8 servings

3 tablespoons pine nuts (I used a handful of walnuts)
1 ¼ cups fresh basil leaves
2 garlic cloves, crushed
½ cup freshly grated Parmesan cheese (I used Parmigiano-Reggiano)
¼ cup olive oil (I added 2 extra tablespoons to loosen it up)
Salt and pepper

Toast the nuts lightly in a dry skillet over medium heat until just golden but not browned, 5 minutes. Set aside to cool.
Put the nuts in a food processor or blender, add the basil, garlic, Parmesan, and oil, and purée to make a smooth sauce. Season with salt and pepper. (I added about ¼ teaspoon of kosher salt and a few turns of the pepper mill.)

Tuesday, June 2, 2009

The Master Recipe: Boule (Artisan Free-Form Loaf)

Until very recently, I considered myself a baker of things such as cakes, pies, muffins, etc... I had dabled in bread baking before, with things like Kugelhopf and Hot Cross Buns, but I never ventured into the dark, scary world of bread baking. I thought only psycho-passionate "bread-lovers" could make good bread. I thought it took years of skill and practice to master. I thought it took hours, if not days, to create bread by hand, and that it would have to be a special occasion if I ever took the time to make any. Those thoughts packed up and said "peace out!" to my brain when I received the books Kneadlessly Simple: Fabulous, Fuss-Free, No-Knead Breads by Nancy Baggett and Artisan Bread in Five Minutes a Day by Jeff Hertzberg and Zoë François. Flipping through their pages, I realized that bread is something that normal people can make every single day... I'm talking 7 days a week, 52 weeks a year (assuming you're really into carbs!). Not only is it simple, there's hardly any labor involved in this new no-knead method that relies on high-moisture dough and a long-slow rise. The result is deliciously tasty bread that will deliver so much pride when you present fresh bread to your family and friends and tell them YOU made it!

So, if you can't tell, I recommend both of these books highly! I've made the master recipe boule from ABin5 about 4 times now. My family always goes crazy over it. We call it "craigslist bread" because one time I made some for my dad before I went out of town. A few hours after I left, he called me and said he was gonna sell it on craigslist and make us rich! Lol :D Just last night, I made the dough AND baked it onlya few hours before dinner! If you still think you can't possibly learn how to make good bread, watch these videos. If I can do it, YOU can do it! I pinky promise! ;D


Here is the recipe from ABin5, but I highly recommend you buy the book for yourself. It is SO worth it!

The Master Recipe: Boule (Artisan Free-Form Loaf) (from Artisan Bread in Five Minutes a Day by Jeff Hertzberg and Zoë François)
Makes four 1-pound loaves. The recipe is easily doubled or halved.

3 cups lukewarm water
1 1/2 tablespoons granulated yeast (2 packets)
1 1/2 tablespoons kosher or other coarse salt
6 1/2 cups (approximately 2 lbs.) unsifted, unbleached, all-purpose white flour*, measured with the scoop-and-sweep method
Cornmeal for pizza peel
*(If using bread flour, reduce amount to 6 1/4 cups)

Mixing and Storing the Dough
1. Warm the water slightly: It should feel just a little warmer than body temperature, about 100°F. Warm water will rise the dough to the right point for storage in about 2 hours. You can use cold tap water and get an identical final result; then the first rising will take 3 or even 4 hours. That won't be too great a difference, as you will only be doing this once per stored batch.

2. Add yeast and salt to the water in a 5-quart bowl or, preferably, in a resealable, lidded (not airtight) plastic food container or food-grade bucket. Don't worry about getting it all to dissolve.

3. Mix in the flour—kneading is unnecessary: Add all of the flour at once, measuring it in with dry-ingredient measuring cups, by gently scooping up flour, then sweeping the top level with a knife or spatula; don't press down into the flour as you scoop or you'll throw off the measurement by compressing. Mix with a wooden spoon, a high ­capacity food processor (14 cups or larger) fitted with the dough attachment, or a heavy-duty stand mixer fitted with the dough hook until the mixture is uniform. If you're hand-mixing and it becomes too difficult to incorporate all the flour with the spoon, you can reach into your mixing vessel with very wet hands and press the mixture together. Don't knead! It isn't necessary. You're finished when everything is uniformly moist, without dry patches. This step is done in a matter of minutes, and will yield a dough that is wet and loose enough to conform to the shape of its container.

4. Allow to rise: Cover with a lid (not airtight) that fits well to the container you're using. Do not use screw-topped bottles or Mason jars, which could explode from the trapped gases. Lidded plastic buckets designed for dough storage are readily available. Allow the mixture to rise at room temperature until it begins to collapse (or at least flattens on the top), approximately 2 hours, depending on the room's temperature and the initial water temperature. Longer rising times, up to about 5 hours, will not harm the result. You can use a portion of the dough any time after this period. Fully refrigerated wet dough is less sticky and is easier to work with than dough at room temperature. So, the first time you try our method, it's best to refrigerate the dough overnight (or at least 3 hours), before shaping a loaf.

On Baking Day
5. The gluten cloak: Don't knead, just "cloak" and shape a loaf in 30 to 60 seconds. First, prepare a pizza peel by sprinkling it liberally with cornmeal (or whatever your recipe calls for) to prevent your loaf from sticking to it when you slide it into the oven. (I put the cloaked dough ball on a piece of parchment that has been dusted with flour or cornmeal.) Sprinkle the surface of your refrigerated dough with flour. Pull up and cut off a 1-pound (grapefruit-size) piece of dough, using a serrated knife. Hold the mass of dough in your hands and add a little more flour as needed so it won't stick to your hands. Gently stretch the surface of the dough around to the bottom on all four sides, rotating the ball a quarter-turn as you go. (I prefer to roll the dough between my hands on a dry, non-floured work surface, much like making pizza dough. See my video for more details.) Most of the dusting flour will fall off; it's not intended to be incorporated into the dough. The bottom of the loaf may appear to be a collection of bunched ends, but it will flatten out and adhere during resting and baking. The correctly shaped final product will be smooth and cohesive. (When you poke it with your finger, the dough should pop back instead of leaving a deep indentation.) The entire process should take no more than 30 to 60 seconds.

6. Rest the loaf and let it rise on a pizza peel: Place the shaped ball on the cornmeal-covered pizza peel. Allow the loaf to rest on the peel for about 40 minutes to 1 ½ hours. (It doesn't need to be covered during the rest period). Depending on the age of the dough, you may not see much rise during this period; more rising will occur during baking ("oven spring"). If you allow the dough to rise until it is slightly wobbly it will bake up with a very nice crumb. You can bake it after 40 minutes but the crumb may be denser.

7. Twenty minutes before baking, preheat the oven to 450°F, with a baking stone placed on the middle rack. Place an empty broiler tray for holding water on any other shelf that won't interfere with the rising bread.

8. Dust and slash: Unless otherwise indicated in a specific recipe, dust the top of the loaf liberally with flour, which will allow the slashing knife to pass without sticking. Slash a ¼-inch deep cross, "scallop," or tic-tac­-toe pattern into the top, using a serrated bread knife.

9. Baking with steam: After a 20-minute preheat, you're ready to bake, even though your oven thermometer won't yet be up to full temperature. With a quick forward jerking motion of the wrist, slide the loaf off the pizza peel and onto the preheated baking stone. (Or just slide your dough sitting on parchment right onto the hot baking stone.) Quickly but carefully pour about 1 cup of hot water from the tap into the broiler tray and close the oven door to trap the steam. Bake for about 30 minutes, or until the crust is nicely browned and firm to the touch. Because you've used wet dough, there is little risk of drying out the interior, despite the dark crust. When you remove the loaf from the oven, it will audibly crackle, or "sing," when initially exposed to room­ temperature air. Allow to cool completely, preferably on a wire cooling rack, for best flavor, texture, and slicing. The perfect crust may initially soften, but will firm up again when cooled.

10. Store the remaining dough in the refrigerator in your lidded (not airtight) container and use it over the next 14 days: You'll find that even one day's storage improves the flavor and texture of your bread. This maturation continues over the 14-day storage period. The dough can also be frozen in 1-­pound portions in an airtight container and defrosted overnight in the refrigerator prior to baking day.


Thursday, May 28, 2009

Greek Restaurant Whole Wheat Bread

At the last Greek festival we went to my parents bought a 10,000 pound can of dolmades (am I exaggerating?). Dolmades, also called dolmas, are grape leaves stuffed with rice and sometimes meat, and they're packed in olive oil and lemon juice. They look like short, fat, slimey green slugs, but they are delicious!! Anyway, my parents bought what I consider to be the world's largest can of them! Then more recently, my mom came home with a GIANT tub of storebought tzatziki. Tzatziki is that deliciously creamy yogurt sauce that comes on gyros... Mmm oh yeah, that's the stuff! Normally I would prefer to make it myself, but how can I let 25 gallons of tzatziki go to waste? Am I exaggerating again??? Oh well. Stay with me.

So for like a week, I've been promising Josh that I'd make Greek food for dinner so we could put a hurting on all the dolmades and tzatziki we've acquired. I knew I wanted to make bread because every time we go out for Greek food the bread is always FABULOUS! At our favorite Greek restaurant, Orapax, I could seriously eat nothing but their bread! It's THAT good! I recently found the book, A Passion for Baking by Marcy Goldman at Ross for $6.99 (a major steal), and as I was flipping through it I found a recipe called "Greek Restaurant Whole Wheat Bread." My best memories of Greek bread are from a Greek restaurant so this recipe seemed perfect! Now, please excuse me while I step onto my soap box...

I'm usually not particular about where I get my recipes from. I do like them to be from trusted sources, but after that it doesn't matter at all. However, it's a totally different case when it comes to Greek recipes. I want them to be from cookbooks that are all about Greek food. This bread recipe is not from a Greek cookbook, and therefore it doesn't taste like any of the bread I ate while I was in Greece. And most importantly it doesn't taste like the bread I get at my favorite Greek restaurant. It is delicious, don't get me wrong. But it tastes like simple whole wheat sandwich bread. Nothing wrong with that, but there's nothing Greek about it.

As you can see, I take Greek food very seriously. I'm 25% Greek, my dad is %50 Greek, and his grandparents were Greek immigrants. I've also been to Greece, so I know what the food tastes like. I hold my Greek standards very high, and this bread just did not cut it for me. But if you want yummy whole wheat bread that makes great toast AND perfect tomato sandwiches, this is the recipe for you!

*Steps down from soap box...*

Click the photos for details of the step-by-step process:


One GIANT loaf of whole wheat bread... coming right up!! For breakfast, how about some toast with butter and raspberry jam!
For lunch, a juicy tomato sandwich with Dukes mayonnaise and LOTS of salt and pepper!
And for dinner, use it to mop up all that tzatziki sauce!Click here for chicken kabob recipe!

Greek Restaurant Whole Wheat Bread (from A Passion for Baking by Marcy Goldman)
Makes 1 large loaf
“Add a touch of white flour to mostly whole wheat and include a judicious use of olive oil and some honey, and what have you? A heavenly, rustic whole wheat bread. Mop up your Greek salad with it or smear halved garlic cloves on a thick slice, drizzle on olive oil, and lightly grill. Then add some feta slabs and partially melt. Top with sliced toma­toes, minced kalamata olives, salt, pepper, and a dusting of oregano.”
2 cups warm water (100°F to 110°F)
2 tablespoons rapid-rise yeast
1 cup white bread flour
2 1/2 teaspoons salt
3 tablespoons honey
5 tablespoons olive oil
4 to 5 cups stoneground whole wheat flour, all-purpose or bread flour, or mixed, preferably organic (I used 3 cups of whole wheat and 1 cup of bread flour)

Finishing Touch
Whole wheat flour, for dusting

Stack two baking sheets together and line top sheet with parchment paper; set aside.

In a mixer bowl, hand-whisk water and yeast together and let stand 2 to 3 minutes to dissolve yeast. Stir in white bread flour. Then mix in salt, honey, oil, and half of whole wheat flour. Attach dough hook and begin kneading on lowest speed of mixer 8 to 10 minutes, adding additional whole wheat flour, as necessary, to form a soft but firm, somewhat tacky dough.

Shape dough into a rounded mass in mixing bowl. Spray inside of bowl and dough lightly with nonstick cooking spray. Cover entire mixer and bowl with a large clear plastic bag (I just covered the bowl with plastic wrap). Let rise about 45 to 90 minutes until almost doubled. (To speed this up, boil a cup of water in the microwave. Leave the bowl of dough in the turned off microwave with the hot water for about 30 minutes, or until doubled.) Turn out dough onto a lightly floured work surface and gently deflate. Shape dough into an oval and place on prepared baking sheets. Spray dough lightly with nonstick cooking spray and dust with whole wheat flour.

Cover loosely with plastic wrap and let rise 45 to 70 minutes until dough is quite puffy (This only took about 30 minutes for me. At this point I slashed the top of my dough. The recipe doesn’t say to do it, but it makes it prettier to look at!).

Preheat oven to 375°F. Bake bread 15 minutes; then reduce oven temperature to 350°F and bake until it is well browned, another 20 to 30 minutes (I did 25). Cool on baking sheets (I cooled mine on a rack to keep the bottom crust from getting too soggy).
“For the fullest flavor, use organic whole wheat flour for this recipe, if you have it, as well as Greek honey, Greek olive oil, and Greek sea salt.”—A Passion for Baking