Flour Child Bakery opens in Virginia Beach!

My mom and I just opened a bakery in Virginia Beach!! "Like" us to stay updated! If you care to read our blog, it's flourchildbakery.blogspot.com.


Showing posts with label ganache. Show all posts

Wednesday, January 21, 2009

Buttercrunch Cake

In honor of January 20th being National Buttercrunch Day, I decided to make a Buttercrunch Cake. Did I say cake? Yes, c-a-k-e! I've been nursing a cold since the weekend. I wasn't in the mood for cupcakes, nor was I in the mood to bake from scratch. Truthfully, I've been craving the flavor of cake mix lately. I'm not gonna be all hoity-toity about it and act like "eww cake mix is so gross." No way, I grew up eating it, and I freakin LOVE the stuff! I did make my own buttercrunch candy, though. I found the recipe for Pecan Buttercrunch on one of my favorite blogs, Dessert First. I followed her recipe exactly, including sprinkling sea salt on top, and it's delicious! I used it to top my Buttercrunch Cake. I'll get right to it because my lunch is calling me from the microwave... Mmmm, my mom's leftover herb-crusted pork loin! But let me just say, this cake is delicious! The caramel filling is SO good. I'll definitely be using the recipe for it again!

Making the candy... Mmm doesn't it look good?
Buttercrunch Cake!
Want some?
This is what I had for breakfast! ;)
Pecan Buttercrunch with Fleur de Sel (from DessertFirst)
about 16 pieces (I got 45-50 small pieces)

3/4 cup sugar
1/2 cup light brown sugar
1/2 cup unsalted butter, cut into pieces
1/8 teaspoon salt
1/4 teaspoon baking soda
1 teaspoon vanilla extract
12 ounces bittersweet or semisweet chocolate (I used 60% cacao)
1 cup pecan halves, toasted and chopped into small pieces
Fleur de Sel

Line a baking sheet or pan with a silicone baking mat.
Combine the sugars, butter, vanilla, and salt in a medium saucepan. Cook over medium heat, stirring to combine, until it comes to a boil.
Continue cooking without stirring until the mixture reaches 298°F on a candy thermometer.
Remove from heat and stir in the baking soda and vanilla.
Pour the mixture onto the baking sheet and spread it out evenly, working quickly before it sets. (I spread mine in a 12" circle) Let the toffee layer cool completely.
Either temper the chocolate or simply melt it in a double boiler. Pour the chocolate over the toffee layer and spread out evenly.
Immediately sprinkle the pecans over the chocolate. Sprinkle a few grains of fleur de sel over the chocolate. Let the chocolate fully set.
Break the toffee into pieces before serving.

Quick Caramel Frosting (from The Cake Mix Doctor)
(Makes enough to fill a 3 or 4 layer cake)
8 tablespoons (1 stick) butter
1/2 cup packed light brown sugar
1/2 cup packed dark brown sugar
1/4 cup whole milk
2 cups confectioners' sugar
1 teaspoon pure vanilla extract

(I added 1/2 teaspoon sea salt)

1. Place the butter and brown sugars in a medium saucepan over medium heat. Stir and cook until the mixture comes to a boil, about 2 minutes. (The book forgets to mention to be very careful on the next step. Add the milk slowly, because it will spatter a lot in the pan!) Add the milk, stir, and bring back to a boil, then remove the pan from the heat. Add the confectioners' sugar and vanilla. Beat with a wooden spoon until the frosting is smooth. (The book says to use the frosting while it's still warm, but it was way too thin to spread. I let it cool all the way to room temp. Then I beat it on high with and electric mixer to fluff it up a little. It will thicken a lot when you start spreading it on the cake. If it gets too stiff, pop it in the microwave for 10-20 seconds.)


Chocolate Ganache
8 oz. semi-sweet chocolate chips
1/2 - 3/4 cup heavy cream (depending how thick you want your ganache to set up)

Put chocolate chips and cream in a microwave-safe bowl. Microwave on high for 45 seconds to 1 minute, depending on your microwave. Stir gently with a rubber spatula. Heat for 15-20 more seconds. Stir until well blended. Let sit about 30 minutes (or cool in an ice bath for 5 minutes) until ganache is spreadable.


To assemble the Buttercrunch Cake:
Bake and cool two 8-inch round cake layers. Split each layer in half. Fill with cooled caramel filling. Top with cooled chocolate ganache. Decorate with buttercrunch candy!

I don't even know if anyone even reads this far down but, PS: The new season of Big Love started on HBO last weekend. It looks pretty good so far. AND my new favorite show, United States of Tara, comes on Showtime. You should totally watch it. It's so hilarious and fun!!

Wednesday, January 7, 2009

Ferrero Rocher Mini Cupcakes

They won the poll! I knew they would. And I'm ecstatic because I really wanted to make them! I started with the chocolate hazelnut cupcake recipe from Cupcakes Galore by Gail Wagman. I chose it because it called for Nutella instead of hazelnut extract (which I don't have, nor do I know where to find some). I filled the suckers with MORE Nutella. Then I topped each one with the crispy part of a sugar wafer cookie. Finally I topped them with half semi-sweet/half milk chocolate ganache filled with chopped hazelnuts. I couldn't find hazelnuts in the store, so I rummaged through a bag of espresso trail mix I got from Target. I got about 1/3 cup of hazelnuts from that. These tiny cupcakes are slam full of hazelnut flavor. The ganache is rich but delicious. The chopped hazelnuts give it great texture. The sugar wafer cookies go stale quickly, but once they're soggy you don't even know they're there. Definitely make these at home if you love Ferrero Rocher chocolates!
Ingredients (sans milk because I suck at remembering things) Mmmmm Nutella batter!!
Ready for the oven...
The sight still makes me drool!
Can you see the thin wafer cookie and the yummy Nutella in the middle?
A sea of Ferrero Rocher heaven!
Mmmm aren't they yummy? Here's a handy little video to show you how to put them together!


Cupcake recipe adapted from Cupcakes Galore by Gail Wagman
Ferrero Rocher Mini Cupcakes
Makes 24 minis and 6 regular

1 3/4 cups all-purpose flour
2 teaspoons baking powder
1/2 teaspoon salt
1/2 cup (1 stick) unsalted butter, softened
1/2 cup sugar
3 eggs
3/4 cup Nutella (plus the rest of the jar, for filling)
1/4 cup milk
1/4 teaspoon instant coffee granules (my own addition)

Ganache
8 oz. semi-sweet or milk chocolate chips (or both)
1/2 cup heavy cream
1/3 cup chopped, toasted hazelnuts

1. Preheat oven to 350 F (325 F for dark pans) . Line mini muffin pan with paper or foil liners.
2. Mix flour, baking powder, and salt together and set aside.
3. Cream butter and sugar until light and fluffy (2-3 minutes) . Add eggs, one at a time, mixing well after each addition. Add 3/4 cup of Nutella and blend thoroughly. (Warm the milk in the microwave. Stir in instant coffee until disolved.) Alternately add flour mixture and milk, blending well after each addition (Don't overmix! Blend only until no traces of flour remain.)
4. Using a tablespoon, fill each cup with batter. Bake for 14-16 minutes or until a tester inserted into the center comes out clean. Remove from oven and cool on wire racks.
5. When cupcakes are cool, fill them with the remaining Nutella.
6. Make the ganache. Put chocolate chips and cream in a microwave-safe bowl. Microwave on high for 45 seconds to 1 minute, depending on your microwave. Stir gently with a rubber spatula. Heat for 15-20 more seconds. Stir until well blended. Let sit about 30 minutes, or until ganache is spreadable. Stir in chopped hazelnuts and spread on cupcakes.

Overall rating on a scale of 1-5
Moistness: 4
Tenderness: 4
Frosting: 5

Wednesday, September 24, 2008

Almond Cupcakes w/ Chocolate Mousse Frosting & Cherry "Bang" Cake

HI WORLD! Wow, it's been a while, huh?? I've been SO freakin busy! Between working at the bakery and working with my parents at the Isle of Wight County Fair, I totalled over 70 hours last week! Needless to say I didn't have the time or the energy to bake. But this week, when I actually got home early from work I finally made the cupcakes that won the poll forever ago... Welllll... I didn't actually make the flavor that won. I didn't know it until the cupcakes were already in the oven, but my mom threw away my raspberries when she cleaned out the refrigerator. So instead, I filled the almond cupcakes with ganache and topped them with chocolate mousse. Then with the leftover batter, I made an 8-inch round cake. I poked holes in it while it was still warm and topped it with triple cherry jam. I frosted it with almond buttercream, which was actually delicious (and I don't even like regular buttercream!). Because I'm nice, here's the recipe for the Almond Raspberry Cream Cupcakes that you voted for, plus some pictures. And I'll post the recipe for what I named "Cherry Bang Cake" at the end of this post as well!

Ingredients for the cupcakes AND my beautiful new "tangerine" colored mixer!
Almond cuppies cooling...
Making the Cherry "Bang" Cake!
So I made lemonade from lemons... well no I didn't... but you get my point. Right?

The cupcake recipe is from Favorite Brand Name: 100 Best Cupcake Recipes. I invented the Cherry "Bang" Cake, mostly because I was bored. And because I had some Lollipop Tree Triple Cherry Jam laying around.

MY NOTES: To make the chocolate ganache and mousse topping: Melt 1/2 cup semi-sweet chocolate chips with 1/4 cup heavy cream in the microwave for 60 seconds. Stir until smooth. Cool to room temperature. Beat 2/3 cup cold heavy cream with a mixer on high speed until stiff. Fold half of the cooled ganache into the whipped cream. Fill the cupcakes with the rest of the ganache.

Almond Raspberry Cream Cupcakes
Makes 18 cupcakes

2 3/4 cups all-purpose flour
2 1/2 teaspoons baking powder
3/4 teaspoon salt
1 3/4 cups granulated sugar
3/4 cup (1 1/2 sticks) unsalted butter, softened
1 teaspoon almond extract
1 teaspoon vanilla
4 eggs
2 egg yolks
1 1/2 cups milk
Raspberry Cream (recipe follows)

Preheat oven to 350°F. Line 18 standard (2 1/2-inch) muffin cups with paper baking cups.
Combine flour, baking powder and salt in medium bowl. Beat granulated sugar, butter, almond extract and vanilla in large bowl with electric mixer at medium speed 4 minutes or until light and fluffy. Add eggs and egg yolks, one at a time, beating well after each addition. Alternately add flour mixture and milk, beating well after each addition (Eff that! Beat just until the flour is incorporate unless you want hockey pucks instead of cupcakes!). Spoon batter into prepared muffin cups, filling three-fourths full.

Bake 20 to 22 minutes (Mine were done at 19 minutes) or until toothpick inserted into centers comes out clean. Cool cupcakes in pans on wire racks 15 minutes. Remove from pans; cool completely on wire racks.
Prepare Raspberry Cream. Cut tops off cupcakes; spread with Raspberry Cream. Replace cupcake tops; sprinkle with powdered sugar.

Raspberry Cream: Beat 1 cup cold whipping cream and 1/4 cup powdered sugar in large bowl with electric mixer at high speed 5 minutes (It only takes about 2 minutes with my hand mixer) or until cream is thickened and almost stiff. Place 1 pint fresh raspberries in small bowl; mash lightly with fork. Gently fold raspberries into whipped cream mixture until well blended and evenly colored. Makes about 3 cups.


Overall rating on a scale of 1-5
Moistness: 5
Tenderness: 4
Frosting (Chocolate Mousse): 5


Cherry "Bang" Cake
1 (8-inch) round cake (You can bake the whole recipe above as 2 (8-inch) rounds, OR make 12 cupcakes plus 1 round like I did)
1/2 cup cherry jam
1-2 tablespoons hot water

Almond Buttercream
2 sticks unsalted butter, softened
3 cups confectioners' sugar, sifted
1 teaspoon almond extract

Make 12 cupcakes and pour the rest of the batter into a greased 8" round pan. Bake until toothpick inserted in the center comes out clean, 25-30 minutes, rotating pan halfway through. Remove pan from oven and cool on wire rack for 10 minutes. Remove cake from pan and place it on a serving dish. Poke holes in the warm cake with the end of a wooden spoon. Dilute 1/2 cup of cherry jam with 1 or 2 tablespoons of hot water. Spread over cake. Lift the cake plate up and bang it on the table a few times until most of the jam seeps into the holes. Cover tightly and refrigerate until cool. To make frosting, beat butter, sugar, and extract for 3 minutes on high speed until light and fluffy. (Makes enough to frost a 2-layer cake).

Overall rating on a scale of 1-5
Moistness: 5
Tenderness: 4
Frosting: 4 (I prefer it less sweet)

Sunday, September 14, 2008

Dad's Boston Cream Birthday Cake!

My dad loooovvves Boston Cream pie. Last year I made Boston Cream cupcakes for his 50th birthday party. This year I was in a bit of a rush. I came home early from work, rummaged up a box of cake mix and some instant pudding, quickly made some ganache... and TADA! Everyone absolutely loved this cake. And even though I cheated with the cake mix, I'll say this is one of the best layer cakes I've ever made. The ganache set up perfectly in the refrigerator. And the lightly sweetened whipped cream was a perfect touch! Sooooo... If you wanna make this at home, here's exactly what I used.


Boston Cream Cake (Serves 14-18)
1 box Betty Crocker® Golden Vanilla cake mix (PLUS water, oil and eggs according to the box)
1 package JELL-O French Vanilla Instant Pudding (PLUS whole milk according to "Pie Filling" directions on the box)
8 oz. semi-sweet chocolate chips
1/2 cup heavy cream (plus more for garnish)

1. Bake and cool the cake according to package directions in two 8" round pans.
2. While cakes are cooling, prepare pudding according to "Pie Filling" directions on the box.
3. Split each cooled cake layer into two. Spread 1/3 of the pudding on each of the first 3 cake layers, leaving about 1/4" space around the edges. Place the last layer of cake on top.
4. In a measuring bowl, combine chocolate chips and heavy cream. Microwave for 1 minute on high. Stir with a rubber spatula. Microwave for another minute on high. Stir until no lumps remain. Chocolate should be thick but pourable.
5. Pour about 1/3 of the chocolate over the top of the cake. With an offset spatula, spread the ganache over the top of the cake and let it begin to spill down the sides. Slowly continue to add the chocolate a little at a time, letting it spill down the sides a little more each time. When all the chocolate is on the cake, smooth the sides. The chocolate will be a very thin layer, just enough to cover the cake.
6. Cover and refrigerate for an hour before serving. Garnish with whipped cream, if desired. Keep leftovers refrigerated up to 3 days.

Monday, August 11, 2008

My Banana Split Birthday Cake!!

UPDATE: THIS RECIPE HAS CHANGED! Read this post for details and new recipe!

Happy birthday to me! Happy birthday to me! Happy birthday, dear Cassie! Happy birthday to me!

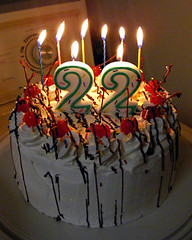
Friday, August 8, was my 22nd birthday. Saturday night I had a small party at my house. And as tradition goes (the tradition I started last year), I made my own cake! Thanks to everyone who left a comment a few entries back suggesting cake ideas. I decided to make a banana split cake. Let's put it this way... I might be making this cake for myself every year until I am so old and mangled that it just wouldn't be possible. It tasted exactly like a banana split! I used the highest rated Hummingbird Cake recipe on Allrecipes.com. I omitted the cinnamon (Have you ever had a banana split with cinnamon on it? Duh, me either). I layered it with whipped cream, fresh strawberries, and chocolate ganache. Then I frosted the whole thing with whipped cream, drizzled on some more ganache, carefully placed a few cherries, and threw on a butt load of sprinkles and HELLO DOLLY! Perfection was reached! The cake is sooo moist, and every single flavor of a banana split is dead on. It's incredible! It tastes delicious right out of the fridge. It's the perfect cake for a summer birthday!

Two unbaked cakes on a cluttered kitchen table.Two cakes cooling on an empty washing machine.Two cakes split into four (with mom's help because I'm no good at splitting cakes).You can see how moist it is.Layered with whipped cream, strawberries, and chocolate.TADA!Closeup!This is the prettiest cake I've ever made!And probably the tastiest!
UPDATE: THIS RECIPE HAS CHANGED! Read this post for details and new recipe!
Hummingbird Cake III from Allrecipes.com

INGREDIENTS
3 cups all-purpose flour
2 cups white sugar
1 teaspoon baking powder
1 teaspoon salt
1 teaspoon ground cinnamon (I omitted this)
3 eggs, beaten
1 1/2 cups vegetable oil (Next time I'll reduce this to 1 cup)
2 teaspoons vanilla extract
1 (8 ounce) can crushed pineapple, drained (REALLY DRAIN IT!)
1 cup chopped pecans (I used walnuts)
2 cups diced bananas

DIRECTIONS
Preheat oven to 350 degrees F (175 degrees C). Grease and flour two 8-inch round cake pans.
Combine flour, white sugar, baking powder, salt, and cinnamon in a large bowl. Add eggs and oil; stir until moistened. Do not beat. Stir in bananas, 2 teaspoons vanilla, pineapple, and pecans walnuts.
Bake for 25 to 30 minutes, or until golden brown around the edges. Cool on a wire rack for 10 minutes. Invert and remove pans. Cover cakes with a lint-free kitchen towel to finish cooling.


To make a Banana Split Cake:
When cakes are completely cool, split each layer into two. Thinly spread whipped cream over each layer. Sprinkle chopped fresh strawberries and drizzle ganache (or chocolate syrup) over the whipped cream. Frost the whole cake with whipped cream and drizzle more ganache over it. Add cherries and sprinkles for decoration.


And how about some photos from the party to finish this post!


My mom & my friend LanceJosh & me <333He always finds a way to undress at my parties!The best friends, Beth & Aaron.
Aaron was on prescriptions meds but couldn't resist Jello shooters...My book collection after getting 7 more for my birthday!

Monday, September 10, 2007

Boston Cream Cupcakes

One of my dad's favorite desserts is Boston Cream Pie. How could I not make Boston Cream Cupcakes for his birthday??? They were delicious, but due to the custard filling they had to be refrigerated which caused the cake to dry out a bit (talk about a run-on sentence). Not to worry, just have a glass of milk nearby! It's best to let these cupcakes sit out for about 15-20 minutes until they are room temp before eating them, unless you're like my dad and you like your Boston Cream straight from the fridge. By the way, I'll be using this custard recipe for all my custard needs from now on! It is sooo good I could barely stop myself from eating it out of the bowl.

Boston Cream Cupcakes on a broken stand I found for $2 at a thrift store. There's nothing a drop of super glue won't fix!
Boston Cream through a cheap wide angle lens I bought on eBay. Boston Cream innards!

Recipe from 125 Best Cupcake Recipes by Julie Hasson.

MY NOTES: Next time I'll add a little more vanilla to the cake batter, because the cake didn't have much of a flavor. I doubled the recipe and got 28 cupcakes. Mine were done at 17 minutes. I used the cone method AND scooped additional cake out of the center of each cupcake. I put 2-3 teaspoons of custard in each.

BOSTON CREAM CUPCAKES
Makes 12 cupcakes
Preheat oven to 350F/180C

1 1/2 cups all-purpose flour
1 1/2 tsp baking powder
1/4 tsp salt
1 cup granulated sugar
1/2 cup unsalted butter, melted and cooled slightly
2 eggs
1/2 tsp vanilla
1/2 cup milk

Filling:
3 tbsp granulated sugar
2 tbsp cornstarch
pinch salt
2 egg yolks
1/2 cup milk
1/4 cup whipping cream (35%) plus 3 tbsp divided
2 tsp unsalted butter
1/2 tsp vanilla paste or vanilla

Glaze:
1/2 cup semisweet chocolate, chopped
1/3 cup whipping cream(35%)

1. In a small bowl, mix flour, baking powder and salt
2. In a large bowl, whisk together sugar, butter, eggs and vanilla until smooth. Alternately whisk in flour mixture and milk in three additions. Beating until smooth.
3. Scoop batter into prepared pan. Bake in preheated oven for 20-25 minutes until golden and brown.let cool in pan or rack for 10 min. Remove from pan and cool comepletely on rack.

Filling:
1. In a heavy saucepan, mix together sugar, cornstarch and salt. Whisk in egg yolks, milk and 1/4 cup of cream until smooth. Bring mixture to simmer over medium heat. Whisking continously.
2. Once mixture is at a simmer and begins to thicken, remove from heat but continue whisking until very thick. Whisk in butter and a vanilla paste until butter is melted and custard is smooth.
3. Spoon custard into a small bowl. Fill a slightly larger bowl with ice. Place small bowl of custard on top of ice. Whisk custard until cool. Remove small pan, dry bottom and sides with a towel so that no moisture gets inside the bowl.
4. Whisk in remaining 3 tsbp whipping cream. Place a piece of plastic wrap on surface of custard and refrigerate for 40 min or untill chilled or for up to 2 days.

Glaze:
In a microwave safe bowl, combine chocolate and cream. Microwave uncovered on High for 40 sec. or until cream is hot and chocolate is soft and almost melted. Stir until smooth. Let chocolate mixture sit for 5 min. or until slightly cooled but still spreadable.

Assembly: (I USED THE CONE METHOD[pictures and instrux after the link], plus scooped a little more cake from the center of each to add LOTS of custard)
1. When cupcakes are cool, peel off paper liners. Carefully slice off tops of cupcakes. Using a small spoon, scoop out about a rounded teaspoon of cake from the bottom half. Dont scoop a hole in the bottom.
2. Spread a layer of reserved cooled custard on cut side of bottom half and fill small hole of custard too. Sandwich two halves together. Repeat with the remaining.
3. Spread tops of cupcakes with chocolate glaze. Place cupcakes on a platter or baking sheet and refrigerate until ready to serve. They need to stay refrigerated so that the custard filling doesn't spoil. Serve straight from the refrigerator or let sit at room temperature for about 15 min. to remove the chill.


PS: My free Flickr account has reached it's limit on the number of photos I can upload. If anyone wants to buy a Pro account for me, that's awesome. Otherwise I'll eventually get around to buying one whenever I have new cupcake photos to upload.

Friday, July 6, 2007

Samoas Cupcakes, Two Different Ways

And the winner is....... Samoas cupcakes! Brought to you by Chockylit @ Cupcake Bakeshop. And here's how the process went...

ingredients for brown sugar cupcakesthick brown sugar cupcake batter There was enough to fill a little more than 12 cups... ...so we ate the rest! They looked so beautiful in the oven. 12 beautifully golden brown cupcakes cooling lunch break! back to work, cutting out cones for the filling cutting off the tip of the cone ready to be filled!
This is where it gets tricky. I made the coconut topping according to the recipe, but something may have gone wrong. Neither me nor Stephanie liked the smell or taste of this stuff. It didn't remind me of a Samoa cookie at all. Stephanie said it smelled like the Ritz cracker topping her mom puts on baked macaroni & cheese. My dad said it tasted like custard, but he thought it would be good on the cupcake. I didn't want to throw it away, so we decided to use it on half of the cupcakes. We wanted to try something else with the other 6 cupcakes. Stephanie and I hopped in the car and drove to the nearest grocery store (which thankfully was only about a minute away). We bought a jar of Smucker's caramel topping. I toasted some more coconut and mixed 1 cup of it with about 1/2 cup of the caramel topping. This stuff tasted a lot better (still not like a Samoa cookie), but it would be too runny to put on top of the cupcake.
I filled half the cupcakes with my coconut/caramel mixture.
I whipped the ganache (the recipe doesn't call for whipping it) and filled the other 6 cupcakes with it. The 6 with my caramel/coconut in the center got topped with whipped ganache. The 6 filled with ganache got topped with the custardy coconut stuff. the final product of the original recipe the final product of my adapted version
I haven't gotten the final verdict on the coconut topped cupcakes, but Stephanie and I shared a ganache topped cupcake. They were okay, but we both agreed that the Samoas recipe will probably not be used again.