Flour Child Bakery opens in Virginia Beach!

My mom and I just opened a bakery in Virginia Beach!! "Like" us to stay updated! If you care to read our blog, it's flourchildbakery.blogspot.com.


Showing posts with label cherry. Show all posts

Tuesday, June 1, 2010

Sour Cherry Lattice Pie

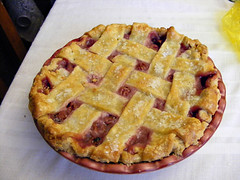
Happy belated Memorial Day! What better way to celebrate an American holiday than with a homemade cherry pie? Well truthfully, it started out as a mulberry pie. But when I went to retrieve my mulberries from the refrigerator, I discovered mold had taken over. Gross! I plundered my kitchen cabinets and found two cans of sour cherries. That'll do, pig! I scanned through my cookbook collection until I finally found a cherry pie recipe that called for canned cherries. This one comes from The Taste of Home Baking Book. I used my go-to crust recipe, and it was perfect. The use of cake flour and my adapted way of making the pastry are really forgiving. I baked the scraps while the pie was in the oven, and even after being rolled and re-rolled, they were still soooo yummy sprinkled with cinnamon and sugar.
My cherry pie!Dad is the grill master!
I also took this opportunity to test out a pie pan I just got. It's made by Chicago Metallic, and it allegedly makes slicing and serving pies a breeze. It comes with a contraption that slices the pie into 8 even slices. The pan itself has a removable bottom, and it came with a little stand that pushes the pie up from the bottom of the pan so that the slices can be removed from the sides without damaging them.After baking and slicing the pie in the Slice Solutions pan, I'm a BIG fan! It browned the crust nicely, and it kept the slices beautiful and clean. The package said it works best on single crust pies, but with some finesse, I managed to press the cutter into my lattice-topped pie with minimal damage. I'll absolutely be using this pie pan again and again! ;D If you're interested, I got it from UWantSavings.com for $17 and FREE shipping!PS: Let's keep this a secret from the new bathing suit I got from Target on Saturday... I'm having a slice of this pie for breakfast right now!

Sour Cherry Lattice Pie (from The Taste of Home Baking Book)
Makes 1 9-inch pie

2 cans (14.5-16 oz each) tart pitted cherries
1 cup sugar
3 tablespoons instant tapioca
1/4 teaspoon almond extract
1/4 teaspoon salt
Red food coloring, optional (the canned cherries are somewhat grayish; I added 3 drops red gel color)
1 tablespoon butter
1 double-crust pastry

Divide pastry dough in half. Roll half into a 12-inch circle, fit into pie pan, and let it rest for 30 minutes in the refrigerator or freezer.

Preheat the oven to 375 degrees F. Drain cherries, reserving 1/4 cup juice. In a large bowl, combine the cherries, juice, sugar, tapioca, extract, salt, and food coloring if desired; let stand for 15 minutes. Meanwhile, roll other half of pastry into a 12-inch circle, and allow it to rest in the refrigerator until needed.

Pour filling into pie shell and dot with butter. With a knife or pastry wheel cut the other rolled out pastry into 3/4” strips. Place pastry strips in a lattice pattern on top of pie. (
Click here for illustrated help.) Bake for 55-60 minutes. If crust begins to brown too quickly, cover edges with aluminum foil or a pie crust shield. Cool completely on a wire rack before slicing.

Wednesday, March 11, 2009

IronCupcake_008: Spumoni Cupcakes

Iron Cupcake:Earth_008
Theme: Nuts & Seeds
My 1st entry: Spumoni Cupcakes
Voting begins: Sunday, March 29 at 8 pm Central @ http://www.ironcupcakemilwaukee.com/ and will be open through Friday, April 3 at 12 noon Central.


I've been wanting to make cupcakes with pistachios for a long time, and when I saw that this month's Iron Cupcake theme is "Nuts & Seeds" I knew it was the perfect excuse! It only took a few minutes to come up with a delicious flavor combination. My inspiration comes from a popular Italian ice cream flavor called spumoni. The main flavors are chocolate, pistachio, and a fruit flavor which is usually cherry. For the cupcake version I made a two-tone chocolate and cherry cupcake with pistachio Swiss meringue buttercream. Formulating a recipe for the pistachio buttercream was harder than I thought. I googled for a recipe, but I couldn't find one. Surely, I'm not the first person to think of pistachio buttercream! I found a few articles that talked about using store-bought pistachio paste to flavor cakes, but I have never seen pistachio paste anywhere. I decided to make my own and blend it into a batch of my SMBC. It worked perfectly! You could definitely taste the pistachio flavor in the buttercream, and it went very nicely with the chocolate and cherry cupcake. Josh loves pistachios but isn't a huge fan of chocolate, and he LOVED these cupcakes! He texted me from work this morning just to make sure there would be another one here waiting for him when he comes over tonight. :D

Two-tone cupcakes cooling... The pistachio paste looks... unappetizing... =/ May I introduce Mr. Spumoni Cupcake! And his insides...He might have a drinking problem...Meet the family too!

Spumoni Cupcakes
MY NOTES: Measure out the ingredients for both batters first. This way you don't have the first batter sitting out for a long time while you make the second one. My cupcakes were done at 16 minutes.

Two-Tone Chocolate and Cherry Cupcakes
Prepare both cherry and chocolate batters (directions below); fill muffin cups with 3 tablespoons of each, side by side. Makes 24.

(If you make one cherry batter and one chocolate batter, you'll have enough for 24 cupcakes; If you split this recipe and make 1/2 cherry batter and 1/2 chocolate batter, you'll get 12 cupcakes. It sounds like common sense, but it was confusing at first.)
8 tablespoons (1 stick) unsalted butter, room temperature, plus more for pan
1 3/4 cups all-purpose flour (spooned and leveled), plus more for pan
2 teaspoons baking powder
1/2 teaspoon salt
3/4 cup sugar
2 large eggs, room temperature
1/2 teaspoon cherry (or raspberry) flavoring
1/2 cup whole milk
1/4 cup chopped cherries (canned or frozen/thawed)

For Chocolate Cupcakes
Add 1 teaspoon vanilla extract. Reduce flour to 1 1/4 cups, and add 1/2 cup unsweetened cocoa powder. Whisk into dry ingredients.

Preheat oven to 350 degrees. Butter and flour a standard 12-cup muffin pan, or use paper liners. In a medium bowl, whisk together flour, baking powder, and salt; set aside.
With an electric mixer, beat butter and sugar until light and fluffy. Add eggs one at a time, beating well after each addition; add cherry flavoring and mix until combined. On low speed, beat in half the flour mixture, followed by milk; end with remaining flour mixture and chopped cherries. Mix just until incorporated (do not overmix).
Fill muffin cups with 3 tablespoons of each batter, side by side (I used a #30 disher with a scant scoop of batter for each half). Bake until a toothpick inserted in center of a cupcake comes out clean, 20 to 22 minutes (Check them at 16 minutes). Cool cupcakes in pan, 5 minutes; transfer to a wire rack to cool completely.

Sweetened Pistachio Paste
Makes about 1 cup

1 cup pistachios, skins removed (if pistachios are salted, rinse them well)
1/4 cup granulated sugar
1/2 cup hot water

In a food processor, grind pistachios and sugar until it becomes a fine meal. With the processor still running, Slowly add hot water, one tablespoon at a time scraping the bowl often, until a thick but spreadable paste forms. Transfer to a bowl and press plastic wrap against the surface. Cool to room temperature.

Pistachio Swiss Meringue Buttercream

Makes about 4 cups

4 large egg whites
1 cup sugar
1 cup (2 sticks) unsalted butter, softened, cut into tablespoons
Sweetened pistachio paste, to taste
Green food coloring (optional)

Put egg whites and sugar into the top of a double boiler over a pan of simmering water. Whisking constantly, cook until sugar has dissolved and mixture is warm (about 160 degrees).
Pour heated egg whites into the bowl of an electric mixer fitted with the whisk attachment. Beat egg white mixture on high speed until it forms stiff (but not dry) peaks. Continue beating until fluffy and cooled, about 7 minutes.
Switch to the paddle attachment. With mixer on medium-low, add butter two tablespoons at a time, beating well after each addition. Increase speed to medium-high; continue beating until frosting appears thick, about 3 minutes. Reduce speed to low; add 1/4 cup pistachio paste and mix until incorporated. Add more if a stronger flavor is desired (I used about 1/2 cup).


Overall rating on a scale of 1-5
Moistness: 5
Tenderness: 5
Frosting: 5

Prizes provided by Etsy artists:
A Bunnycake Easter Plushie by DOGBONEART
A whimsical piece by CAKEASAURUS
A pair of cupcake earrings from LOTS OF SPRINKLES
Also,
CAKESPY, who is now going to be doing a piece for our winner each month until further notice!
SWEET CUPPIN CAKES BAKERY AND CUPCAKERY SUPPLY will be tossing in a collection of all new printed cupcake liners, 200 in all.
Corporate prize providers:
HEAD CHEFS by
FIESTA PRODUCTS
HELLO CUPCAKE by Karen Tack and Alan Richardson
JESSIE STEELE APRONS
CUPCAKE COURIER
TASTE OF HOME books
UPWITHCUPCAKES.COM

Iron Cupcake:Earth is sponsored in part by 1-800-Flowers

Sunday, December 14, 2008

There's Always Time For Pie!

I've been busy... really REALLY busy. Did I mention how busy I've been? Over the span of 3 days last week, I made 4 pies and a birthday cake for our family's annual get-together at my great aunt Christy and uncle Charlie's house. We've accurately dubbed the holiday "Thanksmas." It's between Thanksgiving and Christmas... get it??? It's a holiday we made up in order to see family we don't get to see during the other holidays. I digress. This is about pies. Lately, I've been on a make-my-own-pie-crust kick. It's been fun so far. No major disasters as of yet (One went in the trash, but I'm learning from my mistakes). Anywho, while shopping at Michael's about a month ago, I found the neatest ceramic pie plates. Each plate has a recipe stamped on the inside of it. I thought it would be really nice if I made the pies according to those recipes and gave them the pie plates as a gift! So I did it. And I'm going to post all the photos and recipes in this post. Because last week when I posted all of those cookie recipes separately, I had a lot of unsubscribers saying I update too frequently...... whatever weirdos.

Wednesday evening I cranked out six, count 'em, SIX pie crusts! I was quite proud of myself. One lesson I definitely learned is to make sure the pieces of butter in the pie crust are small! Some of my pieces were as big as [small] marbles. They melted while baking resulting in holes in the crust and a burnt butter smell in the oven. No good at all! Don't stop cutting in the butter until the biggest lumps are the size of peas.

Thursday I got started on the baking. The first pie crust I rolled out was picture perfect. That is, until it went into the oven to be pre-baked. The instructions said just to prick it with a fork, didn't mention a thing about pie weights. The crust shrunk down into the pie pan. I tried to save it as best I could, but it was still kinda ugly. My boyfriend tried to make me feel better by saying it looked more homemade that way. I prefer to say "rustic." The first pie was the pumpkin pie. The recipe made a little too much filling, so I poured the extra into two small ramekins and baked them alongside the pie. Since the pie was going to be given away I couldn't exactly steal a bite, so I used the ramekins as my tasting portions. The filling was definitely delicious. The ginger flavor was my favorite part. (What's with me and ginger this season??) I recently got word from the recipients of this pie that my uncle Lanny ate ALL of it! My aunt Sherry and my cousins, Stephanie and Samantha, didn't even get a taste! I guess I'm flattered... Lol.

The second pie I made was a pecan pie. This was my first time ever making a real pecan pie, so I was nervous. I baked it exactly according to the directions. I took it out when the edges were set and the center was still jiggly. It smelled SO good while it was cooling! I gave this pie to my Aunt Michelle. She loves pecan pies, so I hoped I did it right for her. She said it was baked exactly how she likes it. Still gooey in the middle, not chewey and overbaked. She was nice enough to offer her pie up to everyone at Christy's for dessert Saturday night (alongside the Boston Cream birthday cake I made for Tammy's birthday that got devoured within the hour!).


The next pie on my to-do list was the cherry lattice pie. It was my first time attemping a lattice top pie, and I was especially nervous using homemade pie crust because it's very delicate. A few of the strips broke while I was putting them on the pie. Then the warm cherry filling started to soften the strips while I was folding them into the lattice pattern. It was extremely nerve racking, but I was able to mend all the broken strips. I ended up with a very rustic looking pie. The filling was so good. I snuck a little taste while I was making it. Homemade cherry filling is the BEST! I didn't get a picture of the inside of the pie because my aunt Tammy was not in the mood to share. But that's okay, because she texted me the next day and said it was really delicious!

The fourth and final pie was the one I was most excited to make. The apple cranberry pie was a sinch to put together. The smell of fresh apples and cinnamon is one of my favorite scents in the whole wide world. It comes second in my list of favorite smells only to vanilla cake batter. Now that stuff is pure heaven. But more about the pie. You may be thinking, "Wow, that top crust looks so flaky and perfect." Well remember that pie crust I told you that took a trip to the garbage can? Yeah... It was the top crust on this pie. The one you see in the photo is a Pillsbury refrigerated roll-out crust. I'm not afraid to admit defeat. One of my pie crusts was just too crumbly to roll, so I took a little help from the Dough Boy! But the little apple cut-outs came from my own crust, so props to me for something! Another mishap reared it's head when my great aunt Christy sliced into this pie. The filling never thickened up. It was very soupy. I dunno what went wrong. I've made apple pies before, and this has never happened. Any advice? Could it have been the recipe? Nevertheless (bringing back some old school vocab!), I stole a tiny bite of the slice of pie we took home to my dad. It was really good. The cranberries added a beautiful flavor throughout the pie. And the apples were cooked perfectly. I like when they still have a little bit of texture. The only suggestion my dad gave was that if I was making that pie for him, he'd want a little less cranberry and a little more apple. Other than that, it got great reviews!

Here are all of the recipes with my suggestions in orange italics (as always!):

  • Pumpkin Pie
    1 single-crust pastry
    2 eggs
    1 can (16 oz.) solid pack pumpkin (I used a 15 oz. can)
    ¾ cup granulated sugar
    1 teaspoon ground cinnamon
    ½ teaspoon salt
    ½ teaspoon ground ginger
    ¼ teaspoon ground cloves
    1 can (10 oz.) evaporated milk (Do they come in 10 oz. cans? I used two 5 oz. cans)


    Preheat oven to 425 F. Roll out pastry into round; press onto bottom and up sides of pie pan; trim edges and prick bottom with a fork (I suggest using pie weights). Bake 7-8 minutes (or until lightly golden).
    In large bowl, beat eggs; stir in pumpkin, sugar, salt, spices, and evaporated milk; pour into pie shell. Place pie on jelly roll pan; bake 15 minutes. Reduce oven temperature to 350 F. Continue baking 50-55 minutes or until knife inserted in center comes out clean (I baked mine just until the outside was set and the center was slightly jiggly, about 45 minutes). Cool completely on wire rack. Refrigerate.

  • Pecan Pie
    1 single-crust pastry
    1 cup light or dark corn syrup (I used King Syrup)
    3 eggs, lightly beaten
    ½ cup granulated sugar
    4 tablespoons (½ stick) butter, melted (I used salted butter)
    1 ½ teaspoons vanilla extract
    2 cups pecan halves or pieces

    Preheat oven to 425 F. Roll out pastry into circle; press onto bottom and up sides of pie pan; set aside.
    In large bowl, whisk together corn syrup, eggs, sugar, butter, and vanilla; mix well. Stir in pecans. Pour mixture into pie shell. Bake 15 minutes or until edges are set and center is still slightly liquid (I had to bake mine for about 25 minutes). Remove from oven; cool completely.

  • Cherry Lattice Pie
    1 double-crust pastry
    1 can (20 oz.) pitted tart cherries (I couldn't find a 20 oz. can; I measured 20 oz. from two 14 oz. cans)
    1 cup granulated sugar
    2 tablespoons butter or margarine
    1/3 cup cornstarch
    1/8 teaspoon salt
    ¼ teaspoon almond extract
    Zest of 1 lemon & 1 orange (I used 1 lemon and only half an orange)

    Preheat oven to 375 F. Roll out pastry disk into an 11” circle. Place in pie pan (Don‘t forget the pie weights). Bake 10-12 minutes or until light golden brown.
    Drain cherries, reserving 1 cup liquid. In saucepan, combine sugar, cornstarch, and salt; stir in cherry liquid and bring to a boil. Reduce heat and simmer until thickened, about 5 minutes. Add butter, citrus zest, and almond extract. (The recipe forgot to say this, but add the cherries now, as well.) Pour into pre-baked pie shell. Roll out second pastry disk into an 11” circle. With a knife or pastry wheel cut eight ½” strips. Place pastry strips horizontally, then vertically, across the top of the pie
    (CLICK HERE FOR ILLUSTRATED HELP) . Bake 30-35 minutes or until crust is golden brown. Cool before serving.

  • Apple Cranberry Pie
    6 cups sliced, peeled, and cored baking apples (about 6 large apples)
    (I used 3 Granny Smith apples and 2 Gala apples sliced ½” thick)
    ¾ cup dried cranberries
    1 tablespoon lemon juice
    ¾ cup granulated sugar
    2 tablespoons all-purpose flour
    1 teaspoon ground cinnamon
    1 double-crust pastry
    1 egg white, lightly beaten
    2 tablespoons coarse sugar (optional)

    Preheat oven to 400 F. In large bowl, combine apple slices, cranberries, and lemon juice. In small bowl, combine sugar, flour, and cinnamon. Sprinkle sugar mixture over apples; mix well to coat.
    Line deep dish pie plate with pie crust; fill with apple mixture. Using mini cutter, cut out vents in top pie crust. Place crust over filling; crimp and flute edges. Brush pie crust with egg white (and sprinkle with optional sugar).
    Bake 45-50 minutes or until apples are bubbly and crust is deep golden brown. Remove pie from oven. Cool pie in pan on cooling rack at least 1 hour before serving.

Wednesday, September 24, 2008

Almond Cupcakes w/ Chocolate Mousse Frosting & Cherry "Bang" Cake

HI WORLD! Wow, it's been a while, huh?? I've been SO freakin busy! Between working at the bakery and working with my parents at the Isle of Wight County Fair, I totalled over 70 hours last week! Needless to say I didn't have the time or the energy to bake. But this week, when I actually got home early from work I finally made the cupcakes that won the poll forever ago... Welllll... I didn't actually make the flavor that won. I didn't know it until the cupcakes were already in the oven, but my mom threw away my raspberries when she cleaned out the refrigerator. So instead, I filled the almond cupcakes with ganache and topped them with chocolate mousse. Then with the leftover batter, I made an 8-inch round cake. I poked holes in it while it was still warm and topped it with triple cherry jam. I frosted it with almond buttercream, which was actually delicious (and I don't even like regular buttercream!). Because I'm nice, here's the recipe for the Almond Raspberry Cream Cupcakes that you voted for, plus some pictures. And I'll post the recipe for what I named "Cherry Bang Cake" at the end of this post as well!

Ingredients for the cupcakes AND my beautiful new "tangerine" colored mixer!
Almond cuppies cooling...
Making the Cherry "Bang" Cake!
So I made lemonade from lemons... well no I didn't... but you get my point. Right?

The cupcake recipe is from Favorite Brand Name: 100 Best Cupcake Recipes. I invented the Cherry "Bang" Cake, mostly because I was bored. And because I had some Lollipop Tree Triple Cherry Jam laying around.

MY NOTES: To make the chocolate ganache and mousse topping: Melt 1/2 cup semi-sweet chocolate chips with 1/4 cup heavy cream in the microwave for 60 seconds. Stir until smooth. Cool to room temperature. Beat 2/3 cup cold heavy cream with a mixer on high speed until stiff. Fold half of the cooled ganache into the whipped cream. Fill the cupcakes with the rest of the ganache.

Almond Raspberry Cream Cupcakes
Makes 18 cupcakes

2 3/4 cups all-purpose flour
2 1/2 teaspoons baking powder
3/4 teaspoon salt
1 3/4 cups granulated sugar
3/4 cup (1 1/2 sticks) unsalted butter, softened
1 teaspoon almond extract
1 teaspoon vanilla
4 eggs
2 egg yolks
1 1/2 cups milk
Raspberry Cream (recipe follows)

Preheat oven to 350°F. Line 18 standard (2 1/2-inch) muffin cups with paper baking cups.
Combine flour, baking powder and salt in medium bowl. Beat granulated sugar, butter, almond extract and vanilla in large bowl with electric mixer at medium speed 4 minutes or until light and fluffy. Add eggs and egg yolks, one at a time, beating well after each addition. Alternately add flour mixture and milk, beating well after each addition (Eff that! Beat just until the flour is incorporate unless you want hockey pucks instead of cupcakes!). Spoon batter into prepared muffin cups, filling three-fourths full.

Bake 20 to 22 minutes (Mine were done at 19 minutes) or until toothpick inserted into centers comes out clean. Cool cupcakes in pans on wire racks 15 minutes. Remove from pans; cool completely on wire racks.
Prepare Raspberry Cream. Cut tops off cupcakes; spread with Raspberry Cream. Replace cupcake tops; sprinkle with powdered sugar.

Raspberry Cream: Beat 1 cup cold whipping cream and 1/4 cup powdered sugar in large bowl with electric mixer at high speed 5 minutes (It only takes about 2 minutes with my hand mixer) or until cream is thickened and almost stiff. Place 1 pint fresh raspberries in small bowl; mash lightly with fork. Gently fold raspberries into whipped cream mixture until well blended and evenly colored. Makes about 3 cups.


Overall rating on a scale of 1-5
Moistness: 5
Tenderness: 4
Frosting (Chocolate Mousse): 5


Cherry "Bang" Cake
1 (8-inch) round cake (You can bake the whole recipe above as 2 (8-inch) rounds, OR make 12 cupcakes plus 1 round like I did)
1/2 cup cherry jam
1-2 tablespoons hot water

Almond Buttercream
2 sticks unsalted butter, softened
3 cups confectioners' sugar, sifted
1 teaspoon almond extract

Make 12 cupcakes and pour the rest of the batter into a greased 8" round pan. Bake until toothpick inserted in the center comes out clean, 25-30 minutes, rotating pan halfway through. Remove pan from oven and cool on wire rack for 10 minutes. Remove cake from pan and place it on a serving dish. Poke holes in the warm cake with the end of a wooden spoon. Dilute 1/2 cup of cherry jam with 1 or 2 tablespoons of hot water. Spread over cake. Lift the cake plate up and bang it on the table a few times until most of the jam seeps into the holes. Cover tightly and refrigerate until cool. To make frosting, beat butter, sugar, and extract for 3 minutes on high speed until light and fluffy. (Makes enough to frost a 2-layer cake).

Overall rating on a scale of 1-5
Moistness: 5
Tenderness: 4
Frosting: 4 (I prefer it less sweet)

Friday, August 22, 2008

Good Morning Muffins

Saturday, Josh (my boyfriend) and I decided to take a day trip to Belle Isle in Richmond. It is one of our favorite places to go to relax on the rocks and explore the trails in the woods. I always wake up way before he does, so I decided to kill time by making some hearty muffins to take with us. I started with a recipe from 500 Cupcakes by Fergal Connolly. Neither Josh nor I really love raisins so I subbed some dried cherries, cranberries, and blueberries. I also added some chopped walnuts for a little crunch (Oh now I sound like Giada!). And I was fresh out of wheat bran, so I just added more oats. I ended up not pouring in all of the wet ingredients, because the batter was looking extremely loose. I had about 1/4 cup of wet ingredients left out. The muffins came out delicious and moist, but a little on the greasy side. Next time I'll probably reduce the oil by 1/4 cup. These muffins are a perfect portable snack for a road trip!

Oh yeah....... no pictures. Sorry.

MY NOTES: I omitted the wheat bran and added 1/3 cup MORE oats. I made my own buttermilk by mixing 2 tbsp. white vinegar with 2 cups minus 2 tbsp. whole milk. I substituted mixed berries for raisins. I added chopped walnuts. I got 16 muffins.

Oatmeal Muffins (Adapted from “500 Cupcakes” by Fergal Connolly)
Makes 12-16 muffins


2 cups all-purpose flour
1 cup packed light brown sugar
1 tbsp. baking powder
1 tsp. cinnamon
1/3 cup wheat bran (I omitted this)
1/3 cup rolled oats (I used 2/3 cup oats)
Pinch of salt
2 cups buttermilk
2 lightly beaten eggs
¾ cup vegetable oil
1 cup (6 oz.) raisins (I used ½ dried mixed berries (cherries, blueberries, cranberries) and plumped them in hot water for about 10 minutes)
½ cup chopped walnuts (My own addition)

Preheat the oven to 350F (175C). Grease or line a 12-cup regular muffin pan.
In a large bowl, combine the dry ingredients with a wooden spoon. In a large measuring cup, beat the buttermilk, eggs, and oil with an electric mixer until combined.
Pour wet ingredients into the dry ingredients and stir until almost blended. Fold in the raisins (and nuts).
Spoon the mixture into the prepared pan. Bake for 20 minutes. Remove pan from the oven and cool for 5 minutes. Then remove the muffins and cool on a rack.
Store in airtight container for up to 2 days (mine were still good after 4 days!), or freeze for up to 3 months.


Overall rating on a scale of 1-5
Moistness: 5
Tenderness: 5
Frosting: [none]

Sunday, June 29, 2008

Daring Bakers Challenge - Danish Braid (1 Sweet & 1 Savory)

This month was a great challenge. I'd definitely say it's my second favorite, only rivaled by the Perfect Party Cake. I was extremely intimidated when I found out that the challenge involved making your own puff pastry... AND also using yeast. I'd never done either, and I had just recently seen the episode of Good Eats about puff pastry. Alton Brown made it clear that making your own puff pastry is a hassle. So, after reading the recipe about 10 times I finally mustered up enough courage to get started. I knew I didn't want to do the apple filling, and Bing cherries were on sale... How convenient! I looked up a recipe for cherry filling and made that 2 days ahead of time. It's supposed to be for pies, but if you drain off most of the liquid and pulse it in a food processor, it makes a great filling for the danish. The next day I got started on the dough, but not before reading other people's stories on the DB forum. A lot of people were saying that their dough was really sticky, their yeast wasn't activating, their braid wasn't rising... UH OH! I was really scared! But alas, my dough situation went smoothly. My only problem was that I had to add 1/4 cup more flour before I could knead the dough, because it was quite sticky. Here's the whole story of my Cherry Cheese Braid!
UPDATE: I used the 2nd half of my dough to make a savory Spinach & Feta Braid! Pictures and recipe are at the bottom! :)

Ingredients for the dough and the butter block.

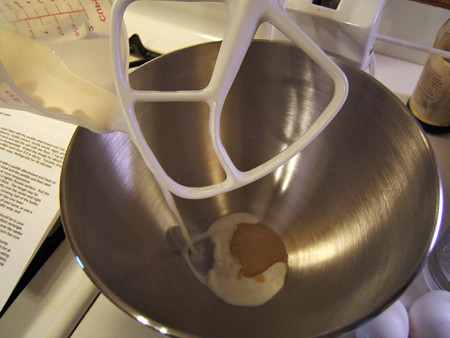
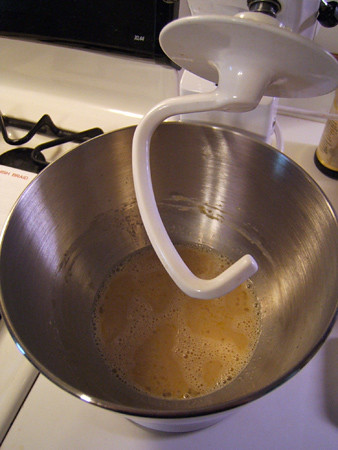
Pouring the milk into the yeast.

Yeast mixture ready for flour to be added.

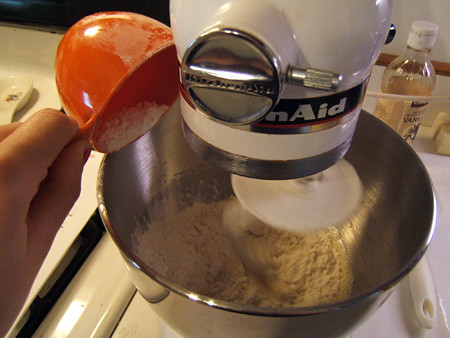
Adding flour 1 cup at a time.

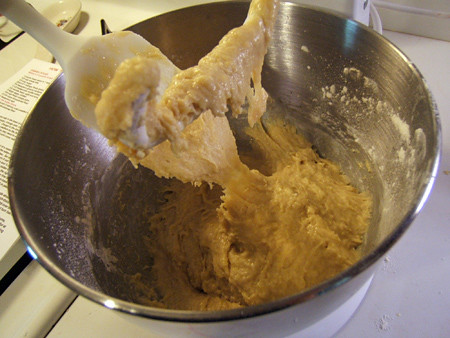
It was REALLY sticky so I added 1/4 cup more flour.

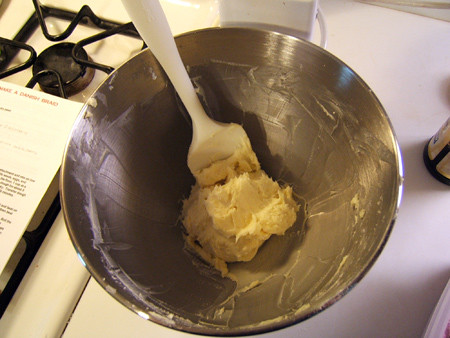
Kneaded and ready to rest overnight in the fridge.

Butter mixture ready to go on the dough.

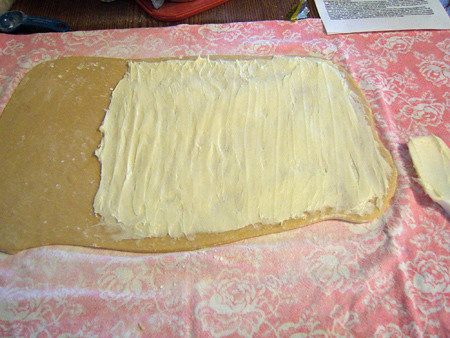
Butter spread onto the dough (This was tricky, I had to use my hands).

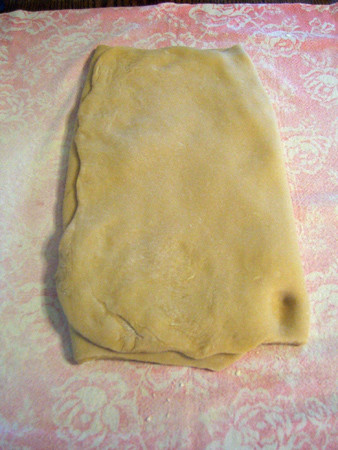
Folded in thirds for the 1st turn.

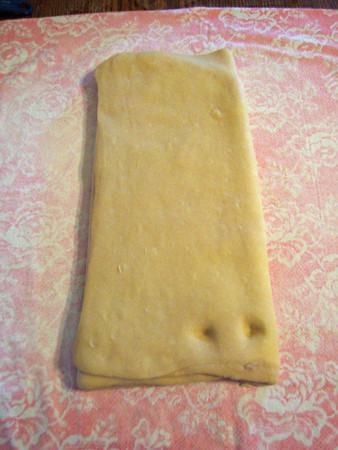
2nd turn.

By the 3rd turn, you could see butter through the thin layers of dough.

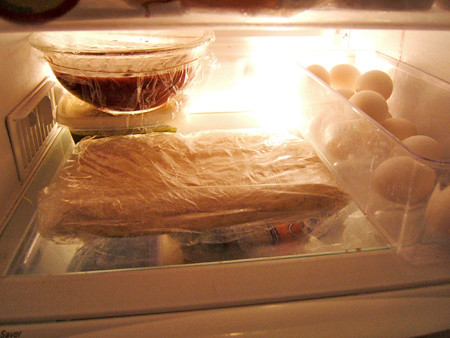
After the 4th turn, it stayed overnight in the fridge.

Rolled out, but nowhere near 15x20!

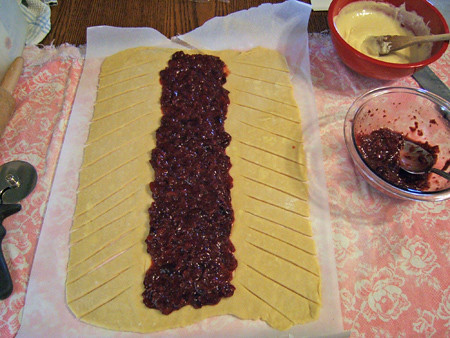
Cherry filling added.

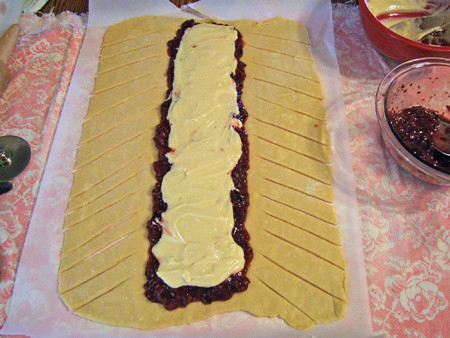
Cream cheese filling on top.

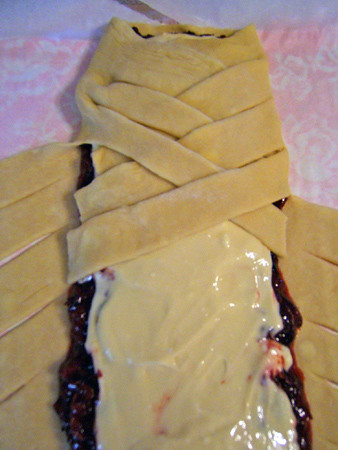
The braiding was the most fun part! :)

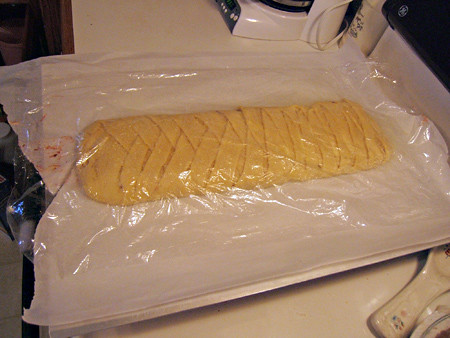
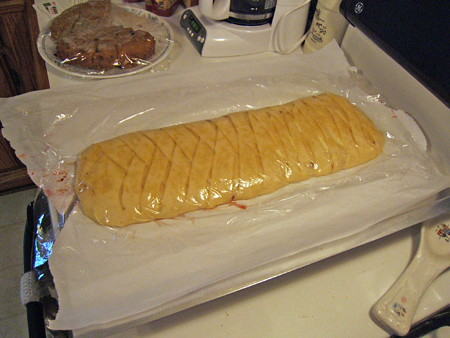
The braid ready to be proofed.

After 2 hours, it's supposed to be doubled in volume... well... it wasn't.
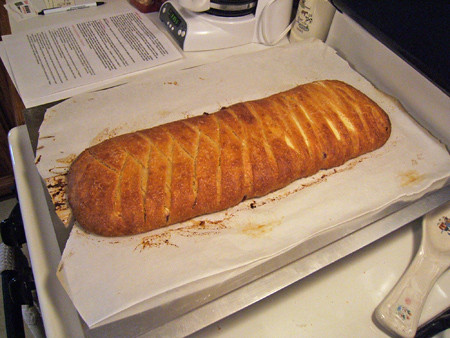
But I threw it in the oven anyway.

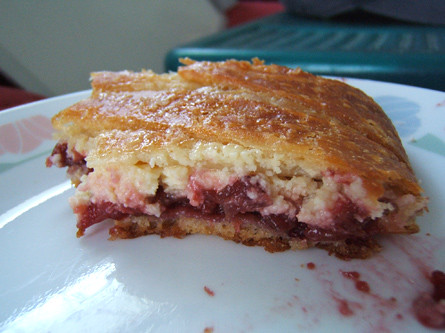
My Cherry Cheese Braid is finally finished!

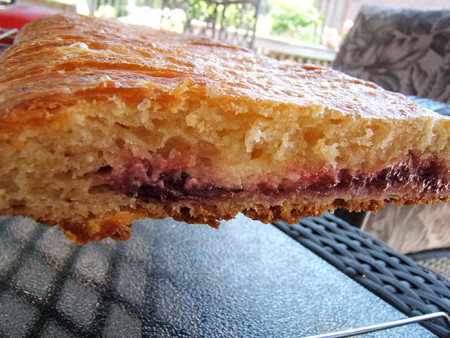
It's not very flaky...

But it's EXTREMELY delicious!!!

Thanks so much to Kelly of Sass & Veracity and Ben of What’s Cookin’ for choosing a great recipe! My notes are in orange italics.

DANISH DOUGH
Makes 2-1/2 pounds dough (Enough for TWO braids)

Ingredients
For the dough (Detrempe)
1 ounce fresh yeast or 1 tablespoon active dry yeast (This is 1 packet + part of another packet)
1/2 cup whole milk
1/3 cup sugar
Zest of 1 orange, finely grated (omit)
3/4 teaspoon ground cardamom (omit)
1-1/2 teaspoons vanilla extract (increase to 2 1/2 teaspoons)
1/2 vanilla bean, split and scraped (omit)
2 large eggs, chilled
1/4 cup fresh orange juice (substitute water)
3-1/4 cups all-purpose flour
1 teaspoon salt

For the butter block (Beurrage)
1/2 pound (2 sticks) cold unsalted butter
1/4 cup all-purpose flour

DOUGH
Combine yeast and milk in the bowl of a mixer fitted with the paddle attachment and mix on low speed. Slowly add sugar, orange zest, cardamom, vanilla extract, vanilla seeds, eggs, and orange juice(water). Mix well. Change to the dough hook and add the salt with the flour, 1 cup at a time, increasing speed to medium as the flour is incorporated. Knead the dough for about 5 minutes, or until smooth. You may need to add a little more flour if it is sticky (I had to add 1/4 cup more). Transfer dough to a lightly floured baking sheet and cover with plastic wrap. Refrigerate for 30 minutes.
Without a standing mixer: Combine yeast and milk in a bowl with a hand mixer on low speed or a whisk. Add sugar, orange zest, cardamom, vanilla extract, vanilla seeds, eggs, and orange juice and mix well. Sift flour and salt on your working surface and make a fountain. Make sure that the “walls” of your fountain are thick and even. Pour the liquid in the middle of the fountain. With your fingertips, mix the liquid and the flour starting from the middle of the fountain, slowly working towards the edges. When the ingredients have been incorporated start kneading the dough with the heel of your hands until it becomes smooth and easy to work with, around 5 to 7 minutes. You might need to add more flour if the dough is sticky.

BUTTER BLOCK
1. Combine butter and flour in the bowl of a mixer fitted with a paddle attachment and beat on medium speed for 1 minute. Scrape down the sides of the bowl and the paddle and then beat for 1 minute more, or until smooth and lump free. Set aside at room temperature.
2. After the detrempe has chilled 30 minutes, turn it out onto a lightly floured surface. Roll the dough into a rectangle approximately 18 x 13 inches and ¼ inch thick. The dough may be sticky, so keep dusting it lightly with flour. Spread the butter evenly over the center and right thirds of the dough (The butter stuck to the dough and was pulling the dough all over the floured surface. I had to use my fingers to smear the butter around). Fold the left edge of the detrempe to the right, covering half of the butter. Fold the right third of the rectangle over the center third. The first turn has now been completed. Mark the dough by poking it with your finger to keep track of your turns, or use a sticky and keep a tally. Place the dough on a baking sheet, wrap it in plastic wrap, and refrigerate for 30 minutes.
3. Place the dough lengthwise on a floured work surface. The open ends should be to your right and left. Roll the dough into another approximately 13 x 18 inch, ¼-inch-thick rectangle. Again, fold the left third of the rectangle over the center third and the right third over the center third. No additional butter will be added as it is already in the dough. The second turn has now been completed. Refrigerate the dough for 30 minutes.
4. Roll out, turn, and refrigerate the dough two more times, for a total of four single turns. Make sure you are keeping track of your turns. Refrigerate the dough after the final turn for at least 5 hours or overnight. The Danish dough is now ready to be used. If you will not be using the dough within 24 hours, freeze it. To do this, roll the dough out to about 1 inch in thickness, wrap tightly in plastic wrap, and freeze. Defrost the dough slowly in the refrigerator for easiest handling. Danish dough will keep in the freezer for up to 1 month.

APPLE FILLING (I used cherry filling and cream cheese filling; Both recipes are right below this)
Makes enough for two braids

Ingredients
4 Fuji or other apples, peeled, cored, and cut into ¼-inch pieces
1/2 cup sugar
1 tsp. ground cinnamon
1/2 vanilla bean, split and scraped
1/4 cup fresh lemon juice
4 tablespoons unsalted butter

Toss all ingredients except butter in a large bowl. Melt the butter in a sauté pan over medium heat until slightly nutty in color, about 6 - 8 minutes. Then add the apple mixture and sauté until apples are softened and caramelized, 10 to 15 minutes. If you’ve chosen Fujis, the apples will be caramelized, but have still retained their shape. Pour the cooked apples onto a baking sheet to cool completely before forming the braid. (If making ahead, cool to room temperature, seal, and refrigerate.) They will cool faster when spread in a thin layer over the surface of the sheet. After they have cooled, the filling can be stored in the refrigerator for up to 3 days. Left over filling can be used as an ice cream topping, for muffins, cheesecake, or other pastries.

CHERRY FILLING (recipe from cooksrecipes.com)
Makes enough for 1 braid; Can be made a few days in advance.

Ingredients
4 cups Bing cherries, rinsed, stemmed and pitted
1 cup granulated sugar
1/4 cup fresh lemon juice
4 tablespoons cornstarch
1/2 teaspoon almond extract

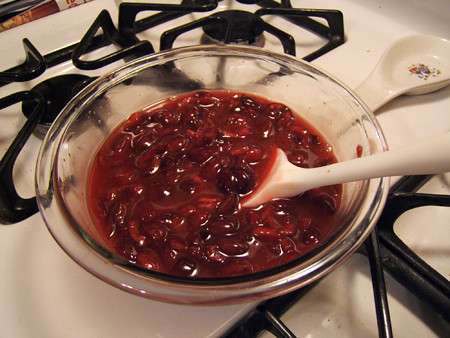
Combine cherries, sugar and lemon juice in a mixing bowl, stir and let sit for at least 6 hours, stirring occasionally to dissolve sugar. Drain off and reserve cherry syrup.
Combine a small amount of syrup to cornstarch to make a paste, then whisk cornstarch paste back into syrup. Pour mixture into a saucepan and cook over medium heat, stirring, until the sauce thickens (about 5 minutes). Stir in the drained cherries and almond extract. Cool, and store in sterilized, airtight jars or freeze in heavy freezer bags. (I kept mine in a glass bowl, covered with plastic wrap for 2 days before using it.)
(Before using in the braid, drain most of the liquid off the cherries (reserve liquid as a delicious topping on ice cream!), and pulse cherries in a food processor until desired consistency. I left mine kinda chunky.)

CREAM CHEESE FILLING (my own recipe)
Makes enough for 1 braid; Make right before you're ready to assemble the braid.

Ingredients
1 8 oz. package cream cheese, softened
1 egg, separated
1/3 cup sugar
1 teaspoon vanilla extract

Put cream cheese, egg yolk, and sugar into a bowl and mix until well combined. Stir in vanilla. Save egg white to brush on top of the braid.

DANISH BRAID
Divide your Danish dough into 2 equal sections. Save the other half for another braid or other Danish pastries.
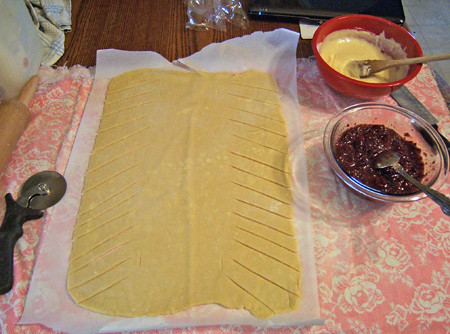
1. Line a baking sheet with a silicone mat or parchment paper. On a lightly floured surface, roll the Danish Dough into a 15 x 20-inch rectangle, ¼ inch thick (Mine was 1/4 inch thick, but a few inches smaller than 15x20). If the dough seems elastic and shrinks back when rolled, let it rest for a few minutes, then roll again. Place the dough on the baking sheet.

2. Along one long side of the pastry make parallel, 5-inch-long cuts with a knife or rolling pastry wheel, each about 1 inch apart (My cuts were less than 5 inches long). Repeat on the opposite side, making sure to line up the cuts with those you’ve already made.
3. Spoon the filling you’ve chosen to fill your braid down the center of the rectangle. Starting with the top and bottom “flaps”, fold the top flap down over the filling to cover. Next, fold the bottom “flap” up to cover filling. This helps keep the braid neat and helps to hold in the filling. Now begin folding the cut side strips of dough over the filling, alternating first left, then right, left, right, until finished. Trim any excess dough and tuck in the ends.
4. Whisk the egg white from the cream cheese filling and lightly brush it on the top of the braid. Sprinkle coarse sugar on top.

Proofing and Baking
1. Spray cooking oil (Pam…) onto a piece of plastic wrap, and place over the braid. Proof at room temperature or, if possible, in a controlled 90 degree F environment for about 2 hours, or until doubled in volume and light to the touch (Mine didn't double in volume, but it was very VERY soft to the touch).
2. Near the end of proofing, preheat oven to 400 degrees F. Position a rack in the center of the oven.3. Bake for 10 minutes, then rotate the pan so that the side of the braid previously in the back of the oven is now in the front. Lower the oven temperature to 350 degrees F, and bake about 15-20 minutes more, or until golden brown (Mine was very brown, but did not taste burned at all). Cool and serve the braid either still warm from the oven or at room temperature. The cooled braid can be wrapped airtight and stored in the refrigerator for up to 2 days, or freeze for 1 month.

Don't forget the savory Spinach & Feta Braid! My cousin, Stephanie C., and I created this with the 2nd half of the dough. Yeah, I know the dough had vanilla in it, but you could barely taste it. I think the proofing step did nothing for this braid. It didn't double in volume. It was exactly the same, but the dough was softer because it came up to room temp. However, while it was proofing, the spinach let out a lot of moisture, soaking the entire bottom of the braid in green spinach juice. No worries though! It came out very VERY tasty!

Filling recipe courtesy of Perfect Greek, A Collection Of Over 100 Essential Recipes from Parragon Publishing.

Ingredients
2 Tbsp olive oil
1 large onion, finely chopped
2 lb 4 oz/1 kg fresh young spinach leaves, washed OR 1 lb 2 oz/500 g frozen spinach (We used 2 10 oz packages of frozen spinach. Make sure you drain it VERY well!)
4 Tbsp chopped fresh flat-leaf parsley (from my herb garden! yay!)
2 Tbsp chopped fresh dill (also from my herb garden!)
3 eggs, beaten
7 oz/200g authentic Greek feta cheese (We used an 8 oz package, but next time I think I'll use a bit more. Here's a tip to save $$: Look for feta cheese in the refrigerated case with the Kraft parmesan cheese and the Bertolli refrigerated products. It's A LOT cheaper than getting it in the case with the exotic cheeses!)
salt and pepper (We used about a pinch of each... NOT ENOUGH! I suggest using 1 tsp of salt and 1/2 teaspoon of pepper)

Directions
1. Heat the oil in a pan, add the onion, and fry until softened. Add the fresh spinach if using, with only the water clinging to the leaves after washing, or the frozen spinach and cook for 2-5 minutes, until just wilted. Remove from the heat and let cool.
2. When the mixture has cooled, add the parsley, dill, and eggs. Crumble in the cheese, season with salt and pepper, and mix well. Mixture is ready to be used in the braid!