Flour Child Bakery opens in Virginia Beach!

My mom and I just opened a bakery in Virginia Beach!! "Like" us to stay updated! If you care to read our blog, it's flourchildbakery.blogspot.com.


Showing posts with label CRANBERRY. Show all posts

Thursday, January 29, 2009

Cranberry Orange Zest Muffins

I tried to stop myself from baking today. I did, I really tried. It's an ongoing debate happening in my head every day. I usually weigh the pros and cons... "But these would be so delicious..." "But we still have cupcakes leftover..." "But I want to use up these oranges..." "But you are baking TWO cakes this weekend!" This morning I lost the battle against myself... Or did I win it?? Who cares! I made these muffins and they are freakin good! Did I use "freakin good" in my last post too? Oh well, it's a very useful and accurate description. These muffins are soft and light, with the perfect amount of orange flavor. The cranberry puree and dried cranberries give them a great burst of tanginess. The addition of coarse sugar on top gives them that perfect muffin-top crunch. These would be perfect for breakfast, but they were mighty delicious as my afternoon snack!


I used a recipe from The Taste of Home Baking Book for basic muffin guideness, but I pretty much did my own thing.

Cranberry Orange Zest Muffins
Makes 8

1 1/2 cups all-purpose flour
1/2 cup sugar
1 teaspoon baking powder
1/4 teaspoon baking soda
1/4 teaspoon salt
2 eggs
1/2 cup sour cream
1/4 cup unsalted butter, melted
1/2 teaspoon vanilla extract
Zest of 1 orange
1/2 cup dried cranberries, divided
1/4 cup orange juice
Coarse sugar, for sprinkling (optional)

1. Preheat oven to 375F. Line a 12-cup muffin pan with 8 paper liners.
2. Combine 1/4 cup dried cranberries with orange juice in a microwave safe measuring cup or bowl. Microwave 1 minute or until mixture is hot. Let sit for 5 minutes to plump the cranberries. Drain off orange juice and pulse cranberries a few times in a food processor.
3. In a large bowl, combine the flour, sugar, baking powder, baking soda, and salt. In another bowl, whisk the eggs, sour cream, melted butter, vanilla, orange zest, and cranberry purée; Stir into dry ingredients until almost completely moistened. Fold in the remaining 1/4 cup dried cranberries until incorporated.
4. Fill muffin cups 2/3 to 3/4 full. Generously sprinkle coarse sugar over the tops. Bake for 20-24 minutes or until tops are lightly golden and a toothpick inserted in the center comes out clean. Cool for 5 minute in pan before removing to a wire rack. Serve warm.

Thursday, December 18, 2008

The Crunchy Cookie Experiment

Whoa! Whoa! Whoa! I have a reputation to keep, so before you go and start getting funky ideas about me in your head, I do NOT like crunchy cookies! I'd prefer to eat a bowl of raw cookie dough, but if they must be baked I say the chewier the better! This experiment is for my dad. He loooves him some crunchy cookies (I'm so glad I didn't inherit that psychotic gene). A few days ago over dinner he requested crunchy cookies. Not just any crunchy cookies. He described cookies with white chocolate chips and cranberries. Then he went on to specify the ratio of white chocolate to cranberries that he'd prefer. My dad makes it so easy to bake for him! So anyway, I woke up this morning and my brain was on cookies. I hopped on the internet and googled about this strange phenomenon that is the "crunchy cookie lover." I found there are actually a lot of people who enjoy their cookies burnt, excuse me, crunchy! I came upon a forum discussing the elusive perfect crunchy cookie recipe (kinda like how us cake people are always looking for the perfect vanilla cake recipe ...hmmm). I decided to compare the first three recipes I found. I started with King Arthur Flour's Classic Crunchy Cookie from The King Arthur Flour Cookie Companion. The other two recipes come from this article about making the perfect cookie. I used the Thin & Crispy recipe and the Thick & Crunchy recipe.

Let's get started with the process, and I'll let you in on the results at the end of the post.

First, we have three bowls of add-ins, because what good is cookie dough with nothing in it???
White chocolate chips and cranberries (for dad), semi-sweet and peanut butter chips, and mini semi-sweet chips and pecans.Cookie dough for KAF's Crunchy Cookies, Thin & Crispy Cookies, and Thick & Chewy Cookies...


Scooped and ready for the oven...


Each cookie after 6 minutes of baking...


Cooling and looking gross... I mean yummy... if you're weird...

And that's the Crunchy Cookie Experiment!
And the results are in! Surprisingly none of these cookies are the kind of "crunchy" both I and my dad were expecting. Dad says in order to be the perfect crunchy cookie, they have to snap when you break them. These cookies merely bend then break softly. My opinion is that KAF's Classic Crunchy has potential to be the crunchiest cookie. A few minutes added to the baking time could equal success. My mom thinks the Thick & Crunchy is the best cookie she's ever eaten. That's probably because it has the most butter, and she was born in North Carolina! Dad thinks the Thin & Crispy is the crunchiest... But when I tasted it, it was almost stick-to-your-teeth chewy. Maybe keeping them in an airtight container is softening them... Hmmm?? I guess the conclusion I must come to is that my dad needs a burnt cookie in order to be satisfied. Or at least a package of Keebler Chips Deluxe! Now if I could only wrangle the recipe from that little elf......

* = my adaptations
  • King Arthur Flour’s Classic Crunchy Cookies (halved) – (I got 15 cookies using a #30 disher)
    1/4 cup (1/2 stick) unsalted butter
    1/2 cup brown sugar
    1/4 cup granulated sugar
    1 teaspoon vanilla
    1/2 tsp. salt
    1/2 tablespoon (1 1/2 teaspoons) white or cider vinegar
    1/2 egg (mix a whole egg with a fork and use half of it)
    1/2 teaspoon baking soda
    1 cup all-purpose flour
    1 cup (6 oz.) white chocolate chips*
    1/2 cup dried cranberries*

    Preheat oven to 350 degrees. Line several baking sheets with parchment paper or silicone mats. In a large bowl, using an electric mixer on medium speed, beat butter, shortening, brown sugar, granulated sugar, vanilla extract, salt and vinegar. Beat in egg until well combined. Reduce speed to low and add baking soda and flour, and mix until just combined. Stir in chocolate chips.
    Drop dough by rounded tablespoonfuls 2 inches apart onto prepared baking sheets. Bake for 12 to 14 minutes, until golden brown. (I baked 2 pans at a time in the top and bottom 1/3 of the oven. I rotated them at 6 and 12 minutes. My total baking time was 17 minutes!) Remove cookies from oven, cool on baking sheets for 2 minutes, then transfer to a wire rack to cool completely.

  • Thin & Crispy Cookies - (I got 14 cookies using a #30 disher. The cookies were HUGE. Next time I’d use a tablespoon to measure them.)
    1/2 cup (1 stick) unsalted butter, melted and cooled to room temp.
    1/2 cup brown sugar
    1/3 cup granulated sugar
    1/2 teaspoon vanilla
    3 tablespoons water
    1/4 teaspoon salt
    3/4 teaspoon baking soda
    1 cup all-purpose flour
    1/2 cup (3 oz.) semi-sweet chocolate chips*
    1/2 cup (3 oz.) peanut butter chips*

    Preheat oven to 300 degrees. Line several baking sheets with parchment paper.
    In a bowl, with an electric mixer on medium speed, beat butter, brown sugar, and granulated sugar until well blended. Beat in 3 tablespoons water and the vanilla until smooth, scraping down sides of bowl as needed.
    In another bowl, mix flour, baking soda, and salt. Stir or beat into butter mixture until well incorporated. Stir in chocolate chips and cranberries.
    Drop dough in 1-tablespoon portions, 2 inches apart.
    Bake until cookies are lightly browned, 18 to 20 minutes. (I baked 2 pans at a time in the top and bottom 1/3 of the oven. I rotated them at 6 and 12 minutes. My total baking time was 19 minutes.)
    Let stand on pans to firm up, 2 to 5 minutes; then transfer to racks to cool completely.

  • Thick & Crunchy Cookies – (I got 29 small cookies)
    2/3 cup unsalted butter, melted and cooled to room temp.
    1/2 cup brown sugar
    1/3 cup granulated sugar
    1/2 teaspoon vanilla
    1/4 teaspoon salt
    3/4 teaspoon baking soda
    1 cup all-purpose flour
    1 cup (6 oz.) mini chocolate chips*
    1/2 cup chopped pecans*

    Preheat oven to 300 degrees. Line several baking sheets with parchment paper.
    In a bowl, with an electric mixer on medium speed, beat butter, brown sugar, granulated sugar, and vanilla until well blended and smooth; scraping down sides of bowl as needed.
    In another bowl, mix flour, baking soda, and salt. Stir or beat into butter mixture until well incorporated. Stir in chocolate chips and cranberries.
    Dough will be crumbly; pinch into 1-­tablespoon lumps and drop about 2 inches apart. (I scooped mine out with a tablespoon and rolled them into balls.)
    Bake until cookies are an even golden brown, 18 to 20 minutes. (I baked 2 pans at a time in the top and bottom 1/3 of the oven. I rotated them at 6 and 12 minutes. My total baking time was 18 minutes.)
    Let stand on pans to firm up, 2 to 5 minutes; then transfer to racks to cool completely.

Sunday, December 14, 2008

There's Always Time For Pie!

I've been busy... really REALLY busy. Did I mention how busy I've been? Over the span of 3 days last week, I made 4 pies and a birthday cake for our family's annual get-together at my great aunt Christy and uncle Charlie's house. We've accurately dubbed the holiday "Thanksmas." It's between Thanksgiving and Christmas... get it??? It's a holiday we made up in order to see family we don't get to see during the other holidays. I digress. This is about pies. Lately, I've been on a make-my-own-pie-crust kick. It's been fun so far. No major disasters as of yet (One went in the trash, but I'm learning from my mistakes). Anywho, while shopping at Michael's about a month ago, I found the neatest ceramic pie plates. Each plate has a recipe stamped on the inside of it. I thought it would be really nice if I made the pies according to those recipes and gave them the pie plates as a gift! So I did it. And I'm going to post all the photos and recipes in this post. Because last week when I posted all of those cookie recipes separately, I had a lot of unsubscribers saying I update too frequently...... whatever weirdos.

Wednesday evening I cranked out six, count 'em, SIX pie crusts! I was quite proud of myself. One lesson I definitely learned is to make sure the pieces of butter in the pie crust are small! Some of my pieces were as big as [small] marbles. They melted while baking resulting in holes in the crust and a burnt butter smell in the oven. No good at all! Don't stop cutting in the butter until the biggest lumps are the size of peas.

Thursday I got started on the baking. The first pie crust I rolled out was picture perfect. That is, until it went into the oven to be pre-baked. The instructions said just to prick it with a fork, didn't mention a thing about pie weights. The crust shrunk down into the pie pan. I tried to save it as best I could, but it was still kinda ugly. My boyfriend tried to make me feel better by saying it looked more homemade that way. I prefer to say "rustic." The first pie was the pumpkin pie. The recipe made a little too much filling, so I poured the extra into two small ramekins and baked them alongside the pie. Since the pie was going to be given away I couldn't exactly steal a bite, so I used the ramekins as my tasting portions. The filling was definitely delicious. The ginger flavor was my favorite part. (What's with me and ginger this season??) I recently got word from the recipients of this pie that my uncle Lanny ate ALL of it! My aunt Sherry and my cousins, Stephanie and Samantha, didn't even get a taste! I guess I'm flattered... Lol.

The second pie I made was a pecan pie. This was my first time ever making a real pecan pie, so I was nervous. I baked it exactly according to the directions. I took it out when the edges were set and the center was still jiggly. It smelled SO good while it was cooling! I gave this pie to my Aunt Michelle. She loves pecan pies, so I hoped I did it right for her. She said it was baked exactly how she likes it. Still gooey in the middle, not chewey and overbaked. She was nice enough to offer her pie up to everyone at Christy's for dessert Saturday night (alongside the Boston Cream birthday cake I made for Tammy's birthday that got devoured within the hour!).


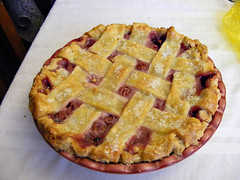
The next pie on my to-do list was the cherry lattice pie. It was my first time attemping a lattice top pie, and I was especially nervous using homemade pie crust because it's very delicate. A few of the strips broke while I was putting them on the pie. Then the warm cherry filling started to soften the strips while I was folding them into the lattice pattern. It was extremely nerve racking, but I was able to mend all the broken strips. I ended up with a very rustic looking pie. The filling was so good. I snuck a little taste while I was making it. Homemade cherry filling is the BEST! I didn't get a picture of the inside of the pie because my aunt Tammy was not in the mood to share. But that's okay, because she texted me the next day and said it was really delicious!

The fourth and final pie was the one I was most excited to make. The apple cranberry pie was a sinch to put together. The smell of fresh apples and cinnamon is one of my favorite scents in the whole wide world. It comes second in my list of favorite smells only to vanilla cake batter. Now that stuff is pure heaven. But more about the pie. You may be thinking, "Wow, that top crust looks so flaky and perfect." Well remember that pie crust I told you that took a trip to the garbage can? Yeah... It was the top crust on this pie. The one you see in the photo is a Pillsbury refrigerated roll-out crust. I'm not afraid to admit defeat. One of my pie crusts was just too crumbly to roll, so I took a little help from the Dough Boy! But the little apple cut-outs came from my own crust, so props to me for something! Another mishap reared it's head when my great aunt Christy sliced into this pie. The filling never thickened up. It was very soupy. I dunno what went wrong. I've made apple pies before, and this has never happened. Any advice? Could it have been the recipe? Nevertheless (bringing back some old school vocab!), I stole a tiny bite of the slice of pie we took home to my dad. It was really good. The cranberries added a beautiful flavor throughout the pie. And the apples were cooked perfectly. I like when they still have a little bit of texture. The only suggestion my dad gave was that if I was making that pie for him, he'd want a little less cranberry and a little more apple. Other than that, it got great reviews!

Here are all of the recipes with my suggestions in orange italics (as always!):

  • Pumpkin Pie
    1 single-crust pastry
    2 eggs
    1 can (16 oz.) solid pack pumpkin (I used a 15 oz. can)
    ¾ cup granulated sugar
    1 teaspoon ground cinnamon
    ½ teaspoon salt
    ½ teaspoon ground ginger
    ¼ teaspoon ground cloves
    1 can (10 oz.) evaporated milk (Do they come in 10 oz. cans? I used two 5 oz. cans)


    Preheat oven to 425 F. Roll out pastry into round; press onto bottom and up sides of pie pan; trim edges and prick bottom with a fork (I suggest using pie weights). Bake 7-8 minutes (or until lightly golden).
    In large bowl, beat eggs; stir in pumpkin, sugar, salt, spices, and evaporated milk; pour into pie shell. Place pie on jelly roll pan; bake 15 minutes. Reduce oven temperature to 350 F. Continue baking 50-55 minutes or until knife inserted in center comes out clean (I baked mine just until the outside was set and the center was slightly jiggly, about 45 minutes). Cool completely on wire rack. Refrigerate.

  • Pecan Pie
    1 single-crust pastry
    1 cup light or dark corn syrup (I used King Syrup)
    3 eggs, lightly beaten
    ½ cup granulated sugar
    4 tablespoons (½ stick) butter, melted (I used salted butter)
    1 ½ teaspoons vanilla extract
    2 cups pecan halves or pieces

    Preheat oven to 425 F. Roll out pastry into circle; press onto bottom and up sides of pie pan; set aside.
    In large bowl, whisk together corn syrup, eggs, sugar, butter, and vanilla; mix well. Stir in pecans. Pour mixture into pie shell. Bake 15 minutes or until edges are set and center is still slightly liquid (I had to bake mine for about 25 minutes). Remove from oven; cool completely.

  • Cherry Lattice Pie
    1 double-crust pastry
    1 can (20 oz.) pitted tart cherries (I couldn't find a 20 oz. can; I measured 20 oz. from two 14 oz. cans)
    1 cup granulated sugar
    2 tablespoons butter or margarine
    1/3 cup cornstarch
    1/8 teaspoon salt
    ¼ teaspoon almond extract
    Zest of 1 lemon & 1 orange (I used 1 lemon and only half an orange)

    Preheat oven to 375 F. Roll out pastry disk into an 11” circle. Place in pie pan (Don‘t forget the pie weights). Bake 10-12 minutes or until light golden brown.
    Drain cherries, reserving 1 cup liquid. In saucepan, combine sugar, cornstarch, and salt; stir in cherry liquid and bring to a boil. Reduce heat and simmer until thickened, about 5 minutes. Add butter, citrus zest, and almond extract. (The recipe forgot to say this, but add the cherries now, as well.) Pour into pre-baked pie shell. Roll out second pastry disk into an 11” circle. With a knife or pastry wheel cut eight ½” strips. Place pastry strips horizontally, then vertically, across the top of the pie
    (CLICK HERE FOR ILLUSTRATED HELP) . Bake 30-35 minutes or until crust is golden brown. Cool before serving.

  • Apple Cranberry Pie
    6 cups sliced, peeled, and cored baking apples (about 6 large apples)
    (I used 3 Granny Smith apples and 2 Gala apples sliced ½” thick)
    ¾ cup dried cranberries
    1 tablespoon lemon juice
    ¾ cup granulated sugar
    2 tablespoons all-purpose flour
    1 teaspoon ground cinnamon
    1 double-crust pastry
    1 egg white, lightly beaten
    2 tablespoons coarse sugar (optional)

    Preheat oven to 400 F. In large bowl, combine apple slices, cranberries, and lemon juice. In small bowl, combine sugar, flour, and cinnamon. Sprinkle sugar mixture over apples; mix well to coat.
    Line deep dish pie plate with pie crust; fill with apple mixture. Using mini cutter, cut out vents in top pie crust. Place crust over filling; crimp and flute edges. Brush pie crust with egg white (and sprinkle with optional sugar).
    Bake 45-50 minutes or until apples are bubbly and crust is deep golden brown. Remove pie from oven. Cool pie in pan on cooling rack at least 1 hour before serving.

Saturday, November 22, 2008

IronCupcake_004: Pear Cupcakes w/ Cranberry Orange Filling


Iron Cupcake:Earth
Theme: Cranberry
My entry: Spiced Pear Cupcakes w/ Cranberry-Orange Filling
Voting begins: Sunday, November 30 at 8 pm Central @ http://mkecupcakequeen.blogspot.com and will be open through Friday, December 5 at 12 noon Central.


After some major brainstorming and some careful consideration, I came up with an entry for this month's Iron Cupcake:Earth challenge! My mom brought some pears home from a roadtrip and they became my initial inspiration. I really wanted to stick with seasonal flavors, so I wanted to do a spiced pear cupcake. I'm a huge fan of cranberry and orange. I decided to use those flavors in the filling and frosting. My frosting came out a bit softer than I wanted (because I'm retarded and added a few tablespoons of heavy cream for some reason...???) But if you make it sans heavy cream, the frosting will be thick and gorgeous! These cupcakes are fantastic! They're perfectly moist. All of the flavors go well together, and how can you go wrong with cream cheese filling? They taste just like Thanksgiving! Here are my photos and the recipe.

Start by soaking your cranberries in fresh orange juice.Peel and core your pears.
Scoop the batter into the cups.
Here are the cuppies cooling!
Making the filling...
Mmmmm creamy cranberry-orange goodness!
Ladies and gentlemen, I present to you a visial runthrough of "The Cone Method."
After filling your cupcakes, you should have about 1/2 leftover to use in the frosting.
Then voila! Delicious Thanksgiving cupcakes!
How about an inside view!

Voting will begin Sunday, November 30 at 8 pm (Central) at NO ONE PUTS CUPCAKE IN A CORNER, http://mkecupcakequeen.blogspot.com/, and will be open through Friday, December 5 at 12 noon (Central).

Recipes were created by yours truly!

Pear Cupcakes with Cranberry Orange Filling
Makes 16-18

CUPCAKES
1 1/2 cups finely diced pears (1 1/2 - 2 pears)
1/2 cup (1 stick) unsalted butter, softened
3/4 cup light brown sugar, packed
Pinch of orange zest
1 large egg
3/4 cup milk
1/2 teaspoon vanilla
2 cups all-purpose flour
1 teaspoon cinnamon
1/4 teaspoon nutmeg, fresh ground if available
1/2 teaspoon salt
1/2 teaspoon baking soda

FILLING
8 oz cream cheese, softened
1/4 cup dried cranberries
Juice of 1 orange
1 teaspoon orange zest
1/4 cup confectioners’ sugar

FROSTING
4 oz cream cheese, softened
1/2 cup leftover filling
3 cups confectioners’ sugar, sifted

Prep for filling: Combine cranberries and orange juice in a measuring cup and heat for 30-40 seconds in microwave, just until mixture is warm. Let sit until cupcakes are baked and cooled, at least 30 minutes.

Make the cupcakes: Preheat the oven to 350F. Line muffin pan with 16 paper liners. In a large bowl sift together flour, spices, salt, and baking soda. Combine milk and vanilla in a measuring cup. With an electric mixer, cream butter and sugar until light and fluffy. Add egg and mix until well incorporated. Add flour and milk alternately, beginning and ending with the flour. Add pears and mix just until incorporated. Divide batter into muffin cups. Bake for 16-18 minutes or until a toothpick inserted in the center comes out clean. Cool on wire racks.

Make the filling: Drain the plumped cranberries and reserve the juice. In a food processor, pulse cranberries until finely chopped. With an electric mixer, combine chopped cranberries, 8 oz cream cheese, 1 teaspoon of reserved orange juice, 1 teaspoon orange zest, and 1/4 cup confectioners’ sugar. Cut a cone out of the center of each cupcake, keeping the top. Fill each cupcake with 1-2 teaspoons of filling. Replace top.

Make the frosting: With an electric mixer, combine 4 oz cream cheese, 1/2 of leftover filling, and 3 cups sifted confectioners’ sugar. Mix until smooth. Keep frosted/filled cupcakes refrigerated for up to 3 days.


Overall rating on a scale of 1-5
Moistness: 5
Tenderness: 5
Frosting: 4


Prizes provided by:
LOLLIPOP WORKSHOP
COOKIE SUNSHINE
A pair of cupcake earrings from LOTS OF SPRINKLES
Also, IronCupcake:Earth is excited to welcome back CAKESPY, who is now going to be doing a piece for our winner each month until further notice!
As an added bonus for November only we have a delicious apron complements of SWEET CUPPIN CAKES BAKERY AND CUPCAKERY SUPPLY.
Corporate prize providers:
HEAD CHEFS by FIESTA PRODUCTS
HELLO CUPCAKE by Karen Tack and Alan Richardson
JESSIE STEELE APRONS
CUPCAKE COURIER
TASTE OF HOME books
Iron Cupcake:Earth is sponsored in part by 1-800-Flowers

If you want to be a part of Iron Cupcake:Earth, visit http://ironcupcake.blogspot.com/!