Flour Child Bakery opens in Virginia Beach!

My mom and I just opened a bakery in Virginia Beach!! "Like" us to stay updated! If you care to read our blog, it's flourchildbakery.blogspot.com.


Showing posts with label spinach. Show all posts

Thursday, February 5, 2009

HTEAC Does Dinner: Homemade Spinach & Broccoli Calzone

Every now and then I get motivated to make something really cool for dinner, as opposed to busting out a box of shells and cheese and frying up a few all-beef hot dogs. Yesterday I got the urge to try homemade pizza dough. I meant to make it last year for a Daring Bakers challenge, but I never found the time. Until yesterday, I was terrified of making homemade pizza dough. The thought of yeast being a living organism really creeps me out. So I decided to do some research before I began.

I chose a recipe from The America's Test Kitchen Family Baking Book for Basic Pizza Dough. The recipe called for instant or rapid-rise yeast. All I had was active dry yeast. Of course I started to freak out. I was all geared up to tackle me fear of yeast and here I am with the wrong kind! Whoa... okay calm down. I quickly flipped to the front of the book where it gives a little info on yeast. I found out I could substitute active dry yeast for instant by using 25% more of it and by proofing it in warm water first. I also read somewhere else that if the water was too warm it would kill the yeast. So now I'm terrified I'm gonna kill the little creatures! I get a small cup of barely warm water (I'm praying I don't kill them), I stir the yeast in, NOTHING HAPPENS! Maybe I had an old packet of yeast. I grab the newer pack, I stir it into some more barely warm water, STILL NOTHING! I immediately go to YouTube (I like visual help). I search for "how to activate dry yeast." The very first video lets me know I'm doing something wrong. By being so worried I was gonna burn the yeast to death, I wasn't letting the water get warm enough. I tried it again with water that was comfortably warm, but not hot (My problems would be solved if I would just get an instant-read thermometer). FINALLY!! I got some action in the glass. My yeast was alive! I mixed the activated yeast in with the rest of the water from the recipe, and it was smooth sailing from then on.

So sorry for not getting pictures of the entire dough making process. I was so nervous the whole time. All I could concentrate on was doing everything right. I was so surprised by how easy all the steps were. The dough came together perfectly in the food processor. It rose perfectly in the oven with the light on. It stretched out to a nice round circle (with a little trimming of course). The filling was really easy to make. And folding and crimping the calzone was easy, too! It sounds really complicated, but really the only hard part is remembering to make the dough ahead of time. If you're reading this thinking, "Omg that's me! I'm scared to make pizza dough too!" Please please please try it! I promise you'll be making pizza dough all the time after you get over the initial fear! I'm already making plans for a pepperoni and italian sausage pizza next week. I'm even gonna make homemade sauce! :D
Dough rising by the heat from the oven light... Skip to... DINNER'S READY!
Mmmmmm... It was sooo yummy!
Recipe from The America's Test Kitchen Family Baking Book. Btw, if you don't have this book already, you need to get it. It is so jam packed full of answers. Anytime I'm not sure about something, I grab this book and BAM! Problem solved!

Basic Pizza Dough (This is half of the recipe that in the book; It makes enough for 1 large calzone.)
2 cups (11 ounces) (plus 2 tablespoons, if needed) bread flour (I used all-purpose)
1/2 envelope (slightly more than 1 teaspoon) instant or rapid-rise yeast (I used 1 1/2 teaspoons active dry yeast; I wrote how to active it below)
3/4 teaspoon salt
1 tablespoon olive oil
1/4 cup, plus 1/2 cup warm water (110 degrees)

(If using active dry yeast, sprinkle yeast over 1/4 cup warm water and let sit for 10 minutes or until the foam rises near the 1/2 cup line. Add yeast mixture with the remaining water in the recipe.)
1. Pulse 2 cups of the flour, yeast (if using instant), and salt together in a food processor (fitted with a dough blade if possible) to combine. With the processor running, pour the oil, then water (and yeast mixture, if using active dry yeast) through the feed tube and process until a rough ball forms, 30 to 40 seconds. Let the dough rest for 2 min­utes, then process for 30 seconds longer. If after 30 seconds the dough is sticky and clings to the blade, add the remaining 2 tablespoons flour.
2. Turn the dough out onto a lightly floured counter and form it into a smooth, round ball. Place the dough in a large, lightly oiled bowl and cover tightly with greased plastic wrap. Let rise in a warm place until doubled in size, 1 to 1 1/2 hours, before using. (I let mine sit in the oven with the light on.)

To Make Ahead
In step 2, do not let the dough rise, but refrigerate it overnight or up to 16 hours; let the dough sit at room temperature for 30 minutes before using. Alternatively, the pizza dough can be frozen for up to 1 month; let the dough rise as directed in step 2, then wrap tightly in greased plastic wrap and squeeze. Let the frozen dough thaw on the counter for 2 to 3 hours, or overnight in the refrigerator, before using.

Spinach & Broccoli Filling (This is my own recipe)
1 garlic clove, minced
1/4 teaspoon red pepper flakes
3/4 cup cottage cheese (ricotta would also work)
1/2 cup shredded mozzarella cheese
1/4 cup grated parmesan cheese
1 (10 oz) box frozen chopped spinach, thawed and drained well
1 egg
1/4 teaspoon Italian seasoning
1/4 teaspoon salt
1/8 teaspoon pepper
1 cup cooked broccoli florets (I just used leftovers from the night before)

Reserve cooked broccoli for adding on top. In a large bowl, combine garlic, red pepper flakes, cheeses, spinach, egg, Italian seasoning, salt and pepper. Mix well.

To Assemble Calzone
1 pound pizza dough (enough for 1 large calzone)
1 recipe for Spinach & Broccoli Filling
1 lightly beaten egg, for egg wash

1. Adjust an oven rack to the middle position and heat the oven to 450 degrees. Line a large baking sheet with parchment paper.
2. Turn the dough out onto a lightly floured counter. Press and roll the dough into a 12-inch round. Transfer the dough to a prepared baking sheet and reshape as needed.
3. Mound the filling onto one side of the dough, leaving a 1-inch border around the edge. Press the broccoli florets on top of the filling. Brush the bottom edge of the dough with some of the egg wash. Fold the other half of the dough over the filling, leaving a 1/2-inch border at the bot­tom uncovered, then press and crimp the edges to seal.
4. Score the top of the calzone with a sharp knife and brush lightly with the remaining egg wash. Bake until the crust is golden brown, about 20 minutes. Transfer the cal­zone to a wire rack and let cool for 5 minutes before serving.

To Make Ahead
The fully formed calzone can be covered with plastic wrap and refrigerated for up to 6 hours; bake as directed.

Sunday, June 29, 2008

Daring Bakers Challenge - Danish Braid (1 Sweet & 1 Savory)

This month was a great challenge. I'd definitely say it's my second favorite, only rivaled by the Perfect Party Cake. I was extremely intimidated when I found out that the challenge involved making your own puff pastry... AND also using yeast. I'd never done either, and I had just recently seen the episode of Good Eats about puff pastry. Alton Brown made it clear that making your own puff pastry is a hassle. So, after reading the recipe about 10 times I finally mustered up enough courage to get started. I knew I didn't want to do the apple filling, and Bing cherries were on sale... How convenient! I looked up a recipe for cherry filling and made that 2 days ahead of time. It's supposed to be for pies, but if you drain off most of the liquid and pulse it in a food processor, it makes a great filling for the danish. The next day I got started on the dough, but not before reading other people's stories on the DB forum. A lot of people were saying that their dough was really sticky, their yeast wasn't activating, their braid wasn't rising... UH OH! I was really scared! But alas, my dough situation went smoothly. My only problem was that I had to add 1/4 cup more flour before I could knead the dough, because it was quite sticky. Here's the whole story of my Cherry Cheese Braid!
UPDATE: I used the 2nd half of my dough to make a savory Spinach & Feta Braid! Pictures and recipe are at the bottom! :)

Ingredients for the dough and the butter block.

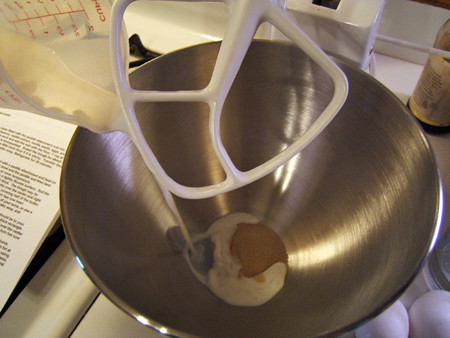
Pouring the milk into the yeast.

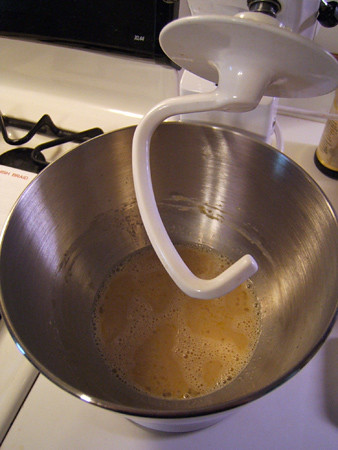
Yeast mixture ready for flour to be added.

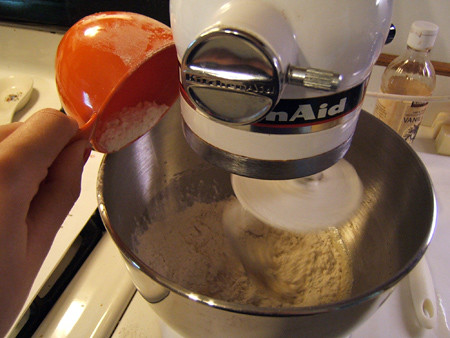
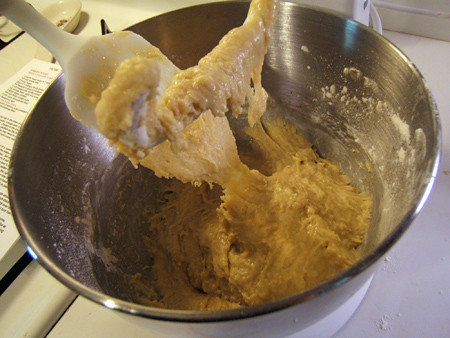
Adding flour 1 cup at a time.

It was REALLY sticky so I added 1/4 cup more flour.

Kneaded and ready to rest overnight in the fridge.

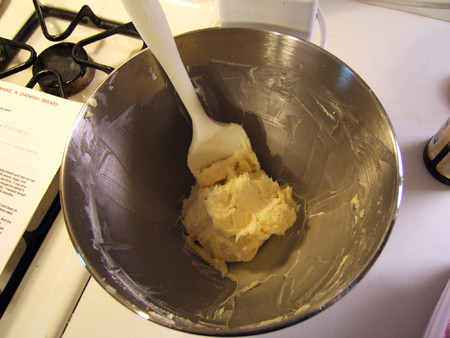
Butter mixture ready to go on the dough.

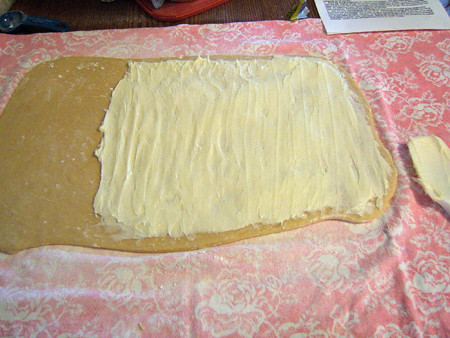
Butter spread onto the dough (This was tricky, I had to use my hands).

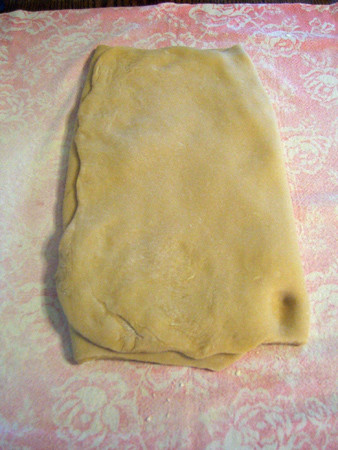
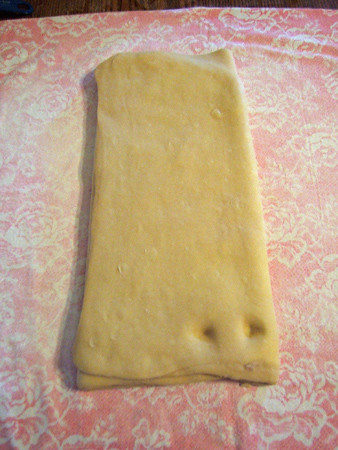
Folded in thirds for the 1st turn.

2nd turn.

By the 3rd turn, you could see butter through the thin layers of dough.

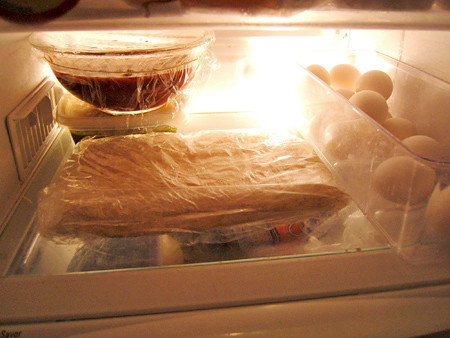
After the 4th turn, it stayed overnight in the fridge.

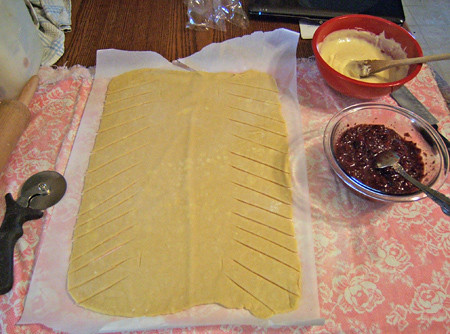
Rolled out, but nowhere near 15x20!

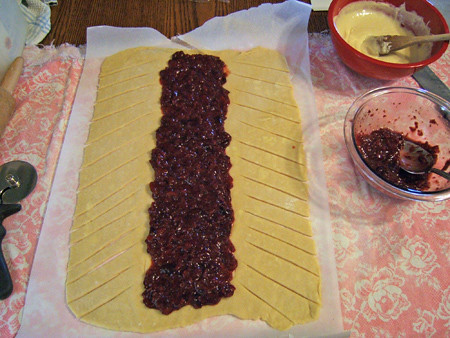
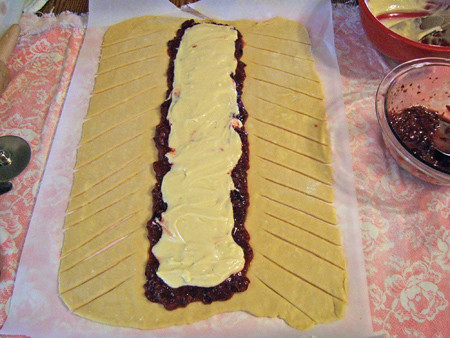
Cherry filling added.

Cream cheese filling on top.

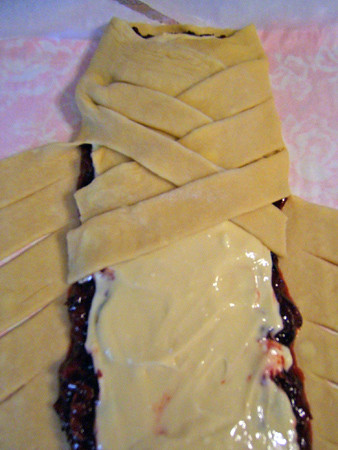
The braiding was the most fun part! :)

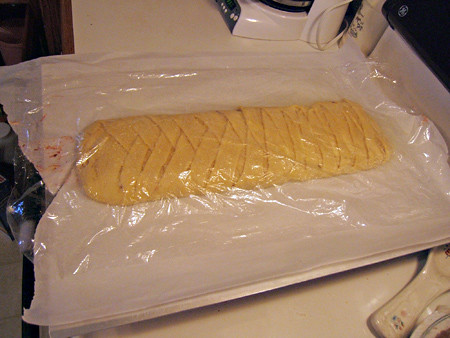
The braid ready to be proofed.

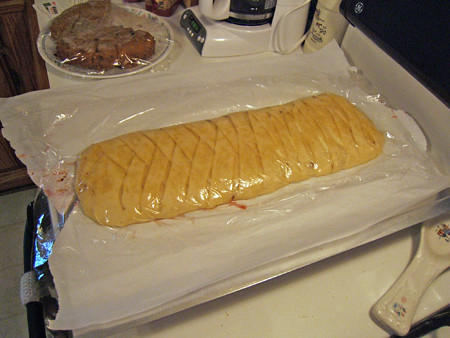
After 2 hours, it's supposed to be doubled in volume... well... it wasn't.
But I threw it in the oven anyway.

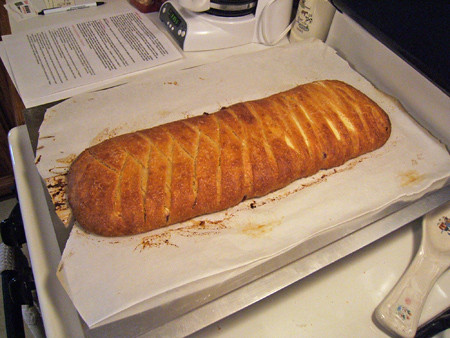
My Cherry Cheese Braid is finally finished!

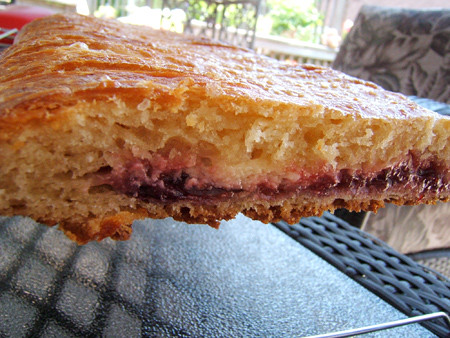
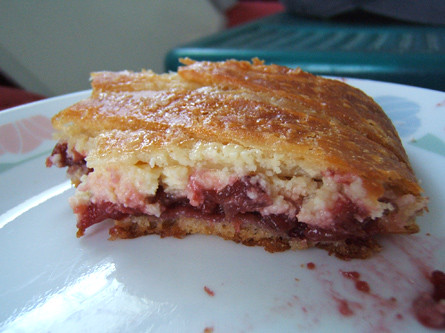
It's not very flaky...

But it's EXTREMELY delicious!!!

Thanks so much to Kelly of Sass & Veracity and Ben of What’s Cookin’ for choosing a great recipe! My notes are in orange italics.

DANISH DOUGH
Makes 2-1/2 pounds dough (Enough for TWO braids)

Ingredients
For the dough (Detrempe)
1 ounce fresh yeast or 1 tablespoon active dry yeast (This is 1 packet + part of another packet)
1/2 cup whole milk
1/3 cup sugar
Zest of 1 orange, finely grated (omit)
3/4 teaspoon ground cardamom (omit)
1-1/2 teaspoons vanilla extract (increase to 2 1/2 teaspoons)
1/2 vanilla bean, split and scraped (omit)
2 large eggs, chilled
1/4 cup fresh orange juice (substitute water)
3-1/4 cups all-purpose flour
1 teaspoon salt

For the butter block (Beurrage)
1/2 pound (2 sticks) cold unsalted butter
1/4 cup all-purpose flour

DOUGH
Combine yeast and milk in the bowl of a mixer fitted with the paddle attachment and mix on low speed. Slowly add sugar, orange zest, cardamom, vanilla extract, vanilla seeds, eggs, and orange juice(water). Mix well. Change to the dough hook and add the salt with the flour, 1 cup at a time, increasing speed to medium as the flour is incorporated. Knead the dough for about 5 minutes, or until smooth. You may need to add a little more flour if it is sticky (I had to add 1/4 cup more). Transfer dough to a lightly floured baking sheet and cover with plastic wrap. Refrigerate for 30 minutes.
Without a standing mixer: Combine yeast and milk in a bowl with a hand mixer on low speed or a whisk. Add sugar, orange zest, cardamom, vanilla extract, vanilla seeds, eggs, and orange juice and mix well. Sift flour and salt on your working surface and make a fountain. Make sure that the “walls” of your fountain are thick and even. Pour the liquid in the middle of the fountain. With your fingertips, mix the liquid and the flour starting from the middle of the fountain, slowly working towards the edges. When the ingredients have been incorporated start kneading the dough with the heel of your hands until it becomes smooth and easy to work with, around 5 to 7 minutes. You might need to add more flour if the dough is sticky.

BUTTER BLOCK
1. Combine butter and flour in the bowl of a mixer fitted with a paddle attachment and beat on medium speed for 1 minute. Scrape down the sides of the bowl and the paddle and then beat for 1 minute more, or until smooth and lump free. Set aside at room temperature.
2. After the detrempe has chilled 30 minutes, turn it out onto a lightly floured surface. Roll the dough into a rectangle approximately 18 x 13 inches and ¼ inch thick. The dough may be sticky, so keep dusting it lightly with flour. Spread the butter evenly over the center and right thirds of the dough (The butter stuck to the dough and was pulling the dough all over the floured surface. I had to use my fingers to smear the butter around). Fold the left edge of the detrempe to the right, covering half of the butter. Fold the right third of the rectangle over the center third. The first turn has now been completed. Mark the dough by poking it with your finger to keep track of your turns, or use a sticky and keep a tally. Place the dough on a baking sheet, wrap it in plastic wrap, and refrigerate for 30 minutes.
3. Place the dough lengthwise on a floured work surface. The open ends should be to your right and left. Roll the dough into another approximately 13 x 18 inch, ¼-inch-thick rectangle. Again, fold the left third of the rectangle over the center third and the right third over the center third. No additional butter will be added as it is already in the dough. The second turn has now been completed. Refrigerate the dough for 30 minutes.
4. Roll out, turn, and refrigerate the dough two more times, for a total of four single turns. Make sure you are keeping track of your turns. Refrigerate the dough after the final turn for at least 5 hours or overnight. The Danish dough is now ready to be used. If you will not be using the dough within 24 hours, freeze it. To do this, roll the dough out to about 1 inch in thickness, wrap tightly in plastic wrap, and freeze. Defrost the dough slowly in the refrigerator for easiest handling. Danish dough will keep in the freezer for up to 1 month.

APPLE FILLING (I used cherry filling and cream cheese filling; Both recipes are right below this)
Makes enough for two braids

Ingredients
4 Fuji or other apples, peeled, cored, and cut into ¼-inch pieces
1/2 cup sugar
1 tsp. ground cinnamon
1/2 vanilla bean, split and scraped
1/4 cup fresh lemon juice
4 tablespoons unsalted butter

Toss all ingredients except butter in a large bowl. Melt the butter in a sauté pan over medium heat until slightly nutty in color, about 6 - 8 minutes. Then add the apple mixture and sauté until apples are softened and caramelized, 10 to 15 minutes. If you’ve chosen Fujis, the apples will be caramelized, but have still retained their shape. Pour the cooked apples onto a baking sheet to cool completely before forming the braid. (If making ahead, cool to room temperature, seal, and refrigerate.) They will cool faster when spread in a thin layer over the surface of the sheet. After they have cooled, the filling can be stored in the refrigerator for up to 3 days. Left over filling can be used as an ice cream topping, for muffins, cheesecake, or other pastries.

CHERRY FILLING (recipe from cooksrecipes.com)
Makes enough for 1 braid; Can be made a few days in advance.

Ingredients
4 cups Bing cherries, rinsed, stemmed and pitted
1 cup granulated sugar
1/4 cup fresh lemon juice
4 tablespoons cornstarch
1/2 teaspoon almond extract

Combine cherries, sugar and lemon juice in a mixing bowl, stir and let sit for at least 6 hours, stirring occasionally to dissolve sugar. Drain off and reserve cherry syrup.
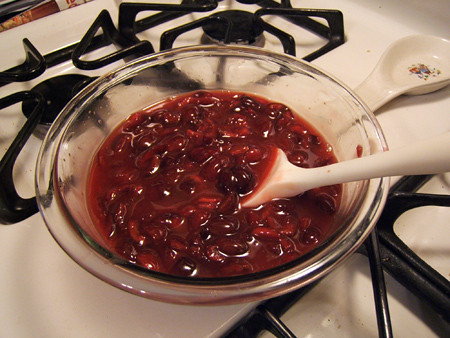
Combine a small amount of syrup to cornstarch to make a paste, then whisk cornstarch paste back into syrup. Pour mixture into a saucepan and cook over medium heat, stirring, until the sauce thickens (about 5 minutes). Stir in the drained cherries and almond extract. Cool, and store in sterilized, airtight jars or freeze in heavy freezer bags. (I kept mine in a glass bowl, covered with plastic wrap for 2 days before using it.)
(Before using in the braid, drain most of the liquid off the cherries (reserve liquid as a delicious topping on ice cream!), and pulse cherries in a food processor until desired consistency. I left mine kinda chunky.)

CREAM CHEESE FILLING (my own recipe)
Makes enough for 1 braid; Make right before you're ready to assemble the braid.

Ingredients
1 8 oz. package cream cheese, softened
1 egg, separated
1/3 cup sugar
1 teaspoon vanilla extract

Put cream cheese, egg yolk, and sugar into a bowl and mix until well combined. Stir in vanilla. Save egg white to brush on top of the braid.

DANISH BRAID
Divide your Danish dough into 2 equal sections. Save the other half for another braid or other Danish pastries.
1. Line a baking sheet with a silicone mat or parchment paper. On a lightly floured surface, roll the Danish Dough into a 15 x 20-inch rectangle, ¼ inch thick (Mine was 1/4 inch thick, but a few inches smaller than 15x20). If the dough seems elastic and shrinks back when rolled, let it rest for a few minutes, then roll again. Place the dough on the baking sheet.

2. Along one long side of the pastry make parallel, 5-inch-long cuts with a knife or rolling pastry wheel, each about 1 inch apart (My cuts were less than 5 inches long). Repeat on the opposite side, making sure to line up the cuts with those you’ve already made.
3. Spoon the filling you’ve chosen to fill your braid down the center of the rectangle. Starting with the top and bottom “flaps”, fold the top flap down over the filling to cover. Next, fold the bottom “flap” up to cover filling. This helps keep the braid neat and helps to hold in the filling. Now begin folding the cut side strips of dough over the filling, alternating first left, then right, left, right, until finished. Trim any excess dough and tuck in the ends.
4. Whisk the egg white from the cream cheese filling and lightly brush it on the top of the braid. Sprinkle coarse sugar on top.

Proofing and Baking
1. Spray cooking oil (Pam…) onto a piece of plastic wrap, and place over the braid. Proof at room temperature or, if possible, in a controlled 90 degree F environment for about 2 hours, or until doubled in volume and light to the touch (Mine didn't double in volume, but it was very VERY soft to the touch).
2. Near the end of proofing, preheat oven to 400 degrees F. Position a rack in the center of the oven.3. Bake for 10 minutes, then rotate the pan so that the side of the braid previously in the back of the oven is now in the front. Lower the oven temperature to 350 degrees F, and bake about 15-20 minutes more, or until golden brown (Mine was very brown, but did not taste burned at all). Cool and serve the braid either still warm from the oven or at room temperature. The cooled braid can be wrapped airtight and stored in the refrigerator for up to 2 days, or freeze for 1 month.

Don't forget the savory Spinach & Feta Braid! My cousin, Stephanie C., and I created this with the 2nd half of the dough. Yeah, I know the dough had vanilla in it, but you could barely taste it. I think the proofing step did nothing for this braid. It didn't double in volume. It was exactly the same, but the dough was softer because it came up to room temp. However, while it was proofing, the spinach let out a lot of moisture, soaking the entire bottom of the braid in green spinach juice. No worries though! It came out very VERY tasty!

Filling recipe courtesy of Perfect Greek, A Collection Of Over 100 Essential Recipes from Parragon Publishing.

Ingredients
2 Tbsp olive oil
1 large onion, finely chopped
2 lb 4 oz/1 kg fresh young spinach leaves, washed OR 1 lb 2 oz/500 g frozen spinach (We used 2 10 oz packages of frozen spinach. Make sure you drain it VERY well!)
4 Tbsp chopped fresh flat-leaf parsley (from my herb garden! yay!)
2 Tbsp chopped fresh dill (also from my herb garden!)
3 eggs, beaten
7 oz/200g authentic Greek feta cheese (We used an 8 oz package, but next time I think I'll use a bit more. Here's a tip to save $$: Look for feta cheese in the refrigerated case with the Kraft parmesan cheese and the Bertolli refrigerated products. It's A LOT cheaper than getting it in the case with the exotic cheeses!)
salt and pepper (We used about a pinch of each... NOT ENOUGH! I suggest using 1 tsp of salt and 1/2 teaspoon of pepper)

Directions
1. Heat the oil in a pan, add the onion, and fry until softened. Add the fresh spinach if using, with only the water clinging to the leaves after washing, or the frozen spinach and cook for 2-5 minutes, until just wilted. Remove from the heat and let cool.
2. When the mixture has cooled, add the parsley, dill, and eggs. Crumble in the cheese, season with salt and pepper, and mix well. Mixture is ready to be used in the braid!