Flour Child Bakery opens in Virginia Beach!

My mom and I just opened a bakery in Virginia Beach!! "Like" us to stay updated! If you care to read our blog, it's flourchildbakery.blogspot.com.


Showing posts with label holiday. Show all posts

Friday, July 2, 2010

Patriotic Poke Cake

Ladies and Gentleman, please give a warm welcome back to Cassie's baking abilities!!!

In case you haven't been part of the unlucky few who live in my house and have been subjected to my bad baking lately, I've been a path of strike-outs for a few weeks. But I'm proud to say I finally hit a homerun. This cake is phenomenal! The white cake layers are scrumptious and moist. The Jell-O gives the cake such a fun, bright flavor. And the frosting... WOW! I love boiled flour buttercreams! They are just genius and crazy delicious! So creamy and wonderful! Not to mention, this cake looks so festive and awesome. Woo hoo! I'm back!
Thanks to Jell-O for coming up with the basic idea for this cake. And thanks to Tish Boyle for the Basic White Cake Layers recipe in "The Cake Book." Another A+ recipe from her! :) Also, thanks to the boys of "Baked: New Frontiers in Baking" for their outstanding boiled buttercream frosting recipe. I adapted it a little by adding a tiny bit of lemon zest to match the brightness of the berry flavored Jell-o in the cake. I think I'm gonna go have a tiny slice right now!Patriotic Poke Cake (inspired by Jell-O and AllRecipes.com)

2 baked 9-inch round white cake layers, cooled (recipe below)
2 cups boiling water, divided
1 (3 ounce) package Jell-O, any red flavor (I used strawberry)
1 (3 ounce) package Jell-O, Berry Blue flavor
1 recipe of your favorite frosting (recipe below)

Place cake layers, top sides up, in 2 clean 9-inch round cake pans. Pierce cake with large fork at 1/2-inch intervals (I used a chopstick for larger spread out holes).
In one bowl, stir 1 cup of the boiling water into red Jell-O. In a separete bowl, stir 1 cup boiling water into Berry Blue Jell-O. Stir for 2 minutes until completely dissolved. Carefully pour red gelatin over 1 cake layer and Berry Blue gelatin over second cake layer. Cover with plastic wrap and refrigerate 3 hours.
Dip one cake pan in warm water 10 seconds; unmold onto serving plate. Spread with about 1 cup of frosting. Unmold second cake layer; carefully place on first cake layer. Frost top and sides of cake with remaining frosting.
Refrigerate 1 hour or until ready to serve. Garnish with fresh fruit, if desired. Store leftover cake in refrigerator.

Basic White Cake Layers (from “The Cake Book” by Tish Boyle)
Makes 2 9” cake layers

3 1/4 cups (11.5 oz/325 g) sifted cake flour
(Notice it doesn’t say "cake flour, sifted." SIFT FIRST, and WEIGH it!)
1 tablespoon baking powder
3/4 teaspoon salt
1 cup (2 sticks/8 oz/227 g) unsalted butter, softened (around 65-67°F)
1 1/2 cups (10.6 oz/300 g) granulated sugar
6 large egg whites
2 teaspoons vanilla extract
1 1/3 cups (320 ml) whole milk

Position a rack in the center of the oven and preheat the oven to 350°F. Grease the bottom and sides of two 9-inch round cake pans. Dust the pans with flour.
Sift together the cake flour, baking powder, and salt into a medium bowl. Whisk to combine, and set aside.
In the bowl of an electric mixer, using the paddle attachment, beat the butter at medium-high speed until creamy, about 30 seconds. Gradually add the sugar and beat at high speed until light, about 2 minutes. Reduce the speed to low and add the egg whites one at a time, beating well after each addition and scraping down the sides of the bowl as necessary. Beat in the vanilla extract.
If you have a splatter shield for your mixer, attach it now (the milk tends to splash up as you add it). Add the flour mixture at low speed in three additions, alternating it with the milk in additions and mixing just until the flour is incorporated. Scrape the batter into the prepared pans, dividing it evenly, and smooth the tops.
Bake the cake for 25 to 30 minutes, until lightly browned around the edges (In 8” round pans, mine took about 32 minutes). Cool the cakes in the pans on wire racks for 15 minutes. Invert the layers onto the racks and cool completely.
Store at room temperature, covered in foil, for up to 5 days.

Boiled Buttercream Frosting (from "Baked: New Frontiers in Baking" by Matt Lewis and Renato Poliafito)

1 1/2 cups sugar
1/4 cup all-purpose flour
1 1/2 cups milk
1/4 cup heavy cream
(I used all 1% milk)
1 1/2 cups (3 sticks) unsalted butter, soft but cool, cut into small pieces
(of course I reduced this to 2 1/2 sticks because that's just how I do!)
1 teaspoon pure vanilla extract
1 teaspoon lemon zest

In a medium heavy-bottomed saucepan, whisk the sugar and flour together. Add the milk and cream and cook over medium heat, whisking occasionally, until the mixture comes to a boil and has thickened, about 20 minutes (It will look like VERY thick glue when it's ready).
Transfer the mixture to the bowl of an electric mixer fitted with the paddle attachment. Beat on high speed until cool (I let mine cool to room temp in the fridge). Reduce the speed to low and add the butter; beat until thoroughly incorporated. Increase the speed to medium-high and beat until the frosting is light and fluffy.
Add the vanilla and lemon zest and continue mixing until combined. If the frosting is too soft, transfer the bowl to the refrigerator to chill slightly; then beat again until it is the proper consistency. If the frosting is too firm, place the bowl over a pot of simmering water and beat with a wooden spoon until it is the proper consistency.

Sunday, December 6, 2009

Sweet Potato Cheesecake w/ Marshmallow-Sour Cream Topping

Mooooooove over, candied yams! There's a new tuber in town (oh yeah, I know my botany). Why not dress your table with this big, honkin' masterpiece for Christmas?? It's a sweet potato cheesecake in a ginger snap crust with marshmallow-sour cream topping. I'm not sure if it's possible to fit more of my favorite words into a food description!

I don't make cheesecake very often. However, it must have been in the stars for me to make a cheesecake this week. Josh and I were in the car going somewhere, and somehow we got on the subject of cheesecake. He suggested I make one, and that's when I realized I've only ever made like two cheesecakes in my entire life! It also hit me that cream cheese had been on sale, and as a result, we had 3 lbs. in the fridge. Ummm I think that pretty much spells out c-h-e-e-s-e-c-a-k-e! I knew I wanted to use up my Murray ginger snaps before they went stale (as much as I love them, I just can't eat a whole bag!). I was going to go the pumpkin route, until I realized we didn't have any canned pumpkin. But we DID have canned sweet potatoes! You can't have sweet potatoes without marshmallows. I did a little googling and found this recipe on Epicurious.com. It's wonderful! I followed reviewers' suggestions and baked it in a larger pan. I still had a few tablespoons of filling that wouldn't fit. There's no way all of it would've fit in the suggested 9" pan. And somehow my cheesecake baked 20 minutes faster than the recipe suggested. Sounds like someone needs to go in and do some editing on that one! Other than that, the cheesecake is outstanding! The sweet potato flavor is subtle, of course, but you definitely recognize it. And the marshmallow topping is fabulous. You know I can't complain about a ginger snap crust. I give this cheesecake an A+!

(PS: It would make a great Christmas present... *hint hint*)
Sweet Potato Cheesecake with Marshmallow-Sour Cream Topping (adapted from epicurious.com)

For crust:
Nonstick vegetable oil spray
2 cups gingersnap cookie crumbs (about 9 ounces)
1 cup pecans (about 3 1/2 ounces)
1/4 cup (packed) golden brown sugar
2 tablespoons chopped crystallized ginger (I omitted this only because I didn't have it)
1/4 cup (1/2 stick) unsalted butter, melted

For filling:
4 8-ounce packages cream cheese, room temperature
2 cups sugar
1 15-ounce can pure pumpkin (or 15 ounces, by weight, of pureed sweet potato)
5 large eggs
3 tablespoons all purpose flour
1 teaspoon ground cinnamon (I upped it to 1 1/2 teaspoons)
1/2 teaspoon ground ginger (I upped it to 3/4 teaspoon)
1/4 teaspoon freshly grated nutmeg
1/4 teaspoon ground allspice
1/4 teaspoon salt
2 tablespoons vanilla extract (I reduced to 1 tablespoon)

For topping:
2 cups mini marshmallows or large marshmallows cut into 1/2-inch cubes
1/4 cup whole milk
1 teaspoon vanilla extract
1/8 teaspoon salt
1 cup sour cream (next time I would reduce to 3/4 cup to help marshmallow flavor come through more)

Crust:
Preheat oven to 350°F. Spray 9-inch-diameter springform pan with 2 3/4-inch-high sides with nonstick spray (I definitely recommend using a 10-inch pan. Also, the cooking spray burned in the oven, so I would omit it next time). Grind cookie crumbs, pecans, brown sugar, and ginger in processor until nuts are finely ground. Add butter; using on/off turns, process to blend. Transfer mixture to prepared pan; press onto bottom and 2 inches up sides of pan. Bake crust until set and lightly browned, about 10 minutes. Cool completely.

Filling:
Preheat oven to 350°F. Using electric mixer, beat cream cheese and sugar in large bowl until light and fluffy, about 2 minutes. Beat in pumpkin. Add eggs 1 at a time, beating on low speed to incorporate each addition. Add flour, spices, and salt; beat just to blend. Beat in vanilla. Transfer filling to cooled crust. Bake until filling is just set in center and edges begin to crack (filling will move slightly when pan is gently shaken), about 1 hour 20 minutes (Mine was ready after only 1 hour). Cool 1 hour. Run knife around sides of pan to release crust. Chill cheesecake uncovered in pan overnight (I would never leave something like this uncovered! Wrap it in plastic unless you want it to taste like your fridge! Btw, I only chilled mine for 2 hours.).

Topping:
Stir marshmallows and milk in medium saucepan over low heat until marshmallows are melted. Remove from heat and stir in vanilla and salt. Cool marshmallow mixture to room temperature, stirring occasionally. Add sour cream to marshmallow mixture; fold gently just to blend. Pour topping over cheesecake and spread evenly, leaving 1/2 inch uncovered around edges. Chill to set topping, at least 1 hour.

Tuesday, March 31, 2009

Easter Sugar Cookies

UPDATE: Here's an awesome tutorial via Annie's Eats to show you how to decorate with royal icing!

Finally I get something posted BEFORE the holiday it pertains to! I'm such a procrastinator. I'm lucky if I get things posted ON the actual holiday, much less before it! For bloggers like me, it's particularly important to get special holiday posts up before the holiday. That way our readers can use the information we post as a guide for their holiday baking. So here are the sugar cookies I decorated for Easter. Feel free to use these designs on your own sugar cookies. I got my inspiration from Flickr user ktrammell.

For all cookies I used either a #1 or #2 round tip, depending on how thin the icing was and the precision of the detail I was trying to draw. For basic outlines with thick icing, I used a #2 tip. For precise details with thick icing, I used a #1 tip. For filling in outlines with thin icing, I used a #1 tip (when I tried using the #2 tip with thin icing, it would constantly drip out of the tip).

For the Hatching Chick: (my favorite!)
1) Using thick white royal icing (#2 tip), outline the shape of the eggshell. Let it dry for 10 minutes.
2) Using thick dark yellow royal icing (#2 tip), outline the shape of the chick. Let it dry for 15 minutes.
3) Using thin teal royal icing (#1 tip), fill in the shape of the eggshell. Drop sprinkles onto the wet icing. Let it dry for 15 minutes.
4) Using thin light yellow royal icing (#1 tip), fill in the shape of the chick. Let it dry for 15 minutes.
5) Using thick white, orange, and dark yellow royal icing (#1 tip), draw the details of the face. Let the finished cookie dry overnight.

For the "Hopping" Bunny:
1) Using thick white royal icing (#2 tip), outline the shape of the bunny. Let it dry for 10 minutes.
2) Using the same icing and tip, fill in a round bunny tail. Drop white nonpareils onto the wet icing. Let it dry for 10 minutes.
3) Using thin royal icing of any color (#1 tip), fill in the shape of the bunny. Let it dry for 15 minutes.
4) Using thick royal icing of any color (#1 tip), draw the details of the face. Let the finished cookie dry overnight.

For the Bunny Face:
1) Using thick pink royal icing (#2 tip), outline the shape of the bunny face. Let it dry for 10 minutes.
2) Using thin white royal icing (#1 tip), fill in the shape of the bunny face. Let it dry for 15 minutes.
3) Using thick pink, light pink, and light teal royal icing (#1 tip), draw the details of the face. Let the finished cookie dry overnight.

For the Flower:
1) Using thick royal icing of any color (#2 tip), outline the shape and center of the flower. Let it dry for 10 minutes.
2) Using thin yellow royal icing (#1 tip), fill in the center of the flower. Let it dry for 10 minutes.
3) Using thin royal icing in a darker or lighter shade than the outline (#1 tip), fill in the shape of the flower. Let it dry for 15 minutes.
4) Using thick royal icing of any color (#1 tip), draw a spiral or any detail in the center. Let the finished cookie dry overnight.

For the Tulip:
1) Using thick royal icing of any color (#2 tip), outline the shape of the tulip and draw the lines of the petals. Let it dry for 10 minutes.
2) Using thin royal icing in a darker or lighter shade (#1 tip), fill in the outlines. Let it dry for 10 minutes.
3) Using thick green royal icing (#1 tip), draw and fill in the stem. Let the finished cookie dry overnight.
As always, I used my favorite sugar cookie recipe (from Allrecipes.com) and the royal icing recipe from Confetti Cakes for Kids by Elisa Strauss.

"The Best Rolled Sugar Cookies" from Allrecipes.com (scaled down)
Makes 50-60 cookies 1/4"-thick cookies

2 sticks + 2 tablespoons unsalted butter, softened
1 1/2 cups granulated sugar
3 large eggs
3/4 teaspoon vanilla
(I always bump it up to 1 teaspoon)
3 3/4 cups all-purpose flour (This time I had to substitute self-rising flour by omitting the baking powder and salt. It resulted in a puffier cookie, but still delicious!)
1 1/2 teaspoons baking powder
3/4 teaspoon salt

In a large bowl, cream together butter and sugar until smooth. Beat in eggs and vanilla. Stir in the flour, baking powder, and salt. Cover, and chill dough for at least an hour (or overnight). (I split my dough in half, and wrap each piece in plastic wrap. It takes mine about 3 hours before it's hard enough to roll out.) Preheat oven to 400 degrees F (200 degrees C). Roll out dough on floured surface 1/4 to 1/2 inch thick. Cut into shapes with any cookie cutter. Place cookies 1 inch apart on ungreased cookie sheets lined with parchment paper. Bake for 6-8 minutes or until barely golden around the edges. Cool on wire rack. (I've found that the kitchen stays organized if you do all the rolling and cutting before you start baking. Cut out the shapes and place them close together on a cookie sheet lined with wax paper. Make sure the pan is small enough to fit into your refrigerator or freezer. You can layer the cookies on sheets of wax paper and keep them all on the same pan in the fridge until you're ready to start baking. Then line the pans you're going to bake the cookies on with parchment paper. Place them 1 inch apart and bake according to the original directions. You might have to add 1 or 2 minutes to the baking time because the cookies are coming straight from the fridge or freezer. This process really makes things less hectic in the kitchen during baking!)

Royal Icing (from Confetti Cakes for Kids by Elisa Strauss)

1/3 cup (3 oz) pasteurized egg whites (about 3 egg whites)
4 1/2 cups + 1 tablespoon confectioners' sugar, sifted
1/2 teaspoon lemon juice
(I use almond and vanilla extracts)

In the bowl of an electric mixer fitted with a paddle attachment, beat the egg whites on medium speed until soft peaks form. Set the mixer to medium-low speed and gradually add the confectioners' sugar, 1/2 cup at a time. Scrap thoroughly between additions. Add the lemon juice and beat on high speed until stiff peaks form and the icing is no longer shiny, 6-8 minutes (mine stays somewhat shiny). Use immediately or place in an airtight container. You can keep the icing in the refrigerator for up to 5 days. Allow it to come to room temperature before using it. (I always add about 2 teaspoons of water to this before I use it. To thin it out even more, add 1/2 teaspoon of water at a time until it's the constistency you want. It takes some practice, but you'll get used to figuring out what constistency you need.)

Friday, December 12, 2008

Christmas Cookie Caper '08: Wrap-Up!

I've already said this like a thousand times, but Christmas is seriously the BEST time to bake. The mood just feels so comfortable and perfect if you put on some Christmas music and bake with someone you love. Enough of sounding like a Halmark card, let's get onto the good stuff. My mom and I really baked our brains out this year! We baked aaaalll day and almost all night. We had the best time, as usual, and it was nice that Josh came over to help... even if all he did was keep us company and eat raw snickerdoodles! After hours and hours of baking, our laundry room was FULL of cookies!

My favorite cookies this year were the Gingerbread Women. I never really loved gingerbread until we made these cookies. Now I'll be making it much more often!

My second faves aren't really cookies, but they're freakin good anyways. The red velvet truffles are AWESOME! I made these for our Halloween party and my mom had to have them again for Christmas. They made a nice addition inside our cookie tins.


We always pack our cookies into cute Christmas tins with sparkly tissue paper. We make a list of like 15-20 people and give them all their own special container of cookies. I think this year's cookies have been the best yet! The cookie tins look so perfect. I hope everyone loves them!

And I hope all of you guys enjoy the recipes. If you make any of these cookies, or any Christmas cookies at all, feel free to e-mail me pictures and stories. I'd love to hear what you guys do during the holidays!

Christmas Cookie Caper '08: #6 - Homemade Oreos

When I saw this recipe in The Great American Bake Sale cookbook I was like "How cool will we be if we make our own Oreos??!!?" While it seemed like a great idea at the time, I don't think we'll make these again next year. They don't stay crunchy for longer than a day. But they are super delicious on the first day! Dark and chocolatey like a real Oreo. The filling is sweet and so good. We made half of them with mint filling and half plain. I didn't wanna put the mint ones into the cookie tins we were giving away because I was scared they'd make everything else taste like mint. Oh well... more for me! The recipe says to roll the dough up like a log and slice it when it's nice and cold. We definitely didn't do that. I was envisioning lopsided, totally unround Oreos... so I decided it would be better to roll it out like sugar cookies and cut them with small round cutters. We used a tiny 1 1/2" flower shaped cutter. But after they baked, the shape was indiscernable. However they were still ROUND! Mission accomplished. I recommend these, but make them in a small batch and don't plan on keeping them around for more than 2 days.

Recipe from The Great American Bake Sale
HOMEMADE OREOS
Makes 50 sandwich cookies

For the cookies
2 cups all-purpose flour
2 cups Dutch-process cocoa powder (I used Hershey's Special Dark)
1 teaspoon baking soda
10 1/2 ounces semisweet chocolate, coarsely chopped
14 tablespoons (1 3/4 sticks) unsalted butter
3/4 cup sugar
1 large egg
1/2 cup light corn syrup

For the filling
16 tablespoons (2 sticks) unsalted butter, softened
5 1/2 cups confectioners' sugar
1/4 teaspoon pure vanilla extract

1 teaspoon mint extract (optional)

1. In a large bowl, sift together the flour, cocoa, and baking soda.
2. In a small heavy saucepan, melt the chocolate over low heat, stirring the entire time. Remove from the heat and cool slightly. (You may also melt the chocolate using a microwave-safe bowl, setting the microwave at half power for 1 minute; re­move the chocolate, stir, and return to the microwave for another burst, if needed. When the chocolate is half melted, stirring will complete the process.)
3. In a medium saucepan, over medium heat, melt the butter with the sugar, stirring to dissolve the sugar. Remove from the heat and add the melted chocolate, egg, and corn syrup; mix thoroughly. Pour the chocolate mixture into the dry ingredients and mix well to blend all of the ingredients.
4. Here's where I changed things around. I divided the dough in half, wrapped each piece in plastic wrap, and threw it in the fridge overnight. The next day it took a looong time to soften up, so take it out of the fridge at least 4 hours before you're ready to roll. Roll it to 1/4" thick. Cut it into 1 1/2" circles. Everything else is the same so continue reading below...

5. Preheat the oven to 350°F and line two or three cookie sheets with parchment paper or silicone mats.
6. Slice the cookies into 1/4-inch-thick disks and arrange them on the prepared pan, leaving 1 inch between each cookie. Place the pan on the middle rack of the oven and bake for 10 to 12 minutes, until the cookies are firm. (They won't be perceptibly darker or crispy.) Transfer the baked cookies to a wire rack to cool completely.
7. To make the filling, put the butter in the bowl of an electric mixer fitted with the paddle attachment. Mix on medium speed for 2 minutes, or until creamy. Reduce the speed to low, gradually add the confection­ers' sugar, and mix until creamy and smooth. Add the vanilla and mix briefly.
8. Oh yeah we did this part different too. Don't worry about rolling the filling into a log and slicing it... that's silly. Instead roll it into balls the size of marbles (it's not sticky so it won't stick to your hands). Sandwich a ball of filling between two cookies and press. TADA! Divide the filling in half. Roll each half into a log just a bit smaller than the di­ameter of the finished cookies. Slice the logs into 1/3-inch disks, and sandwich each be­tween two of the baked cookies. Store the cookies in airtight containers.


Christmas Cookie Caper '08: #5 - Snickerdoodles

Here's another cookie recipe that isn't new, but it's still really REALLY good! I'm a newfound snickerdoodle lover. I never even knew what they were until Josh asked me to make them last year because they're his favorite cookie. If you've never had one either, they're sugar cookies coated with cinnamon sugar. They're slightly crunchy around the edges and perfectly soft in the center. Definitely a keeper in the Christmas Cookie Caper's Final 5! This recipe comes from AllRecipes.com (my favorite recipe website). I'm pretty sure this is the highest rated Snickerdoodle recipe. It totally deserves first place. Leave these for Santa and you are SO getting the best presents on the block!

Snickerdoodles
Makes about 30 large cookies

MY NOTES: Increase the cinnamon-sugar coating to 3 Tbsp sugar and 1 Tbsp cinnamon. If you make them smaller, they will be done in 7 minutes. Mine were done in 9 minutes. They are slightly crunchy around the edges and soft in the middle... Yum!

1/2 cup butter, softened
1/2 cup shortening
1 1/2 cups white sugar
2 eggs
2 teaspoons vanilla extract
2 3/4 cups all-purpose flour
2 teaspoons cream of tartar
1 teaspoon baking soda
1/4 teaspoon salt
2 tablespoons white sugar
2 teaspoons ground cinnamon

Preheat oven to 400 degrees F (200 degrees C).Cream together butter, shortening, 1 1/2 cups sugar, the eggs and the vanilla. Blend in the flour, cream of tartar, soda and salt. Shape dough by rounded spoonfuls into balls. Mix the 2 tablespoons sugar and the cinnamon. Roll balls of dough in mixture. Place 2 inches apart on ungreased baking sheets. Bake 8 to 10 minutes, or until set but not too hard. Remove immediately from baking sheets.


Christmas Cookie Caper '08: #4 - Kitchen Sink Cookies

Alright, so you can say I punked out because this isn't a new recipe. Actually we used 3 recipes that we've done before. But you can't deny recipes that are super delicious!! I made these kitchen sink cookies a few months ago. I kinda made up the recipe by compiling a bunch of recipes. I wanted a cookie full of stuff and this is what I came up with. They've got oatmeal, walnuts, two kinds of chocolate chips, coconut, and raisins. Feel free to leave out any of those if you don't like them. One tip I like to remember when making cookie dough is to use butter that's softened but still cool. I'm not sure why but I feel better putting cold cookie dough into the oven. If you want, you can make this dough a few days ahead and scoop it straight from the fridge.

Kitchen Sink Cookies
Makes 18 cookies

MY NOTES: I used a cookie scoop that holds 2 tbsp of cookie dough.

1/2 cup (1 stick) butter
1/2 cup sugar
1/2 cup packed light brown sugar
1 egg
1/2 teaspoon vanilla extract
3/4 cup all-purpose flour
1/2 teaspoon salt
1/2 teaspoon baking soda
1 1/2 cups rolled oats
1/2 cup chopped and toasted walnuts
1/4 cup semi-sweet chocolate chips
1/4 cup milk chocolate chips
1/4 cup coconut
1/4 cup raisins

Preheat the oven to 350 degrees F (175 degrees C). Line 2 large cookie sheets with parchment paper.In a medium sized bowl, sift together the flour, salt and baking soda. In the bowl of a stand mixer fitted with the paddle attachment, cream together the butter and sugars on medium speed until smooth and fluffy, about 1 minute. Add egg and beat until fully incorporated. Mix in vanilla extract. With the mixer on it's lowest speed, slowly add the flour until almost incorporated. Mix in oats, then with a rubber spatula fold in the chocolate chips, walnuts, coconut and raisins. Drop by heaping tablespoons onto the prepared cookie sheets.Bake one sheet at a time for 13-15 minutes, or until golden brown. Allow the cookies to cool for 5 minutes on the cookie sheets. Transfer them to wire racks to cool completely.


Christmas Cookie Caper '08: #2 - Gingerbread Women

Let me start off by apologizing for lack of photos of the cookie-making process. I had taken quite a few photos of my mom and I making them. But somehow I erased the ENTIRE memory card on my camera... After crying for a while, my mom convinced me to come back in the kitchen and get a few last minute photos.

May I introduce you to the first cookie in our Final 5! These are our feminist version of the traditional gingerbread cookie you usually see around the holidays. We didn't plan on making all women, but it was the only cutter we had. My mom decorated them with royal icing (which, btw, don't try to make red royal icing unless you have a TON of food coloring you wanna use up!). And I came behind her and added the little silver decorations on their skirts. And they are my favorite cookies out of all the ones we made! They are slightly sweet, kinda soft, and perfectly gingery. I ate about 3 of them while I was watching the gingerbread challenge on Food Network this morning! Definitely a fabulous start to our Christmas Cookie Caper 2008!

Recipe from Better Homes & Gardens: New Baking Book (2004)

GINGERBREAD CUTOUTS
Prep:
40 minutes Chill: 3 hours
Bake: 7 minutes per batch (We cooked ours for 8 minutes)
Makes: 18 large cookies (We got quite a bit more than 18)

Oven: 375 F

1/2 cup shortening
1/2 cup sugar
1 teaspoon baking powder
1 teaspoon ground ginger
1/2 teaspoon baking soda
1/2 teaspoon ground cinnamon
1/2 teaspoon ground cloves
1/2 cup molasses
1 egg
1 tablespoon vinegar
2 1/2 cups all-purpose flour

1. 1n a large mixing bowl beat shortening with an electric mixer on medium to high speed for 30 seconds. Add sugar, baking powder, ginger, bak­ing soda, cinnamon, and cloves. Beat until com­bined, scraping bowl often. Beat in molasses, egg, and vinegar until combined. Beat in as much of the flour as you can with the mixer. Using a wooden spoon, stir in any remaining flour. Divide dough in half. Cover and chill for 3 hours or until easy to handle.
2. Grease a cookie sheet (Or use parchment paper like we did; We used the same 4 sheets all day!); set aside. On a lightly floured surface, roll half of the dough at a time to 1/4-inch thickness. Cut with 4 1/2 to 6-inch people-shaped cookie cutters.
3. Bake in a 375 oven for 6 to 8 minutes or until edges are lightly browned.

Friday, December 5, 2008

"Gift Giving For Dummies" for Cupcakes Take The Cake

Recently I was asked by one of the fine women of "Cupcakes Take The Cake" to participate as a guest blogger for the month of December. I feel so honored that they thought of me! They were one of the sources that spawned my love for cupcakes about a year and a half ago. Thanks again, ladies, for the opportunity! For my post I compiled a gift guide full of fun cupcake/baking related gifts. It's my way of making it easier for you to find something special to give to your fellow cupcake connoisseurs (Or even weirdos who aren't so into cupcakes, but love baking and such).

"GIFT GIVING FOR DUMMIES"
(aka "I hope I don't get sued!!") brought to you by How To Eat A Cupcake

Looking for something special for a family member, friend, co-worker, or your favorite blogger??? Here's a list of great gifts that will be perfect for any cupcake lover or anyone who loves to swing open an oven door from time to time!

1) KitchenAid 3-speed hand mixer
My mom has had her KA hand mixer for over 15 years. It's the Classic model (the cheapest one), but that baby is still kicking! I use it more now than she ever did when I was younger, and it is in perfect condition. And who needs more speeds than high, medium, and low??? I use it for making cake batter, whipped cream, mashed potatoes, and really fluffy omelettes! You can find them at Target stores for around $38!


2) Ice cream scoop w/ trigger handle
A strange but useful stocking stuffer! This ice cream scoop with a lever handle (also called a dsher) is perfect for scooping out uniform cupcakes with no mess (unless you're just prone to messes, in which case Clorox wipes may be a better alternative)! I never make cupcakes without this handy, dandy tool. (PS: It's also great for pancakes!) A #16 ice cream scoop holds about 1/4 cup of batter. You can pick one up almost anywhere that sells kitchen gadgets for under $10.


3) EvenDough bands
I don't know what I'd do without these! Let's put it this way, I suck at eyeballing the thickness of cookie dough and pie crust. With these rings, there's no guesswork. If you need your dough to be 1/4" thick, just slide the appropriate rings on and BOOM! Perfectly even 1/4" dough all over! Mine were a Christmas present from mom last year. She picked them up at Williams-Sonoma for $8.99.


4) Wilton Excelle Elite cupcake and mini muffin pans
I love love LOVE these pans! They are great because they have enough room on the ends to hold the pan without smashing your pretty cuppies. The dark finish browns cupcakes perfectly. I like the 24-cup mini muffin pan. Who only makes 12 mini-cupcakes at a time, ever?? Not me. And these pans are cheap! Less than $8 each at Walmart.


5) Pie Crust Shield
How annoying is it to remember to put little strips of foil on your pies like halfway through baketime so the crust doesn't get too brown? It's really annoying. This little gadget is on MY Christmas list this year. If you are the pie maker in the family, this should be on your Christmas list too! Just slip it over the pie before the it goes into the oven. Your crust will be perfectly and evenly brown! Find them at Walmart for under $5.


6) Vanilla Bean Extract 'Crush'
This stuff is heaven in a bottle. It's vanilla extract loaded with real vanilla bean seeds! It smells just like a vanilla bean, and tastes absolutely perfect in ice cream, creme brulee, buttercream, pound cake, etc... Plus, for every bottle of Vanilla Crush sold, Sonoma Syrups will donate 10% of the retail price to Susan G. Komen for the Cure. I bought mine at Marshall's for $12.99. I've also seen it at Ross and TJ Maxx.


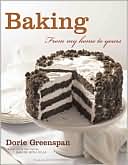
7) Baking: From My Home To Yours by Dorie Greenspan
If you love baking, you need this book. It's as simple as that. The recipes are fantastic, the photos are spectacular, and most recipes come with a little backstory. And if you haven't heard of "Tuesdays with Dorie," it's a huge group of bloggers that make a recipe from this book every single week! The suggested retail price of the book is $40. But I got mine used from Amazon for $11. I've also seen it at Ross for really cheap!


8) Better Homes and Gardens: New Baking Book
If you've been reading my blog lately, you might've seen the Pumpkin-Cream Cheese pie I made not too long ago. That recipe came from this book, which has quickly become one of my favorite baking books! It's full of pictures and includes tons of helpful tips. I recommend this book for any new or experienced baker. The retail price is $19.95, but I was lucky enough to find mine at Ross for $7.


9)2009 Cupcake Box Calendar by Fergal Connolly


If you love the book 500 Cupcakes by Fergal Connolly, you'll definitely love this calendar. It features a new recipe every day. And supposedly it has new recipes in it! The retail price is $13.99.


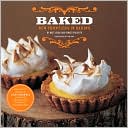
10) Baked: New Frontiers in Baking by Matt Lewis and Renato Poliafito
This book is on my own Christmas list this year. If Santa doesn't deliver, I'll definitely go out and buy it for myself! I browsed through it last time I was in B&N. It features new twists on classic desserts as well as unique modern desserts. Definitely a good gift for an out-of-the-box baker. It retails for $29.95.


BONUS: Here's a tip for finding great books at the perfect price! It's hard buying books online because you can't always flip through them (which is especially important if you're a picture-lover like me!). What I do is take a trip to my favorite book store (Barnes & Noble is my choice because it always smells so nice). Browse through the books. Write down the books that have the best recipes and most gorgeous pictures. Take that list home and go to Amazon.com. Most of the time you can find those same books for about 50% off or more. Usually you can get them new (from the independent dealers) for really cheap. For instance, "Cupcakes Galore" by Gail Wagman sells for $16.95 at B&N. But on Amazon.com you can get a brand new copy for $7.45 from an independent seller. And lots of times you can get free shipping for various reasons (ex: signing up for a trial of Amazon Prime, Free Super Saver shipping if you spend over a certain amount, etc.) Also, I've gotten lots of used books from Amazon's independent sellers and all of them were in great condition when I got them! I should get paid for this kind of advertisement! (Psst.. Amazon, how about a check??) Haha :D

Well, I hope I was able to help someone solve a gift giving dilemma this year. I know the economy sucks. If you can't afford to buy gifts this year, give the gift of cupcakes. And if someone doesn't like it, smash it in their face! HAPPY HOLIDAYS!

Sunday, November 2, 2008

Trick-or-Treats: Cookies, Cupcakes & Truffles, OH MY!

This post is a few days late, but with GOOD reason! Friday, we hosted our annual Halloween party. I started baking Wednesday, and didn't completely finish until Friday afternoon (thanks to some arduous sugar cookies that I'll never make again!). My mom and I started decorating Thursday evening. We decorated well into the early morning hours of Friday. We slept in a little Friday morning, but as soon as we got up we kicked it into high gear to finish all the decorations. We went all out in the kitchen where the food would be served, as well as on our back porch where most of the guests would be hanging out. We had a blast! The place looked great, the food was delish, everyone had a great time! Wanna know the sad part? I barely took any pictures. I wasn't even thinking! Well, it could've been the Jell-O shooters... (I lost count after 12, hahaha). But I got pictures of the important stuff: DESSERT! I'll post those pictures, along with recipes. If I find any cool pictures on anyone else's camera, I'll post them here later. *Pinky promise*
(PS: Sorry the pictures aren't very great. Photoshop is acting up on my computer, so I had to use some random Dell program to edit them =/ )

The sugar cookies are what demanded all of my attention! I made the dough, baked them, and outlined them with royal icing on Wednesday. Then I finished decorating them for almost 5 hours on Thurday. Although they are seriously delicious, I probably won't decorate them like this again because it took up soooooo much time. :(
UPDATE: Here's an awesome tutorial via Annie's Eats to show you how to decorate with royal icing!
The cupcakes were perfect! I made my favorite vanilla cupcakes (Amy Sedaris' recipe) and dyed them purple and orange. I topped them with my grandma's chocolate frosting. SOOO good!The most addicting treats I made were the Red Velvet "Truffles". People couldn't stop popping them into their mouth! They were so easy and so yummy. I'll be making these often!

Sugar Cookies (This is a scaled down recipe from the Valentine's Day cookies I made)
Makes 50-60 cookies (I got 58 1/4"-thick cookies)

2 sticks + 2 tablespoons unsalted butter, softened
1 1/2 cups granulated sugar
3 large eggs
3/4 teaspoon vanilla
3 3/4 cups all-purpose flour
1 1/2 teaspoons baking powder
3/4 teaspoon salt

In a large bowl, cream together butter and sugar until smooth. Beat in eggs and vanilla. Stir in the flour, baking powder, and salt. Cover, and chill dough for at least one hour (or overnight). Preheat oven to 400 degrees F (200 degrees C). Roll out dough on floured surface 1/4 to 1/2 inch thick. Cut into shapes with any cookie cutter. Place cookies 1 inch apart on ungreased cookie sheets lined with parchment paper. Bake for 6-8 minutes or until barely golden around the edges. Cool on wire rack.

Royal Icing (From Confetti Cakes for Kids by Elisa Strauss)

1/3 cup (3 oz) pasteurized egg whites (about 3 egg whites)
4 1/2 cups + 1 tablespoon confectioners' sugar, sifted
1/2 teaspoon lemon juice (I used almond extract)

In the bowl of an electric mixer fitted with a paddle attachment, beat the egg whites on medium speed until soft peaks form. Set the mixer to medium-low speed and gradually add the confectioners' sugar, 1/2 cup at a time. Scrap thoroughly between additions. Add the lemon juice and beat on high speed until stiff peaks form and the icing is no longer shiny, 6-8 minutes. Use immediately or place in an airtight container. You can keep the icing in the refrigerator for up to 5 days. Allow it to come to room temperature before using it.

Halloween Cupcakes (Amy Sedaris' Vanilla Cupcakes)
Makes 12

3/4 stick (6 tbsp) unsalted butter, softened
3/4 cup + 2 tablespoons sugar
1 large egg
1 teaspoon vanilla
1/4 teaspoon salt
1 1/4 teaspoons baking powder
1 1/4 cups all-purpose flour
1/2 cup + 2 tablespoons milk

Preheat over to 350 degrees. In large bowl, cream together butter and sugar. Beat in eggs, vanilla, salt and baking powder. Add flour in 3 batches, alternating with milk. If you want to color the batter 2 different colors, divide it into 2 bowls before completely mixing in the flour. Add food color to each bowl. Mix until batter is smooth with no lumps. Do not overbeat. Divide batter evenly among cups. Bake for 16 to 20 minutes or until toothpick inserted into center comes out clean. Cool on wire rack for 45 minutes or until at room temperature.

My Grandma's Chocolate Frosting
Makes about 3 cups (Enough to frost 12 cupcakes + 1 cup leftover)

1 stick (4 oz) butter or margarine (Grandma always uses margarine)
3 3/4 cups confectioners' sugar, sifted
1/2 cup cocoa powder
1/4 cup milk
1/2 teaspoon instant coffee
1 teaspoon vanilla extract

Heat milk for about 30 seconds in microwave until hot. Stir in vanilla and instant coffee until dissolved. In a large bowl, cream together margarine, sugar, and cocoa powder. Add warm milk and mix on high speed until fluffy.

Overall rating on a scale of 1-5
Moistness: 5
Tenderness: 4
Frosting: 5

Red Velvet Truffles (My own recipe)
Makes about 60-70

1 box Red Velvet cake mix (+ ingredients on box)
1 can (12 oz) whipped chocolate frosting
1 teaspoon almond extract
12 oz semi-sweet chocolate chips
2 tablespoons vegetable shortening
Red melting chocolate wafers (optional)

Bake the cake according to package directions in any size pan (I used a 13x9"). When the cake is completely cooled, crumble it into a large bowl. Stir in chocolate frosting and almond extract. Mix well until there are no visible pieces of cake. Using a small ice cream scoop, shape into bite-sized balls and place on a baking sheet lined with wax paper. Freeze for at least 1 hour. In the top of a double boiler, melt semi-sweet chocolate and shortening over medium heat. Dip truffles into chocolate and let set on wax paper (A special fork made for chocolate dipping works, but you can do what we do. If you have one of those huge 2 prong forks used for holding a turkey or ham while you're carving it, those work great as dipping forks! Just drop the truffle into the chocolate, fish it out on the end of the fork, tap it on the side of the bowl to remove excess chocolate, and slip it onto the pan). In my opinion, these are best served chilled, but they do not require refrigeration.