Flour Child Bakery opens in Virginia Beach!

My mom and I just opened a bakery in Virginia Beach!! "Like" us to stay updated! If you care to read our blog, it's flourchildbakery.blogspot.com.


Friday, December 12, 2008

Christmas Cookie Caper '08: #5 - Snickerdoodles

Here's another cookie recipe that isn't new, but it's still really REALLY good! I'm a newfound snickerdoodle lover. I never even knew what they were until Josh asked me to make them last year because they're his favorite cookie. If you've never had one either, they're sugar cookies coated with cinnamon sugar. They're slightly crunchy around the edges and perfectly soft in the center. Definitely a keeper in the Christmas Cookie Caper's Final 5! This recipe comes from AllRecipes.com (my favorite recipe website). I'm pretty sure this is the highest rated Snickerdoodle recipe. It totally deserves first place. Leave these for Santa and you are SO getting the best presents on the block!

Snickerdoodles
Makes about 30 large cookies

MY NOTES: Increase the cinnamon-sugar coating to 3 Tbsp sugar and 1 Tbsp cinnamon. If you make them smaller, they will be done in 7 minutes. Mine were done in 9 minutes. They are slightly crunchy around the edges and soft in the middle... Yum!

1/2 cup butter, softened
1/2 cup shortening
1 1/2 cups white sugar
2 eggs
2 teaspoons vanilla extract
2 3/4 cups all-purpose flour
2 teaspoons cream of tartar
1 teaspoon baking soda
1/4 teaspoon salt
2 tablespoons white sugar
2 teaspoons ground cinnamon

Preheat oven to 400 degrees F (200 degrees C).Cream together butter, shortening, 1 1/2 cups sugar, the eggs and the vanilla. Blend in the flour, cream of tartar, soda and salt. Shape dough by rounded spoonfuls into balls. Mix the 2 tablespoons sugar and the cinnamon. Roll balls of dough in mixture. Place 2 inches apart on ungreased baking sheets. Bake 8 to 10 minutes, or until set but not too hard. Remove immediately from baking sheets.


Christmas Cookie Caper '08: #4 - Kitchen Sink Cookies

Alright, so you can say I punked out because this isn't a new recipe. Actually we used 3 recipes that we've done before. But you can't deny recipes that are super delicious!! I made these kitchen sink cookies a few months ago. I kinda made up the recipe by compiling a bunch of recipes. I wanted a cookie full of stuff and this is what I came up with. They've got oatmeal, walnuts, two kinds of chocolate chips, coconut, and raisins. Feel free to leave out any of those if you don't like them. One tip I like to remember when making cookie dough is to use butter that's softened but still cool. I'm not sure why but I feel better putting cold cookie dough into the oven. If you want, you can make this dough a few days ahead and scoop it straight from the fridge.

Kitchen Sink Cookies
Makes 18 cookies

MY NOTES: I used a cookie scoop that holds 2 tbsp of cookie dough.

1/2 cup (1 stick) butter
1/2 cup sugar
1/2 cup packed light brown sugar
1 egg
1/2 teaspoon vanilla extract
3/4 cup all-purpose flour
1/2 teaspoon salt
1/2 teaspoon baking soda
1 1/2 cups rolled oats
1/2 cup chopped and toasted walnuts
1/4 cup semi-sweet chocolate chips
1/4 cup milk chocolate chips
1/4 cup coconut
1/4 cup raisins

Preheat the oven to 350 degrees F (175 degrees C). Line 2 large cookie sheets with parchment paper.In a medium sized bowl, sift together the flour, salt and baking soda. In the bowl of a stand mixer fitted with the paddle attachment, cream together the butter and sugars on medium speed until smooth and fluffy, about 1 minute. Add egg and beat until fully incorporated. Mix in vanilla extract. With the mixer on it's lowest speed, slowly add the flour until almost incorporated. Mix in oats, then with a rubber spatula fold in the chocolate chips, walnuts, coconut and raisins. Drop by heaping tablespoons onto the prepared cookie sheets.Bake one sheet at a time for 13-15 minutes, or until golden brown. Allow the cookies to cool for 5 minutes on the cookie sheets. Transfer them to wire racks to cool completely.


Christmas Cookie Caper '08: #3 - Spritz Cookies

We've had our cookie spritzer for who knows how long, and I don't know if it's ever seen daylight before! If you don't know what a cookie spritzer (or cookie press) is, it's this nifty little gadget that presses out cookie dough in neat little shapes. We'll definitely be using it every year now that we know how freakin awesome it is! The cookies almost taste like those buttery shortbread cookies that come in those blue tins around Christmas. Ya know those ones that come in weird shapes like pretzels?? If we had sprinkled ours with coarse sugar before baking them, I bet they would've tasted just like 'em! We decided to make ours festive by coloring the dough. We made regular weird shaped cookies (no clue what that shape is), green Christmas trees, and red flowers that we're gonna pretend are poinsettias. I definitely recommend these if you wanna make something easy! Oh and here's a good tip. Don't try to press these cookies onto parchment paper! We almost threw the spritzer away because the cookies wouldn't stick! Follow the directions and put them on an ungreased cookie sheets. ;)

Recipe from Better Homes & Gardens: New Baking Book (2004)

SPRITZ
Prep:
25 minutes Bake: 8 minutes per batch
Makes: about 84 cookies Oven: 375 F

1 1/2 cups butter
1 cup sugar
1 teaspoon baking powder
1 egg
1 teaspoon vanilla
1/4 teaspoon almond extract (optional)
3 1/2 cups all-purpose flour

1. In a large mixing bowl beat butter with an electric mixer on medium to high speed for 30 seconds. Add sugar and baking powder. Beat until combined, scraping sides of bowl occasionally. Beat in egg, vanilla, and, if desired, almond extract until combined. Beat in as much flour as you can with the mixer. Using a wooden spoon, stir in any remaining flour.
2. Force unchilled dough through a cookie press onto an ungreased cookie sheet.
3. Bake in a 375 oven for 8 to 10 minutes or until edges are firm but not browned. Transfer cookies to a wire rack and let cool. If desired, dip tops into icing.


Christmas Cookie Caper '08: #2 - Gingerbread Women

Let me start off by apologizing for lack of photos of the cookie-making process. I had taken quite a few photos of my mom and I making them. But somehow I erased the ENTIRE memory card on my camera... After crying for a while, my mom convinced me to come back in the kitchen and get a few last minute photos.

May I introduce you to the first cookie in our Final 5! These are our feminist version of the traditional gingerbread cookie you usually see around the holidays. We didn't plan on making all women, but it was the only cutter we had. My mom decorated them with royal icing (which, btw, don't try to make red royal icing unless you have a TON of food coloring you wanna use up!). And I came behind her and added the little silver decorations on their skirts. And they are my favorite cookies out of all the ones we made! They are slightly sweet, kinda soft, and perfectly gingery. I ate about 3 of them while I was watching the gingerbread challenge on Food Network this morning! Definitely a fabulous start to our Christmas Cookie Caper 2008!

Recipe from Better Homes & Gardens: New Baking Book (2004)

GINGERBREAD CUTOUTS
Prep:
40 minutes Chill: 3 hours
Bake: 7 minutes per batch (We cooked ours for 8 minutes)
Makes: 18 large cookies (We got quite a bit more than 18)

Oven: 375 F

1/2 cup shortening
1/2 cup sugar
1 teaspoon baking powder
1 teaspoon ground ginger
1/2 teaspoon baking soda
1/2 teaspoon ground cinnamon
1/2 teaspoon ground cloves
1/2 cup molasses
1 egg
1 tablespoon vinegar
2 1/2 cups all-purpose flour

1. 1n a large mixing bowl beat shortening with an electric mixer on medium to high speed for 30 seconds. Add sugar, baking powder, ginger, bak­ing soda, cinnamon, and cloves. Beat until com­bined, scraping bowl often. Beat in molasses, egg, and vinegar until combined. Beat in as much of the flour as you can with the mixer. Using a wooden spoon, stir in any remaining flour. Divide dough in half. Cover and chill for 3 hours or until easy to handle.
2. Grease a cookie sheet (Or use parchment paper like we did; We used the same 4 sheets all day!); set aside. On a lightly floured surface, roll half of the dough at a time to 1/4-inch thickness. Cut with 4 1/2 to 6-inch people-shaped cookie cutters.
3. Bake in a 375 oven for 6 to 8 minutes or until edges are lightly browned.

Friday, December 5, 2008

"Gift Giving For Dummies" for Cupcakes Take The Cake

Recently I was asked by one of the fine women of "Cupcakes Take The Cake" to participate as a guest blogger for the month of December. I feel so honored that they thought of me! They were one of the sources that spawned my love for cupcakes about a year and a half ago. Thanks again, ladies, for the opportunity! For my post I compiled a gift guide full of fun cupcake/baking related gifts. It's my way of making it easier for you to find something special to give to your fellow cupcake connoisseurs (Or even weirdos who aren't so into cupcakes, but love baking and such).

"GIFT GIVING FOR DUMMIES"
(aka "I hope I don't get sued!!") brought to you by How To Eat A Cupcake

Looking for something special for a family member, friend, co-worker, or your favorite blogger??? Here's a list of great gifts that will be perfect for any cupcake lover or anyone who loves to swing open an oven door from time to time!

1) KitchenAid 3-speed hand mixer
My mom has had her KA hand mixer for over 15 years. It's the Classic model (the cheapest one), but that baby is still kicking! I use it more now than she ever did when I was younger, and it is in perfect condition. And who needs more speeds than high, medium, and low??? I use it for making cake batter, whipped cream, mashed potatoes, and really fluffy omelettes! You can find them at Target stores for around $38!


2) Ice cream scoop w/ trigger handle
A strange but useful stocking stuffer! This ice cream scoop with a lever handle (also called a dsher) is perfect for scooping out uniform cupcakes with no mess (unless you're just prone to messes, in which case Clorox wipes may be a better alternative)! I never make cupcakes without this handy, dandy tool. (PS: It's also great for pancakes!) A #16 ice cream scoop holds about 1/4 cup of batter. You can pick one up almost anywhere that sells kitchen gadgets for under $10.


3) EvenDough bands
I don't know what I'd do without these! Let's put it this way, I suck at eyeballing the thickness of cookie dough and pie crust. With these rings, there's no guesswork. If you need your dough to be 1/4" thick, just slide the appropriate rings on and BOOM! Perfectly even 1/4" dough all over! Mine were a Christmas present from mom last year. She picked them up at Williams-Sonoma for $8.99.


4) Wilton Excelle Elite cupcake and mini muffin pans
I love love LOVE these pans! They are great because they have enough room on the ends to hold the pan without smashing your pretty cuppies. The dark finish browns cupcakes perfectly. I like the 24-cup mini muffin pan. Who only makes 12 mini-cupcakes at a time, ever?? Not me. And these pans are cheap! Less than $8 each at Walmart.


5) Pie Crust Shield
How annoying is it to remember to put little strips of foil on your pies like halfway through baketime so the crust doesn't get too brown? It's really annoying. This little gadget is on MY Christmas list this year. If you are the pie maker in the family, this should be on your Christmas list too! Just slip it over the pie before the it goes into the oven. Your crust will be perfectly and evenly brown! Find them at Walmart for under $5.


6) Vanilla Bean Extract 'Crush'
This stuff is heaven in a bottle. It's vanilla extract loaded with real vanilla bean seeds! It smells just like a vanilla bean, and tastes absolutely perfect in ice cream, creme brulee, buttercream, pound cake, etc... Plus, for every bottle of Vanilla Crush sold, Sonoma Syrups will donate 10% of the retail price to Susan G. Komen for the Cure. I bought mine at Marshall's for $12.99. I've also seen it at Ross and TJ Maxx.


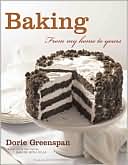
7) Baking: From My Home To Yours by Dorie Greenspan
If you love baking, you need this book. It's as simple as that. The recipes are fantastic, the photos are spectacular, and most recipes come with a little backstory. And if you haven't heard of "Tuesdays with Dorie," it's a huge group of bloggers that make a recipe from this book every single week! The suggested retail price of the book is $40. But I got mine used from Amazon for $11. I've also seen it at Ross for really cheap!


8) Better Homes and Gardens: New Baking Book
If you've been reading my blog lately, you might've seen the Pumpkin-Cream Cheese pie I made not too long ago. That recipe came from this book, which has quickly become one of my favorite baking books! It's full of pictures and includes tons of helpful tips. I recommend this book for any new or experienced baker. The retail price is $19.95, but I was lucky enough to find mine at Ross for $7.


9)2009 Cupcake Box Calendar by Fergal Connolly


If you love the book 500 Cupcakes by Fergal Connolly, you'll definitely love this calendar. It features a new recipe every day. And supposedly it has new recipes in it! The retail price is $13.99.


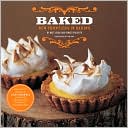
10) Baked: New Frontiers in Baking by Matt Lewis and Renato Poliafito
This book is on my own Christmas list this year. If Santa doesn't deliver, I'll definitely go out and buy it for myself! I browsed through it last time I was in B&N. It features new twists on classic desserts as well as unique modern desserts. Definitely a good gift for an out-of-the-box baker. It retails for $29.95.


BONUS: Here's a tip for finding great books at the perfect price! It's hard buying books online because you can't always flip through them (which is especially important if you're a picture-lover like me!). What I do is take a trip to my favorite book store (Barnes & Noble is my choice because it always smells so nice). Browse through the books. Write down the books that have the best recipes and most gorgeous pictures. Take that list home and go to Amazon.com. Most of the time you can find those same books for about 50% off or more. Usually you can get them new (from the independent dealers) for really cheap. For instance, "Cupcakes Galore" by Gail Wagman sells for $16.95 at B&N. But on Amazon.com you can get a brand new copy for $7.45 from an independent seller. And lots of times you can get free shipping for various reasons (ex: signing up for a trial of Amazon Prime, Free Super Saver shipping if you spend over a certain amount, etc.) Also, I've gotten lots of used books from Amazon's independent sellers and all of them were in great condition when I got them! I should get paid for this kind of advertisement! (Psst.. Amazon, how about a check??) Haha :D

Well, I hope I was able to help someone solve a gift giving dilemma this year. I know the economy sucks. If you can't afford to buy gifts this year, give the gift of cupcakes. And if someone doesn't like it, smash it in their face! HAPPY HOLIDAYS!

Wednesday, December 3, 2008

Christmas Cookie Caper '08: #1 - World Peace Cookies

EDIT: I've made this recipe several times since posting this entry. My favorite way to make them is to use coarse salt and double the amount. I also add 1/2 teaspoon ground cayenne. It's an insane sensation in your mouth! I call them "World Domination Cookies!" ;)

I'm so excited. I mean I'm REALLY REEAALLLLYY excited!! I'm almost Pointer Sisters excited! Are you curious yet? It's CHRISTMAS COOKIE TIME!! My mom and I started a new tradition three years ago when we decided to bake a butt-load of all different kinds of cookies and package them in cute little tins with sparkly tissue paper. We made one for almost every person we know. After hours and hours of making dough, decorating sugar cookies, washing pans, guarding the cooling cookies from the dog, we were up to our eyeballs in cookies! After that escapade, we toned it down for the next year. The second time around we only made 5 kinds of cookies, and we made a lot LESS of each kind. But we were still sticking to our old stand-bys... sugar cookies, oatmeal raisin cookies, Toll House cookies, no-bake chocolate oatmeal cookies, and double chocolate chunk cookies. This year I really want to try new recipes. I thought I'd have plenty of time to test recipes before we decided on the "final 5." However, after my mom looked over our social calendar, we quickly realized that the first weekend in December is our only free weekend to make cookies! So last night I sat down with two of my favorite baking books and chose 7 or 8 recipes from them. I narrowed it down to the 5 I really want to try. I knew my mom would find at least one to complain about. She picked the "World Peace Cookies." Of course because they have a strange name, and she doesn't know what world peace tastes like! I got home early from work today and decided to test the recipe. And so begins...
This recipe from from Baking From My Home To Yours by Dorie Greenspan. If we decide not to put these cookies in our "final 5," then you guys just got a bonus recipe! I'll post the final 5 sometime next week.
Sooo... Let's enter somewhere in the dough making process...
After creaming the butter and sugars, dump all the dry ingredients in and cover the mixer with a kitchen towel.
After pulsing a few times, my dough was still dry.
About 10 seconds more and it came together nicely.
After adding the chocolate chips, divide it into two.
Roll them up into logs and refrigerate for 3 hours.
Cut the logs into 1/2 inch slices and bake.
Mmmm don't they look so yummy??

They are very delicious! Chewy but crumbly and VERY chocolatey.I was expecting them to be saltier (given the description below), but it could be because I used kosher salt... who knows? Mom says they're awesome! They're definitely in the running for the Final 5!

WORLD PEACE COOKIES
MAKES ABOUT 36 COOKIES
From Dorie:

I once said I thought these cookies, the brainchild of the Parisian pastry chef Pierre Hermé, were as important a culinary breakthrough as Toll House cookies, and I've never thought better of the statement. These butter-rich, sandy-textured slice-and-bake cookies are members of the sablé family. But, unlike classic sablés, they are midnight dark--there's cocoa in the dough--and packed with chunks of hand-chopped bittersweet chocolate. Perhaps most memorably, they're salty. Not just a little salty, but remarkably and sensationally salty. It's the salt--Pierre uses fleur de sel, a moist, off-white sea salt--that surprises, delights and makes the chocolate flavors in the cookies seem preternaturally profound. When I included these in Paris Sweets, they were called Korova Cookies and they instantly won fans, among them my neighbor Richard Gold, who gave them their new name. Richard is convinced that a daily dose of Pierre's cookies is all that is needed to ensure planetary peace and happiness.
SERVING: The cookies can be eaten when they are warm or at room temperature ­and are best suited to cold milk or hot coffee.

STORING: Packed airtight, the cookies will keep at room temperature for up to 3 days; they can be frozen for up to 2 months.

1 1/4 cups all-purpose flour
1/3 cup unsweetened cocoa powder
1/2 teaspoon baking soda
1 stick plus 3 tablespoons (11 tablespoons) unsalted butter, at room temperature
2/3 cup (packed) light brown sugar
1/4 cup sugar
1/2 teaspoon fleur de sel or 1/4 teaspoon fine sea salt (I used 1/2 teaspoon kosher salt)
1 teaspoon pure vanilla extract
5 ounces bittersweet chocolate, chopped into chips, or a generous 3/4 cup store ­bought mini chocolate chips

Sift the flour, cocoa and baking soda together.
Working with a stand mixer, preferably fitted with a paddle attachment, or with a hand mixer in a large bowl, beat the butter on medium speed until soft and creamy. Add both sugars, the salt and vanilla extract and beat for 2 minutes more.
Turn off the mixer. Pour in the dry ingredients. Drape a kitchen towel over the stand mixer to protect yourself and your kitchen from flying flour and pulse the mixer at low speed about 5 times, a second or two each time. Take a peek--if there is still a lot of flour on the surface of the dough, pulse a couple of times more; if not, remove the towel. Continuing at low speed, mix for about 30 seconds more, just until the flour disappears into the dough-for the best texture. Work the dough as little as possible once the flour is added, and don't be concerned if the dough looks a little crumbly. Toss in the chocolate pieces and mix only to incorporate.
Turn the dough out onto a work surface, gather it together and divide it in half. Working with one half at a time, shape the dough into logs that are 1 1/2 inches in diameter. Wrap the logs in plastic wrap and refrigerate them for at least 3 hours. (The dough can be refrigerated for up to 3 days or frozen for up to 2 months. If you've frozen the dough, you needn't defrost it before baking--just slice the logs into cookies and bake the cookies 1 minute longer.)

GETTING READY TO BAKE: Center a rack in the oven and preheat the oven to 325 degrees F. Line two baking sheets with parchment or silicone mats.
Using a sharp thin knife, slice the logs into rounds that are 1/2 inch thick. (The rounds are likely to crack as you're cutting them--don't be concerned, just squeeze the bits back onto each cookie.) Arrange the rounds on the baking sheets, leaving about 1 inch between them. Bake the cookies one sheet at a time for 12 minutes--they won't look done, nor will they be firm, but that's just the way they should be. Transfer the baking sheet to a cooling rack and let the cookies rest until they are only just warm, at which point you can serve them or let them reach room temperature.

Tuesday, December 2, 2008

IronCupcake_005: Pumpkin Pecan Cupcakes... 2 Ways!

Iron Cupcake:Earth
Theme: Chocolate with a Twist
My 2nd entry: Pumpkin Pecan Chocolate Chip Cupcakes w/ Chocolate Glaze
Voting begins: Monday, December 29 at 8 pm Central @ http://mkecupcakequeen.blogspot.com and will be open through Friday, January 2 at 12 noon Central.

We had a VERY close call in the poll this week! Pumpkin Pecan Cupcakes pulled ahead of German Chocolate Cupcakes at the last minute with 2 more votes. YYAAYY!! I knew I could integrate chocolate into this somehow and use it as another Iron Cupcake entry. After those pumpkin-swirl brownies, I'm a tried and true pumpkin+chocolate fan. I made 6 of the cupcakes just the way they are in the book. Then to the rest of the batter I added some mini semi-sweet chocolate chips. I topped the regular ones with cinnamon cream cheese. On top of the chocolate chip cupcakes I used the same chocolate glaze from my first ICE_005 entry, chocolate mayonnaise cupcakes, but I added a pinch of cinnamon to it this time! To make them extra fancy I dipped some pecans in melted sugar. Then I dipped some of those in semi-sweet chocolate. These cupcakes are so so so good! The cinnamon in the chocolate glaze is such a tasty addition! And the crunchy pecans in the cupcake are a very nice texture compliment. I can't believe how easy this months IC challenge has been so far. Expect a few more entries out of me! :P
Measuring the dry ingredients Dry ingredients... meet wet ingredients!
Ready for the oven
Candied pecans... Mmmm!
Cupcakes cooling in the kitchen
On the left: Pumpkin Pecan Cupcakes w/ Cinnamon Cream Cheese
On the right: Pumpkin Pecan Chocolate Chip Cupcakes w/ Chocolate Glaze
Cupcake recipe adapted from Cupcakes by Shelly Kaldunski
Pumpkin Pecan Cupcakes
MAKES 12 CUPCAKES

1 cup all-purpose flour
1 tsp baking powder
1/2 tsp baking soda
1/4 tsp salt
1 tsp ground cinnamon
1/2 tsp ground ginger
1/4 tsp ground allspice
Pinch freshly grated nutmeg
1 cup canned pumpkin puree
1 cup sugar
1/2 cup vegetable oil
2 large eggs, at room temperature
1 cup pecans, toasted and coarsely chopped
Maple Glaze (This was nasty and I threw it away! I won't even include the recipe.)


Position a rack in the middle of the oven and preheat to 350°F. Line a standard 12-cup muffin pan with paper or foil liners.

In a bowl, whisk together the flour, baking powder, baking soda, salt, cinnamon, ginger, allspice, and nutmeg. In another bowl, whisk together the pumpkin puree, sugar, oil, and eggs. Add the flour mixture and whisk to combine completely. Stir in the chopped pecans. (I added 1/4 cup mini semi-sweet chocolate chips to half of the batter).

Divide the batter evenly among the prepared muffin cups, filling each about three-fourths full. Bake until a toothpick inserted into the center of a cupcake comes out clean, 22-24 minutes (Mine were done at 19 minutes). Let the cupcakes cool in the pan on a wire rack for 5 minutes. Transfer the cupcakes to the wire rack and let cool completely, about 1 hour.
Spoon the glaze over the cupcakes and serve. {The glazed cupcakes can be refrigerated in an airtight container for up to 4 days; bring to room temperature before serving.}

Chocolate Cinnamon Glaze
1/2 cup semisweet chocolate chips
2 tablespoons butter
1 tablespoon light corn syrup
1/4 teaspoon vanilla extract
Pinch of cinnamon

In a double boiler over hot, but not boiling water, combine chocolate chips, butter and corn syrup. Stir until chips are melted and mixture is smooth, then add vanilla and cinnamon. Allow to cool for about 10 minutes. Spread glaze over top of cupcakes.


Overall rating on a scale of 1-5
Moistness: 5
Tenderness: 5
Frosting: 5


Prizes provided by Etsy artists:
BETTY TURBO
A pair of cupcake earrings from LOTS OF SPRINKLES
Also, IronCupcake:Earth is excited to welcome back
CAKESPY, who is now going to be doing a piece for our winner each month until further notice!
As an added bonus for December we have adorable cupcake pincushions compliments of SWEET CUPPIN CAKES BAKERY AND CUPCAKERY SUPPLY.
Corporate prize providers:
HEAD CHEFS by
FIESTA PRODUCTS
HELLO CUPCAKE by Karen Tack and Alan Richardson
JESSIE STEELE APRONS
CUPCAKE COURIER
TASTE OF HOME books
Iron Cupcake:Earth is sponsored in part by
1-800-Flowers