Flour Child Bakery opens in Virginia Beach!

My mom and I just opened a bakery in Virginia Beach!! "Like" us to stay updated! If you care to read our blog, it's flourchildbakery.blogspot.com.


Showing posts with label birthday. Show all posts

Wednesday, August 12, 2009

Banana Split Birthday Cake, Version 2.0

UPDATE: Made this for Josh's birthday in January 2010. My bag of ganache exploded all over the top of the cake while I was drizzling it over. Had to scrape off most of the whipped cream. Didn't have enough cream to pipe more swirls on top, so we tried using Reddi-Whip (ya know, the kind in the aerosol can??). It lasted for about 14 seconds before it started to disintegrate and melt down the side of the cake. Oh well, the whole thing still tasted good! Just wish it would've been a masterpiece for Josh's surprise birthday party!

If you've been reading my blog for a while, you may remember my banana split birthday cake from last year. The layers were hummingbird cake (banana and pineapple) without the cinnamon. I filled it with whipped cream, fresh sliced strawberries, and chocolate ganache. I frosted the whole thing with whipped cream and topped it like a real banana split with cherries, sprinkles, and more chocolate drizzled over the whole thing. It was a freaking masterpiece, if I may say so myself. So last Saturday when my birthday rolled around again, I knew I wanted to give this cake another try.

Stephanie L. and I baked the cake layers Friday afternoon. I just wasn't satisfied with the way the cake looked. It barely rose at all, and it felt way too dense. Just for reference, I looked up a hummingbird cake recipe in Southern Cakes and noticed it was exactly the same except it used baking soda instead of baking powder, as well as a lot less oil. I had already tweaked last year's recipe to use less oil, but I had a feeling the leavening was wrong. So we made it AGAIN using baking soda this time. It rose more, and the soda made the cake brown faster, which looked a lot prettier (even though it would soon be smothered in whipped cream). Don't worry! We didn't waste the first attempt. Even though they were dense I know they'll still taste yummy, so I threw them in the freezer for later use.

To celebrate my birthday, we all stayed at my parents' camper at Sunset Beach Resort on the Easter Shore. "We" including myself, Josh, my parents, two of my aunts, two of my cousins, and a handful of my parents' friends. We had such a blast! My family knows me so well, because I didn't ask for anything at all for my birthday, and all of my gifts were still amazing. I got a bread maker, a popcorn machine, an angelfood cake pan, a digital picture frame, a BUNCH of underwear (there's an inside joke, don't worry), two Queen cd's, and obviously there was a sale on hand soaps at Bath & Body Works! ;P My dad made ribs on the grill with THREE different kinds of BBQ sauce he got from Quaker Steak & Lube. They were so yummy! When it was time for the cake, everyone raved about how beautiful it was. My dad tasted it and said that when we have our own bakery we're gonna call it the "$1M cake" and charged $79.95 as an introductory price! Haha, I dunno what neighborhood he thinks that bakery is gonna be in with wallets that big! Lol, anyway this tweaked recipe is definitely the one that's going into our family cookbook!

All I got was a cell phone picture, sorry! I totally forgot about taking pictures until we were about to walk out the door!
Here's what it looked like last year...

Banana Split Cake
3 cups all-purpose flour
2 cups white sugar
1 teaspoon baking soda
1/2 teaspoon salt
3 eggs, beaten
3/4 cup vegetable oil
2 cups diced bananas
1 (8 ounce) can crushed pineapple
2 teaspoons vanilla extract
1 cup chopped finely walnuts

Whipped cream
1/4 cup sugar
1 tablespoon cornstarch
3 cups cold heavy cream
1 1/2 teaspoons vanilla

Chocolate sauce
6 ounces semi-sweet chocolate chips
6 ounces heavy cream

Fresh sliced strawberries

Preheat oven to 350 degrees F. Grease three 8-inch round cake pans and line bottoms with parchment paper.
Combine flour, sugar, baking soda, and salt in a large bowl. In another bowl, combine eggs, oil, bananas, pineapple, vanilla, and walnuts; stir until moistened. Do not beat.
Bake for 20 to 30 minutes, or until lightly browned and a toothpick inserted in the center comes out clean. Cool on a wire rack for 10 minutes. Invert and remove pans. Cover cakes with a lint-free kitchen towel to finish cooling.

While cakes are cooling, make chocolate sauce. Combine chocolate chips and cream in a microwave safe bowl. Microwave on high in 30 second intervals, stirring each time, until chocolate is almost melted. Continue stirring until chocolate is completely melted. Let cool until slightly thickened.

When cakes are completely cool, make whipped cream. Whisk the sugar and cornstarch together in a small saucepan and slowly whisk in 1/2 cup of cream. Bring the mixture to a simmer over medium heat, whisking constantly until the mixture thickens and resembles pudding, 2-3 minutes. Let the mixture cool to room temperature, about 30 minutes. In a large bowl, whip the remaining 2 1/2 cups cream and the vanilla together with an electric mixer on low speed until frothy, about 30 seconds. Increase mixer speed to medium and continue whipping until it begins to thicken, about 30 seconds. Slowly add the cooled cornstarch mixture and continue to whip until soft peaks form (about the texture of Cool Whip), 1-3 minutes. Do not overwhip, or mixture will curdle.

Thinly spread whipped cream over each layer. Arrange fresh sliced strawberries and drizzle chocolate sauce over the whipped cream. Frost the whole cake with whipped cream and drizzle more chocolate on top. Add maraschino cherries and sprinkles for decoration.


Monday, April 27, 2009

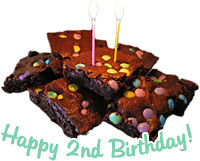
CI's "Classic Brownies" for HTEAC's 2nd Birthday!

UPDATE: Two days later, these brownies are quite delicious after they've dried out a bit! ;)

Happy 2nd birthday, HTEAC! My, how you've grown! It seems like only yesterday I was typing ".blogspot.com" after your name. Now you've established yourself on the almighty interweb and changed your last name to ".net!" No matter what, you'll always be my little baby blog!

As always, I really want to say thank you to every pair of eyes that has ever graced my pages, as well as every set of fingers that have typed a comment. Thank you to all of you who don't click "Spam" when you get my e-mail updates in your inbox. Thank you to all of you who send pictures showing what a great job you did recreating the recipes you've seen here! Thank you to the many of you who have actually sent me things by mail, just out of the kindness of your hearts (PS: Maela, I'm going to pick up your package from the post office on Monday!)! And most importantly, thanks to everyone who puts up with my mindlessness when I forget things, like including the amount of flour in the Whoopie Pie recipe! I wouldn't maintain this blog if it wasn't for all of my readers, so give yourselves a hug and then make these brownies!

By now, my most faithful readers probably know that I'm not the biggest chocoholic in the world. Don't get me wrong, chocolate is A-OK in my book. But given the choice between chocolate or vanilla, 8 times out of 10 I'm gonna pick vanilla! On that note, I'm going to tell you why I don't absolutely love these Cook's Illustrated brownies. First of all, I didn't really discover until today that I prefer cake brownies over fudge brownies... meaning I prefer them more on the fluffy side with just a hint of chewy fudginess. These "Classic Brownies" are definitely for fudge-lovers! They're made with cake flour, so that pretty much ditches any hope that they'll be chewy. They are extremely dense and fudgy when baked according to CI's instructions. My inspiration to make these brownies came from Smitten Kitchen, and she mentions that if they're baked longer, they'll be cakey. I'm not going to take that chance. My next brownie venture will be with a recipe that specifically caters to the chewy characteristic of my ideal brownie. And I'll also be looking for a recipe with a little less sugar, because these were almost tooth-achingly sweet.
Anyway, HAPPY BIRTHDAY, my dear blog!

Classic Brownies (from Cook’s Illustrated)

1 cup (4 ounces) pecans or walnuts, chopped medium (optional)
1¼ cups (5 ounces) cake flour
½ teaspoon salt
¾ teaspoon baking powder
6 ounces unsweetened chocolate, chopped fine
12 tablespoons (1½ sticks) unsalted butter, cut into six 1-inch pieces
2¼ cups (15¾ ounces) sugar
4 large eggs
1 tablespoon vanilla extract

1. Adjust oven rack to middle position; heat oven to 325 degrees. Cut 18-inch length foil and fold lengthwise to 8-inch width. Fit foil into length of 13 by 9-inch baking dish, pushing it into corners and up sides of pan; allow excess to overhand pan edges. Cut 14-inch length foil and, if using extra-wide foil, fold lengthwise to 12-inch width; fit into width of baking pan in same manner, perpendicular to first sheet. Spray foil-lined pan with nonstick cooking spray.
2. If using nuts, spread nuts evenly on rimmed baking sheet and toast in oven until fragrant, 5 to 8 minutes. Set aside to cool.
3. Whisk to combine flour, salt, and baking powder in medium bowl; set aside.
4. Melt chocolate and butter in large heatproof bowl set over saucepan of almost-simmering water, stirring occasionally, until smooth. (Alternatively, in microwave, heat butter and chocolate in large microwave-safe bowl on high for 45 seconds, then stir and heat for 30 seconds more. Stir again, and, if necessary, repeat in 15-second increments; do not let chocolate burn.) When chocolate mixture is completely smooth, remove bowl from saucepan and gradually whisk in sugar. Add eggs on at a time, whisking after each addition until thoroughly combined. Whisk in vanilla. Add flour mixture in three additions, folding with rubber spatula until batter is completely smooth and homogeneous.
5. Transfer batter to prepared pan; using spatula, spread batter into corners of pan and smooth surface. Sprinkle toasted nuts (if using) evenly over batter and bake until toothpick or wooden skewer inserted into center of brownies comes out with few moist crumbs attached, 30 to 35 minutes. Cool on wire rack to room temperature, about 2 hours, then remove brownies from pan by lifting foil overhang. Cut brownies into 2-inch squares and serve. (Store leftovers in airtight container at room temperature, for up to 3 days, or, ahem, in the freezer until your resistance gets the better of you.)


[printable recipe coming soon]

Monday, February 2, 2009

Josh's Perfect Party Cake!

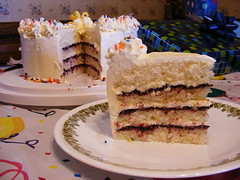
Saturday was Josh's 21st birthday. Yeah yeah, I'm a cradle robber! He's about 1 1/2 years younger than me. But you wouldn't know it by looking at us! Most people say he looks 5 years older than me easily. That could be because I look 16. Or it could be because of his massively cool beard. Haha ANYWAY! He asked me to make him a lemon raspberry cake. Soooo of course I had to return to Dorie's Perfect Party Cake. The first time I made this cake was for a Daring Bakers challenge. I had to make it again because it's fabulous! I added a secret ingredient to make it more moist (scroll down to the recipe if you wanna know!). Dorie's Swiss meringue buttercream was yummy, despite my mistake of using salted butter... OOPS! However, next time I'll use my own recipe for SMBC because mine has less butter. I used Braswell's seedless black raspberry preserves for the filling. It's the most delicious preserve I've ever tasted. You can find it almost all the time at TJ Maxx! Overall this cake is a 10 out of 10!

Ooh yeah, we sliced it before we sang. We were excited to eat it! :D

FIRST BITE!!Oh oh me next!!

Recipe from Dorie Greenspan’s Baking from My Home to Yours.

Perfect Party Cake
For the Cake
2 1/4 cups cake flour
1 tablespoon baking powder
½ teaspoon salt
1 ¼ cups whole milk or buttermilk (I used milk)
4 large egg whites
1 ½ cups sugar
2 teaspoons grated lemon zest (I zested a whole lemon)
1 stick (8 tablespoons or 4 ounces) unsalted butter, at room temperature
½ teaspoon pure lemon extract
4 tablespoons buttermilk powder (My secret ingredient!)

For the Buttercream (This is just enough to thinly frost the cake, but if you want to enough to play around with, go ahead and
times the recipe by 1.5)
1 cup sugar
4 large egg whites
3 sticks (12 ounces) unsalted butter, at room temperature
(I recommend reducing this to 2 sticks [1 stick for every 2 whites is my general rule])
¼ cup fresh lemon juice (from 2 large lemons) (I used 2 teaspoons lemon extract)

1 teaspoon pure vanilla extract (I omitted this)

For Finishing
2/3 cup seedless raspberry preserves stirred vigorously or warmed gently until spreadable (I used slightly less [just enough to thinly coat each cake layer] and it was just the right amount of flavor)
About 1 ½ cups sweetened shredded coconut (I omitted this; Josh isn't a huge coconut fan)

Center a rack in the oven and preheat the oven to 350 degrees F. Butter two 9 x 2 inch round cake pans (I used 8x2) and line the bottom of each pan with a round of buttered parchment or wax paper. Put the pans on a baking sheet.

Sift together the flour, baking powder and salt (and buttermilk powder, if using). Whisk together the milk and egg whites in a medium bowl. Put the sugar and lemon zest in a mixer bowl or another large bowl and rub them together with your fingers until the sugar is moist and fragrant. Add the butter and working with the paddle or whisk attachment, or with a hand mixer, beat at medium speed for a full 3 minutes, until the butter and sugar are very light. Beat in the extract, then add one third of the flour mixture, still beating on medium speed. Beat in half of the milk-egg mixture, then beat in half of the remaining dry ingredients until incorporated. Add the rest of the milk and eggs beating until the batter is homogeneous, then add the last of the dry ingredients. Finally, give the batter a good 2- minute beating to ensure that it is thoroughly mixed and well aerated (This sounds opposite of what most cake recipes tell you, but DO IT!). Divide the batter between the two pans and smooth the tops with a rubber spatula. Bake for 30-35 minutes, or until the cakes are well risen and springy to the touch – a thin knife inserted into the centers should come out clean.

Transfer the cakes to cooling racks and cool for about 5 minutes, then run a knife around the sides of the cakes, unfold them and peel off the paper liners. Invert and cool to room temperature, right side up (the cooled cake layers can be wrapped airtight and stored at room temperature overnight or frozen for up to two months).

To Make the Buttercream
Put the sugar and egg whites in a mixer bowl or another large heatproof bowl, fit the bowl over a pan of simmering water and whisk constantly, keeping the mixture over the heat, until it feels hot to the touch, about 3 minutes (160F on a candy thermometer). The sugar should be dissolved, and the mixture will look like shiny marshmallow cream (unless you whisked the eff out of it, it won't look like marshmallow cream YET!). Remove the bowl from the heat. Working with the whisk attachment or with a hand mixer, beat the meringue on medium speed until it is cool, about 5 minutes. Switch to the paddle attachment if you have one, and add the butter a stick at a time, beating until smooth. Once all the butter is in, beat the buttercream on medium-high speed until it is thick and very smooth, 6-10 minutes. During this time the buttercream may curdle or separate – just keep beating and it will come together again. On medium speed, gradually beat in the lemon juice, waiting until each addition is absorbed before adding more, and then the vanilla. You should have a shiny smooth, velvety, pristine white buttercream. Press a piece of plastic against the surface of the buttercream and set aside briefly.


To Assemble the Cake
Using a sharp serrated knife and a gentle sawing motion, slice each layer horizontally in half. Put one layer cut side up on a cardboard cake round or a cake plate protected by strips of wax or parchment paper. Spread it with 1/3 of the preserves. Cover the jam evenly with about 1/4 of the buttercream. Top with another layer, spread with preserves and buttercream and then do the same with a third layer (you’ll have used all the jam and have buttercream leftover). Place the last layer cut side down on top of the cake and use the remaining buttercream to frost the sides and top (This cake is super crumbly, so I recommend doing a thin crumb coat first). Press the coconut into the frosting, patting it gently all over the sides and top.

Serving
The cake is ready to serve as soon as it is assembled, but I think it’s best to let it sit and set for a couple of hours in a cool room – not the refrigerator. Whether you wait or slice and enjoy it immediately, the cake should be served at room temperature; it loses all its subtlety when it’s cold. Depending on your audience you can serve the cake with just about anything from milk to sweet or bubbly wine.

Storing
The cake is best the day it is made, but you can refrigerate it, well covered, for up to two days. Bring it to room temperature before serving. If you want to freeze the cake, slide it into the freezer to set, then wrap it really well – it will keep for up to 2 months in the freezer; defrost it, still wrapped overnight in the refrigerator.

Saturday, August 23, 2008

A Very Late Birthday Present!

Don't you just LOVE late birthday gifts? You feel like all the excitement of your birthday is long gone, and then suddenly BAM! It's birthday time all over again! That's how I felt Thursday when I was checking my voicemail on my way home from work. My dad left a message saying a bunch of boxes were delivered to me on our backporch. YAY! YAY! YAY! My old laptop died last year. Since then I've been mooching off my brother's laptop (and my parents' dinosaur of a desktop), so they decided to get me my own for my birthday. My mom ordered an awesome Dell XPS with an all-in-one scanner/printer/copier thingy. It was on sale for a really nice price, and it came with a free 30-minute Flip video camera. I got home quickly (by driving safely and focusing on the road, of course), and ripped into those boxes like a mad woman... but not before taking a picture of them neatly stacked in my room!


Packed safely inside those boxes were a Dell XPS M1530 laptop, a Logitech coardless mouse, a Flip 30-minute video recorder, and a Dell V305 Printer. I don't have anywhere to put the printer in my room yet, so I just left it in the box.

Today, I've gotta go shopping for some shelves so that I can move all of my cookbooks off my desk to make room for this beauty! This thing is seriously awesome! Now I've just got to figure out a way to get the songs from my iPod onto this computer without resetting my entire iTunes library.... Ugh!

Anyway, I must give a huge thanks to my mom and dad. They are incredible, and I couldn't ask for better parents. I owe them so much dish and laundry duty now!! Lol :D

Friday, February 1, 2008

Banana Split Cupcakes OR Banana Cupcakes with Banana Coconut Frosting

Yesterday was my boyfriend's birthday, so I let him choose what kind of cupcakes he wanted. After looking through all of my cupcake books he finally decided on Banana Split Cupcakes. The recipe comes from Crazy About Cupcakes by Krystina Castella. It's a banana cupcake topped with a scoop of ice cream and all the fixin's of a banana split. The cupcakes are so moist and ccrraazzyy good! I left 5 of them plain for the banana splits, and I topped the remaining cupcakes with Banana Coconut Frosting. The idea for the frosting came from the same book, but the recipe just didn't work at all. I tweaked it and came up with a deeeeelicious banana frosting that I will definitely make again!
And may I just say I'm in an acceptionally good mood today. It's freakishly warm outside (68F), and I'm writing this entry with my bedroom windows wide open!
ingredients... and once again I've left out a very important ingredient!This batter was so delicious. I could've gotten an extra cupcake out of it, but I couldn't stop myself from eating the batter right out of the bowl! ...ready for the oven in their cute birthday cases!I accidentally deleted the picture of the naked cupcakes cooling...
But here's the main event!And this one is topped with the Banana Coconut Frosting!Don't you wish it was your birthday??

Cupcake recipe from Crazy About Cupcakes by Krystina Castella.

MY NOTES: It took 2 1/2 bananas to get 1 cup mashed. I used the leftover 1/2 banana in the frosting. I got 21 cupcakes. Mine were done at 19 minutes.

Banana Cupcakes
Makes 18-22


1 cup (2 sticks) unsalted butter, at room temperature
1 cup granulated sugar
2 large eggs
1 cup mashed ripe bananas
1 3/4 cups all-purpose flour
1 teaspoon baking soda
1/2 teaspoon salt
5 tablespoons milk
2 teaspoons vanilla extract


1. Preheat the oven to 350°F. Insert liners into a medium cupcake pan.
2. With an electric mixer on medium speed, cream the butter and sugar together until fluffy, about 3-5 minutes. Add the eggs to the creamed mixture and beat well. Add the bananas and mix well.
3. In a separate bowl sift together the flour, baking soda, and salt.
4. Add all the dry ingredients to the creamed mixture and mix until completely integrated.
5. Add the milk and vanilla. Mix for 1 minute on medium speed.
6. Fill cupcake liners one-half to three-quarters full with batter. Bake for 20-25 minutes or until a toothpick inserted in the center of cupcakes comes out clean. Cool cupcakes in the pan.


Banana Coconut Frosting (my own recipe)
Makes enough to frost 30 cupcakes


9 tablespoons (1 stick + 1 tablespoon) unsalted butter, at room temperature
4 oz. cream cheese, at room temperature
1/2 cup sweetened flaked coconut
1/3 cup finely chopped pecans
1/4 cup mashed bananas
1/2 teaspoon lemon juice
3 cups confectioners' sugar
1 teaspoon vanilla extract


1. Melt 1 tablespoon butter in a large skillet. Stir in coconut and pecans. Cook, stirring constantly, over medium heat until coconut is golden brown, about 8 minutes. Cool before adding to the frosting.
2. Meanwhile, in a small bowl combine the bananas, lemon juice, and vanilla.
3. In a separate bowl beat the cream cheese and remaining stick of butter with an electric mixer on medium speed. Add the sugar, then the banana mixture. Blend well.
4. Add the coconut-pecan mixture. Mix until incorporated.